Overview
There are a variety of features available within Floify for you to integrate your realtors and partners into the loan flow process along with your borrowers seamlessly including adding realtors and partners to your database, editing realtor and partner contact information, inviting realtors and partners to a loan flow, and setting up realtor and partner co-branding.
This help article provides a tutorial on how to use the realtor and partner features mentioned above.
How to Setup and Use
Add a Realtor or Partner
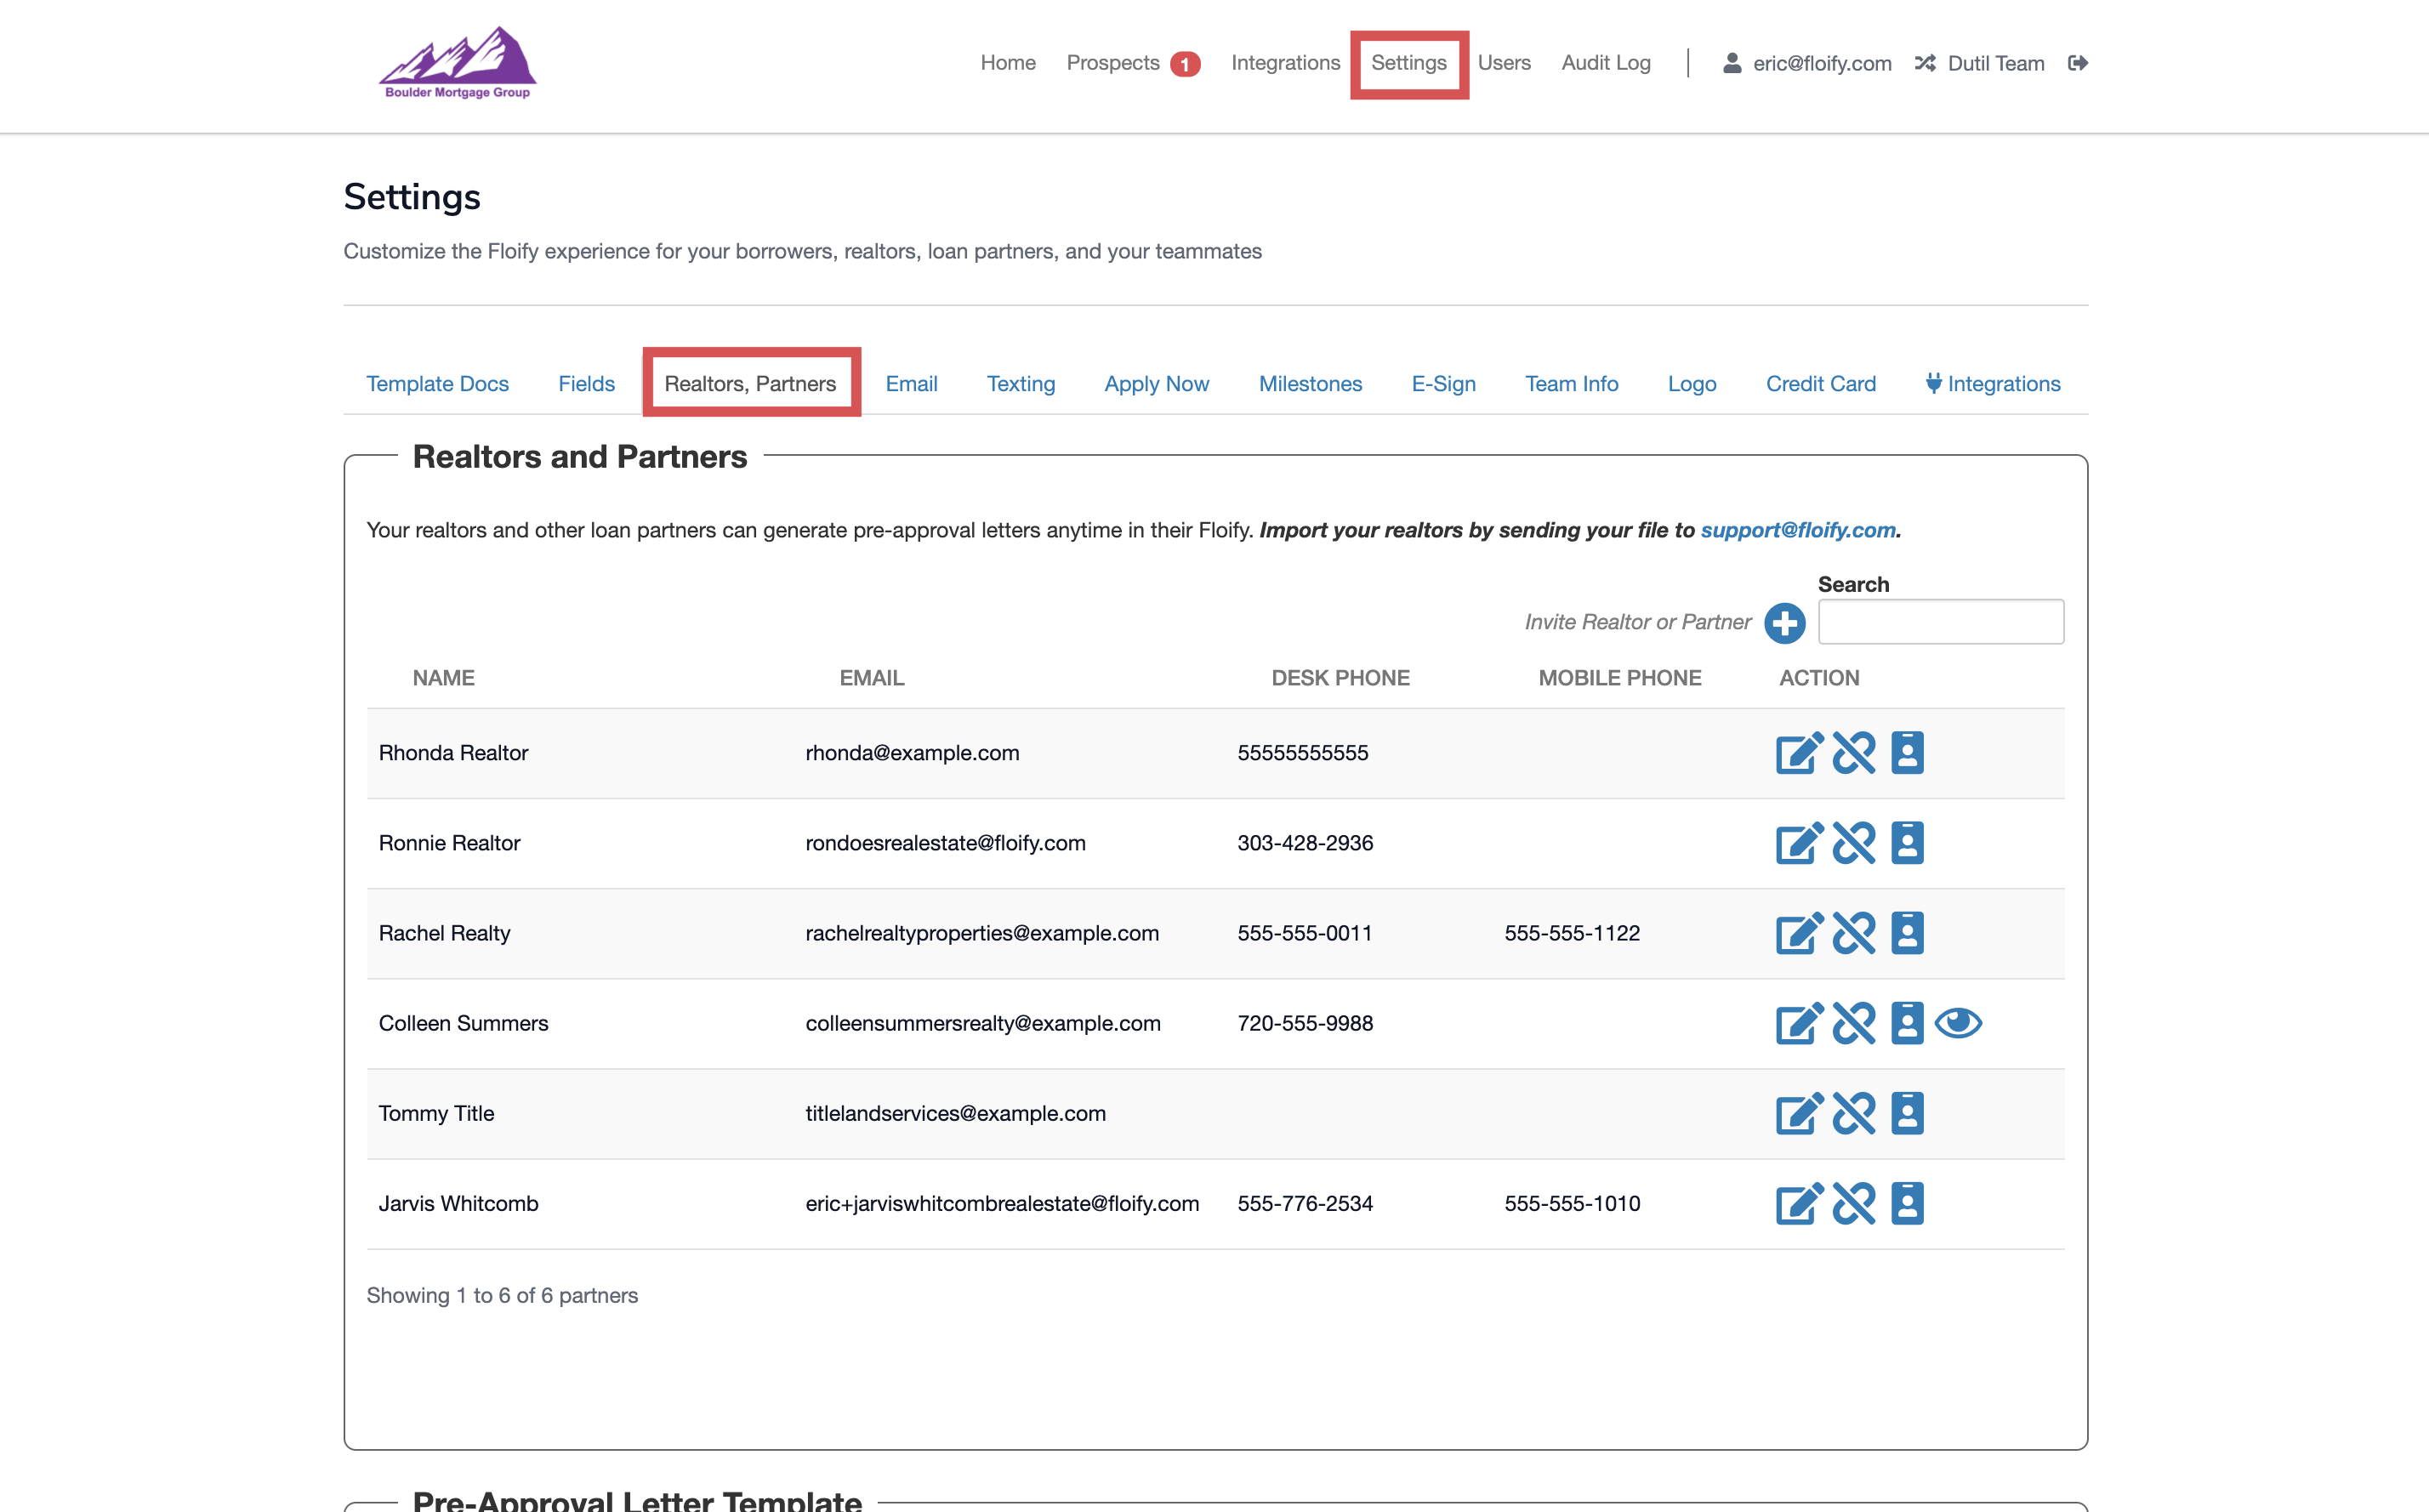
From your loan pipeline, navigate to Settings and select the Realtors, Partners tab:
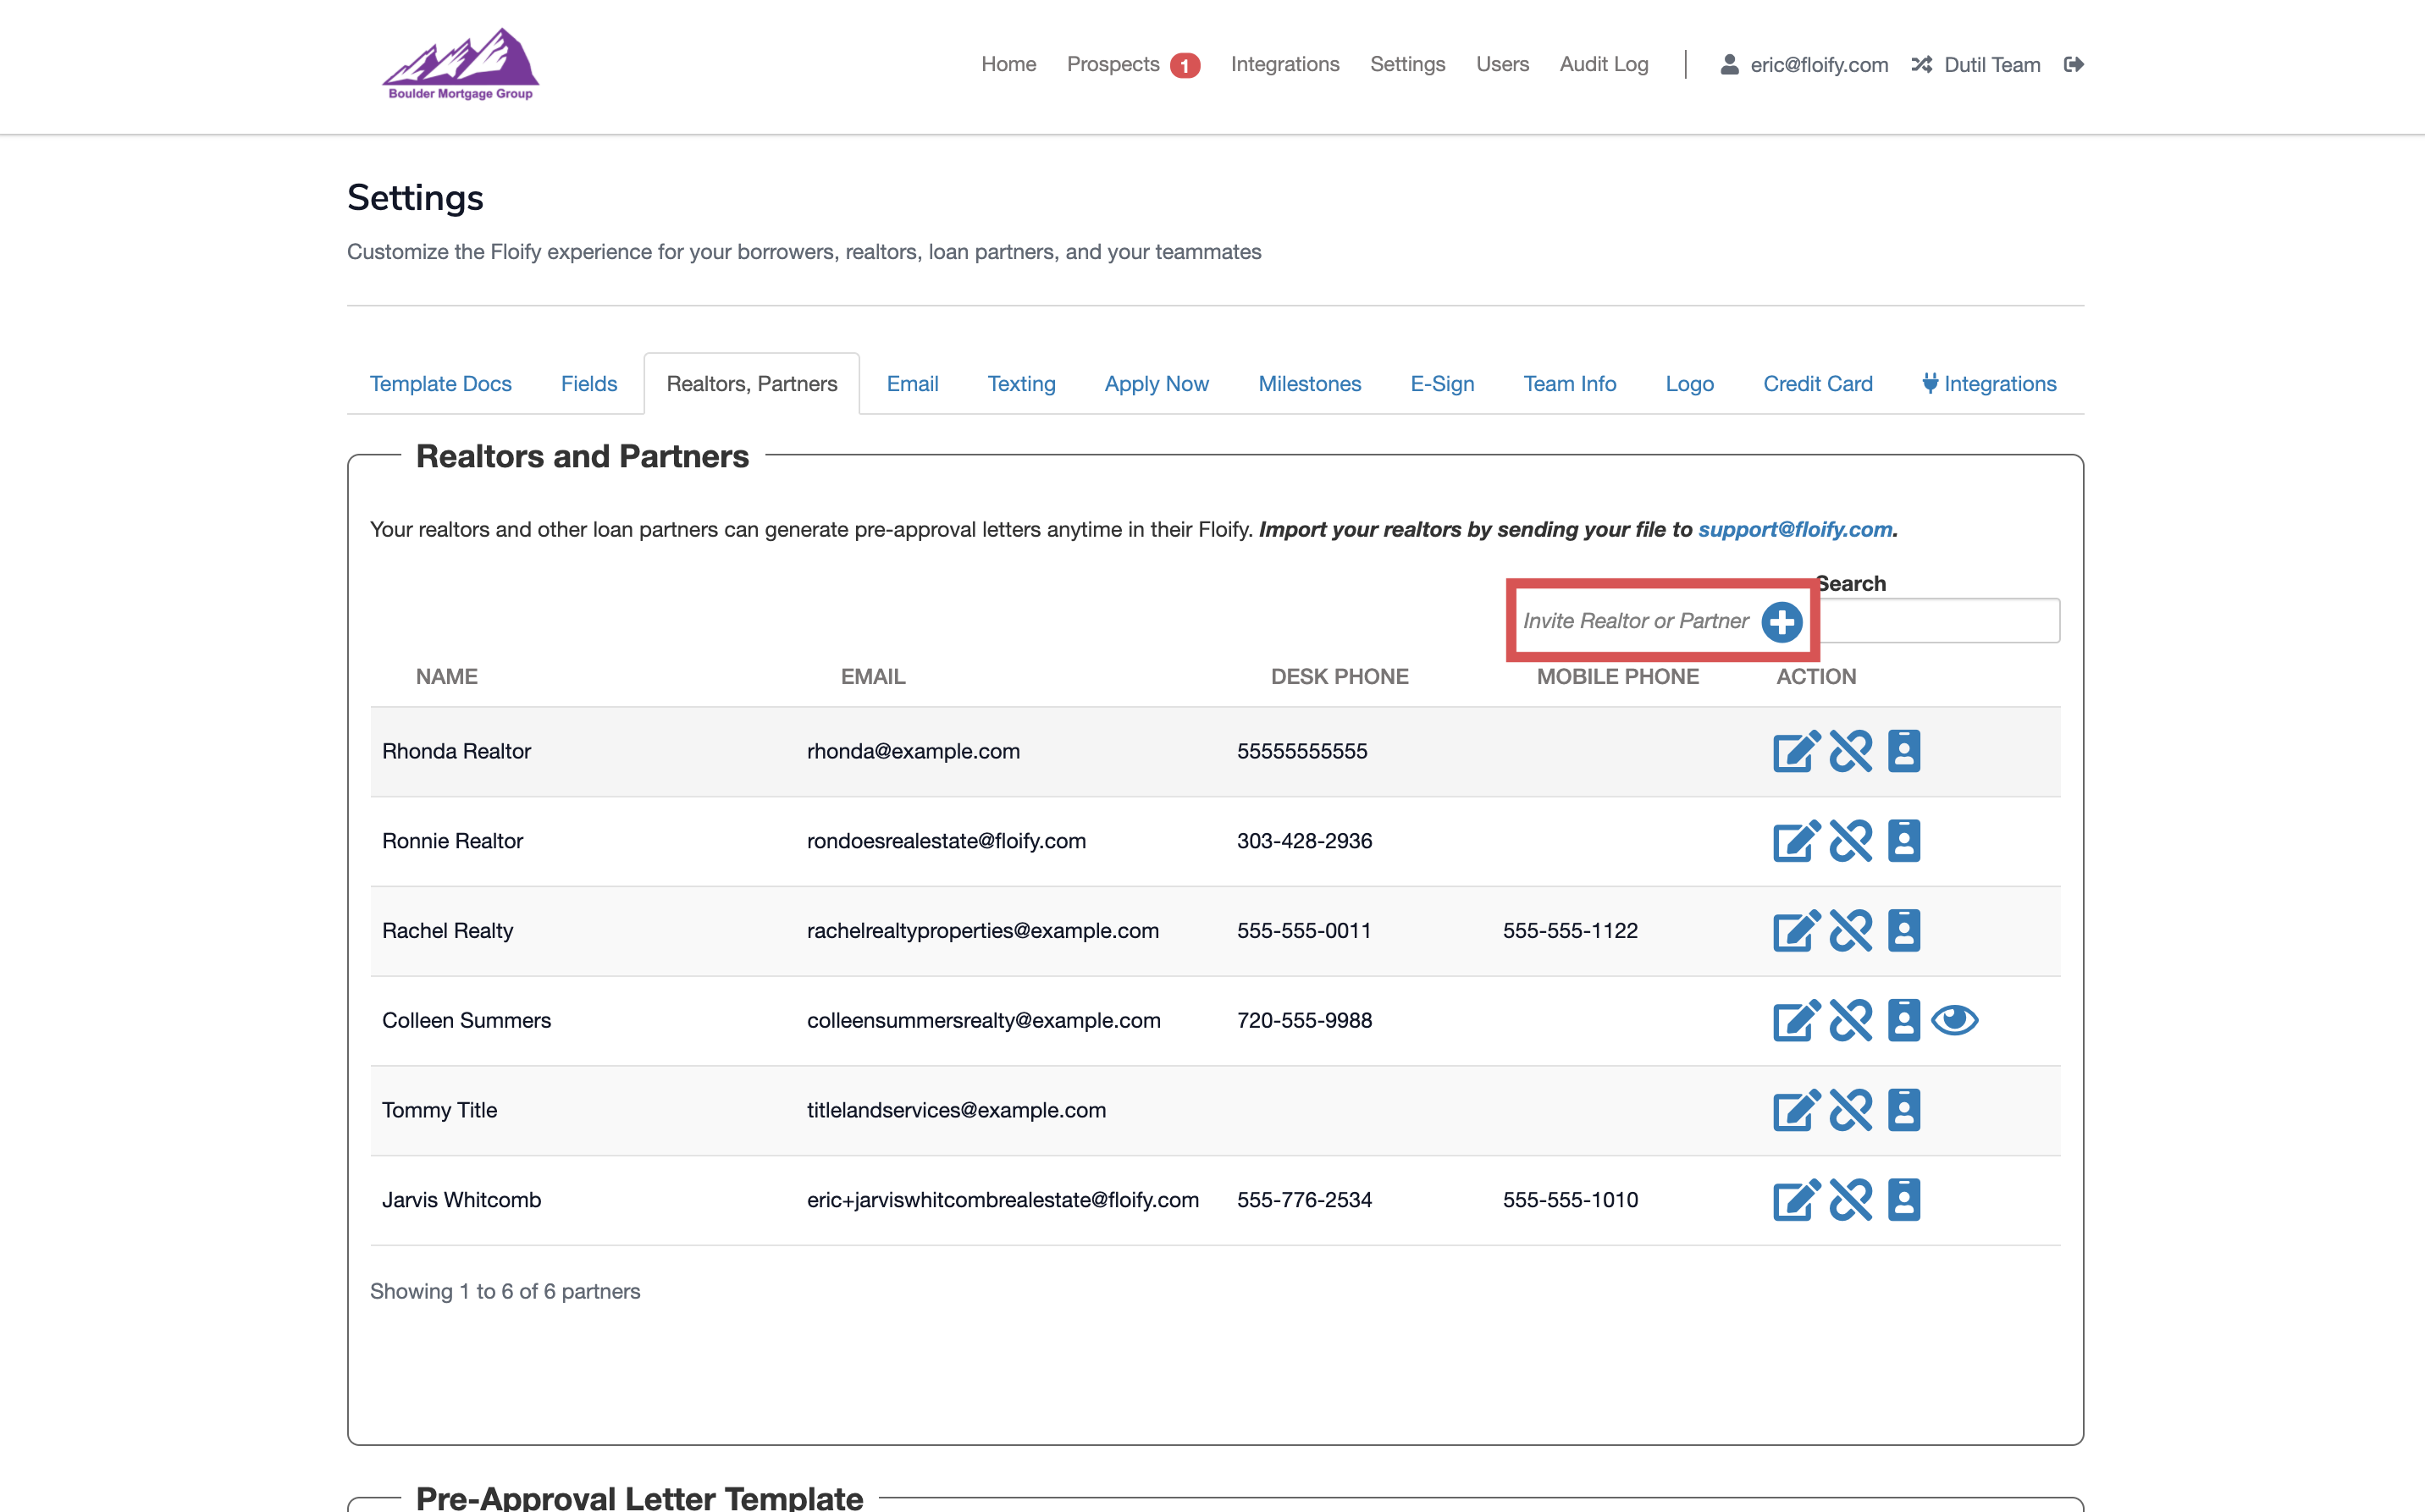
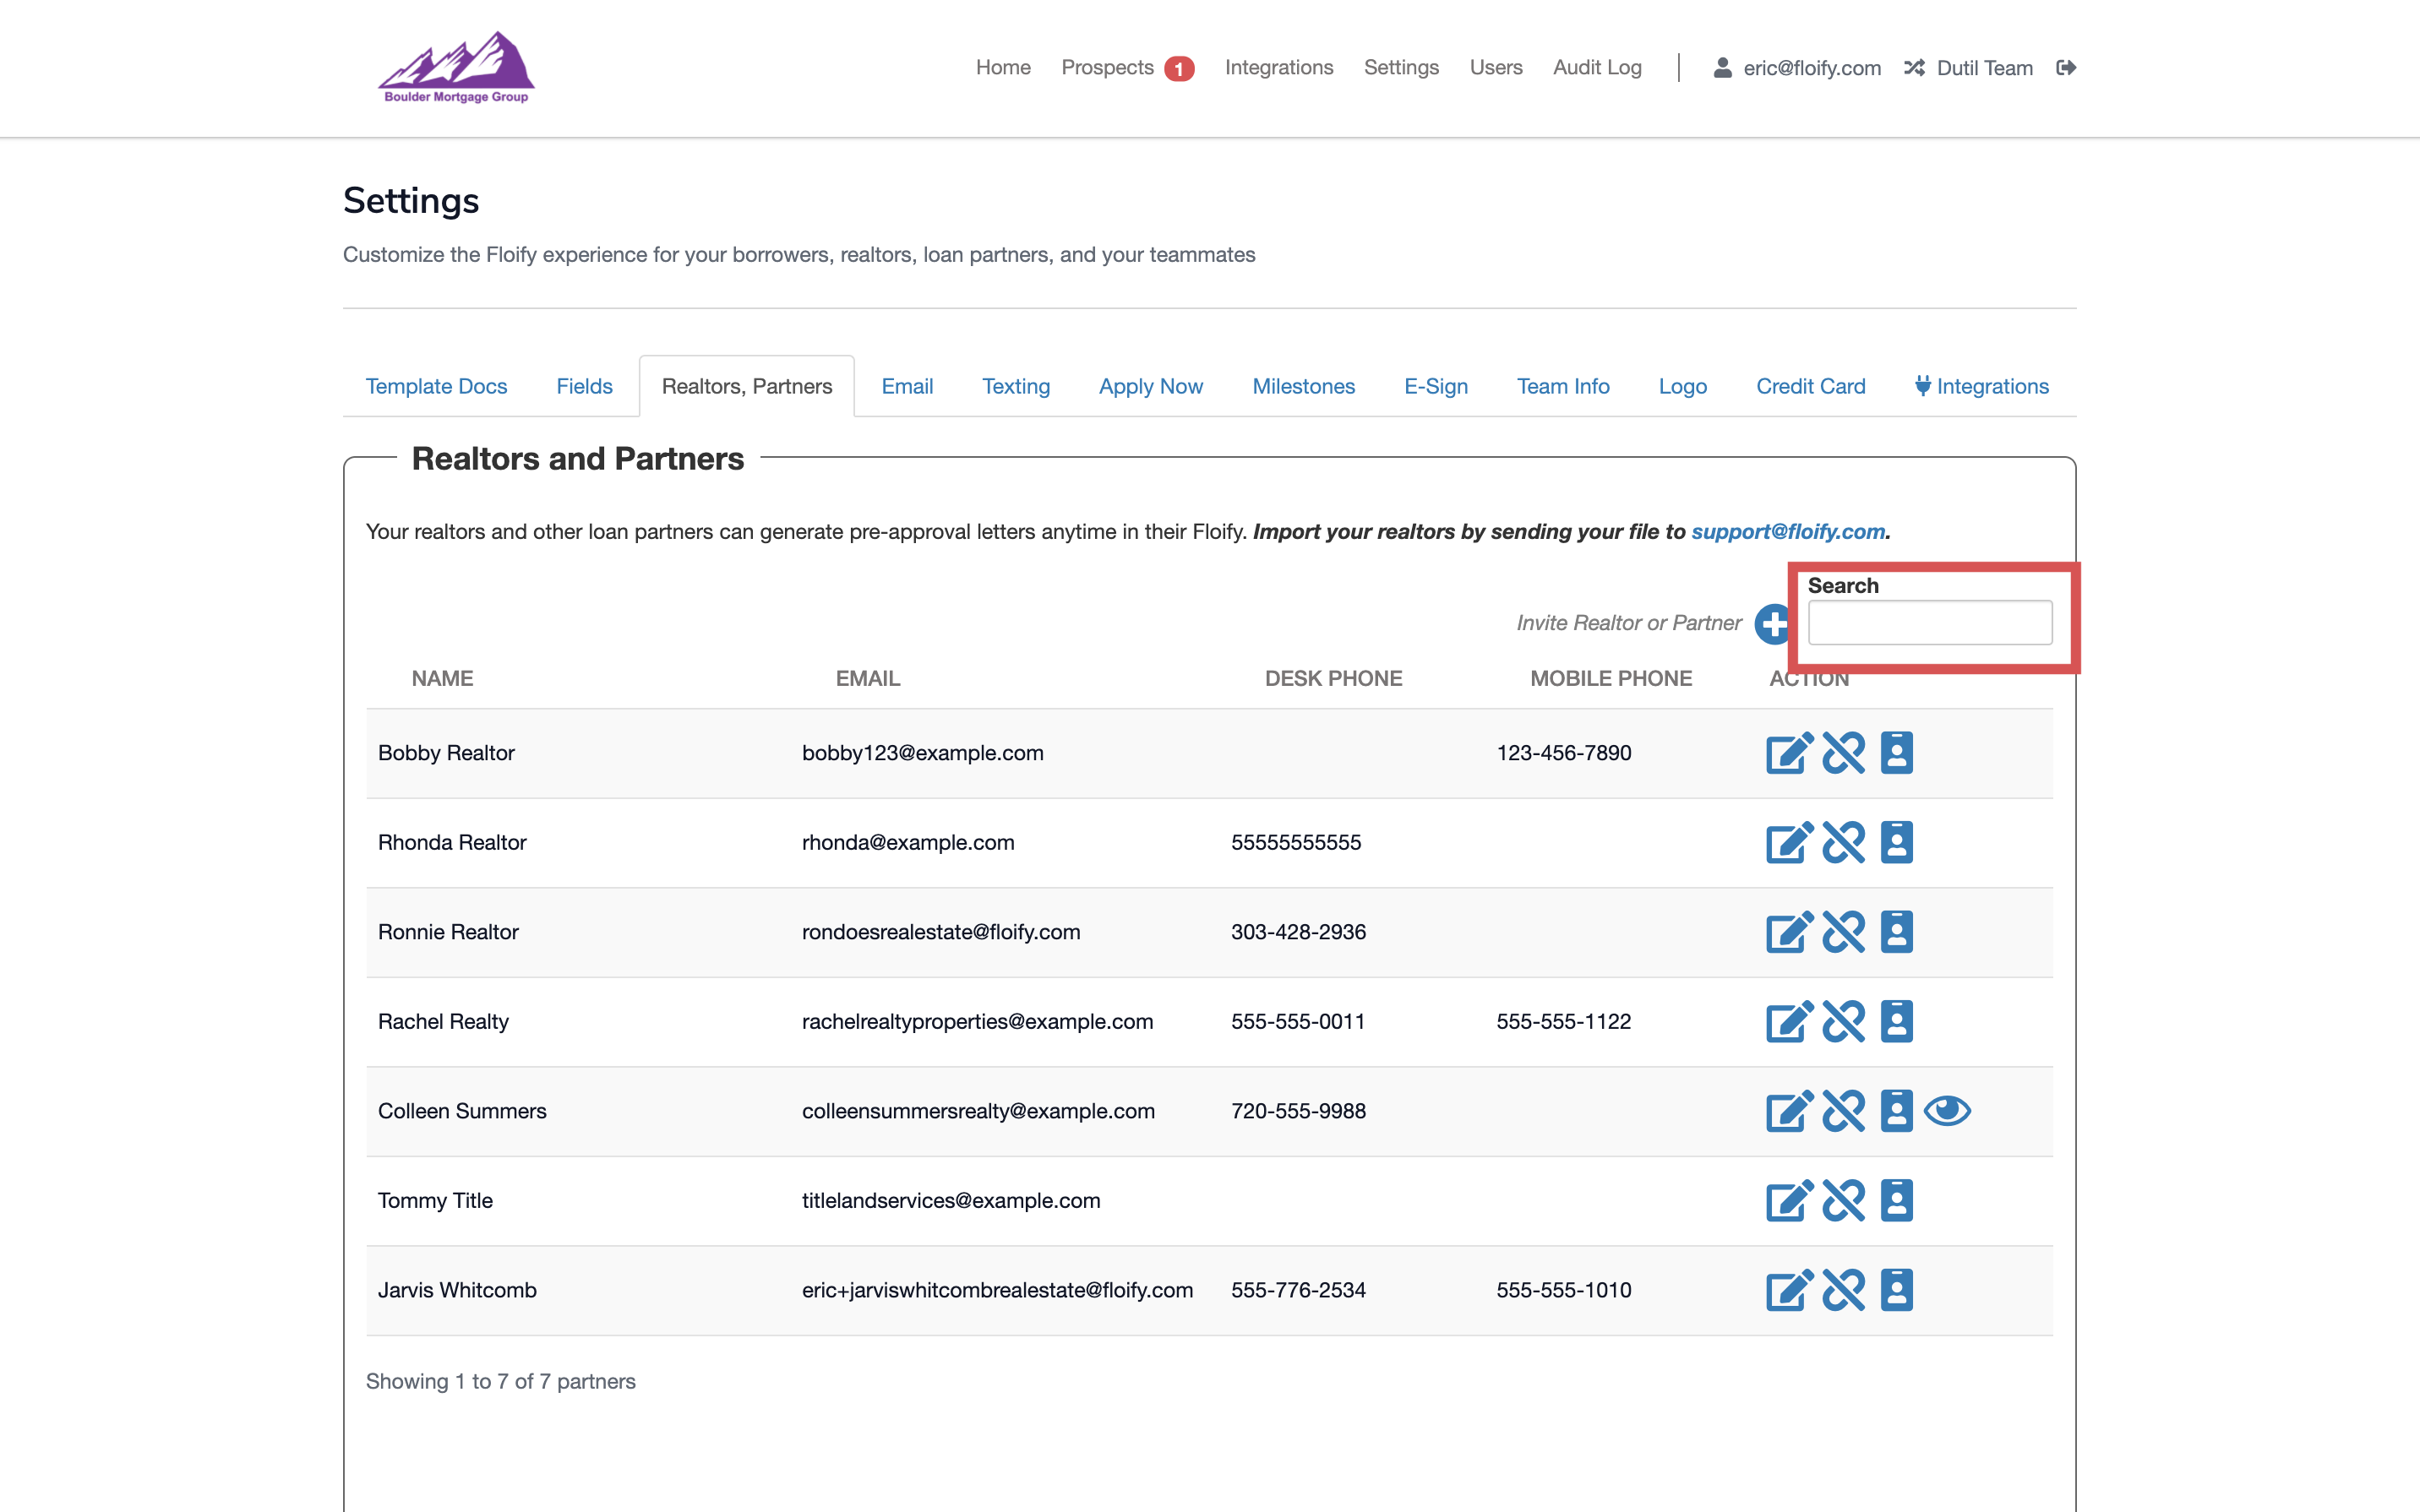
Select the plus sign next to Invite Realtor or Partner on the right hand side:
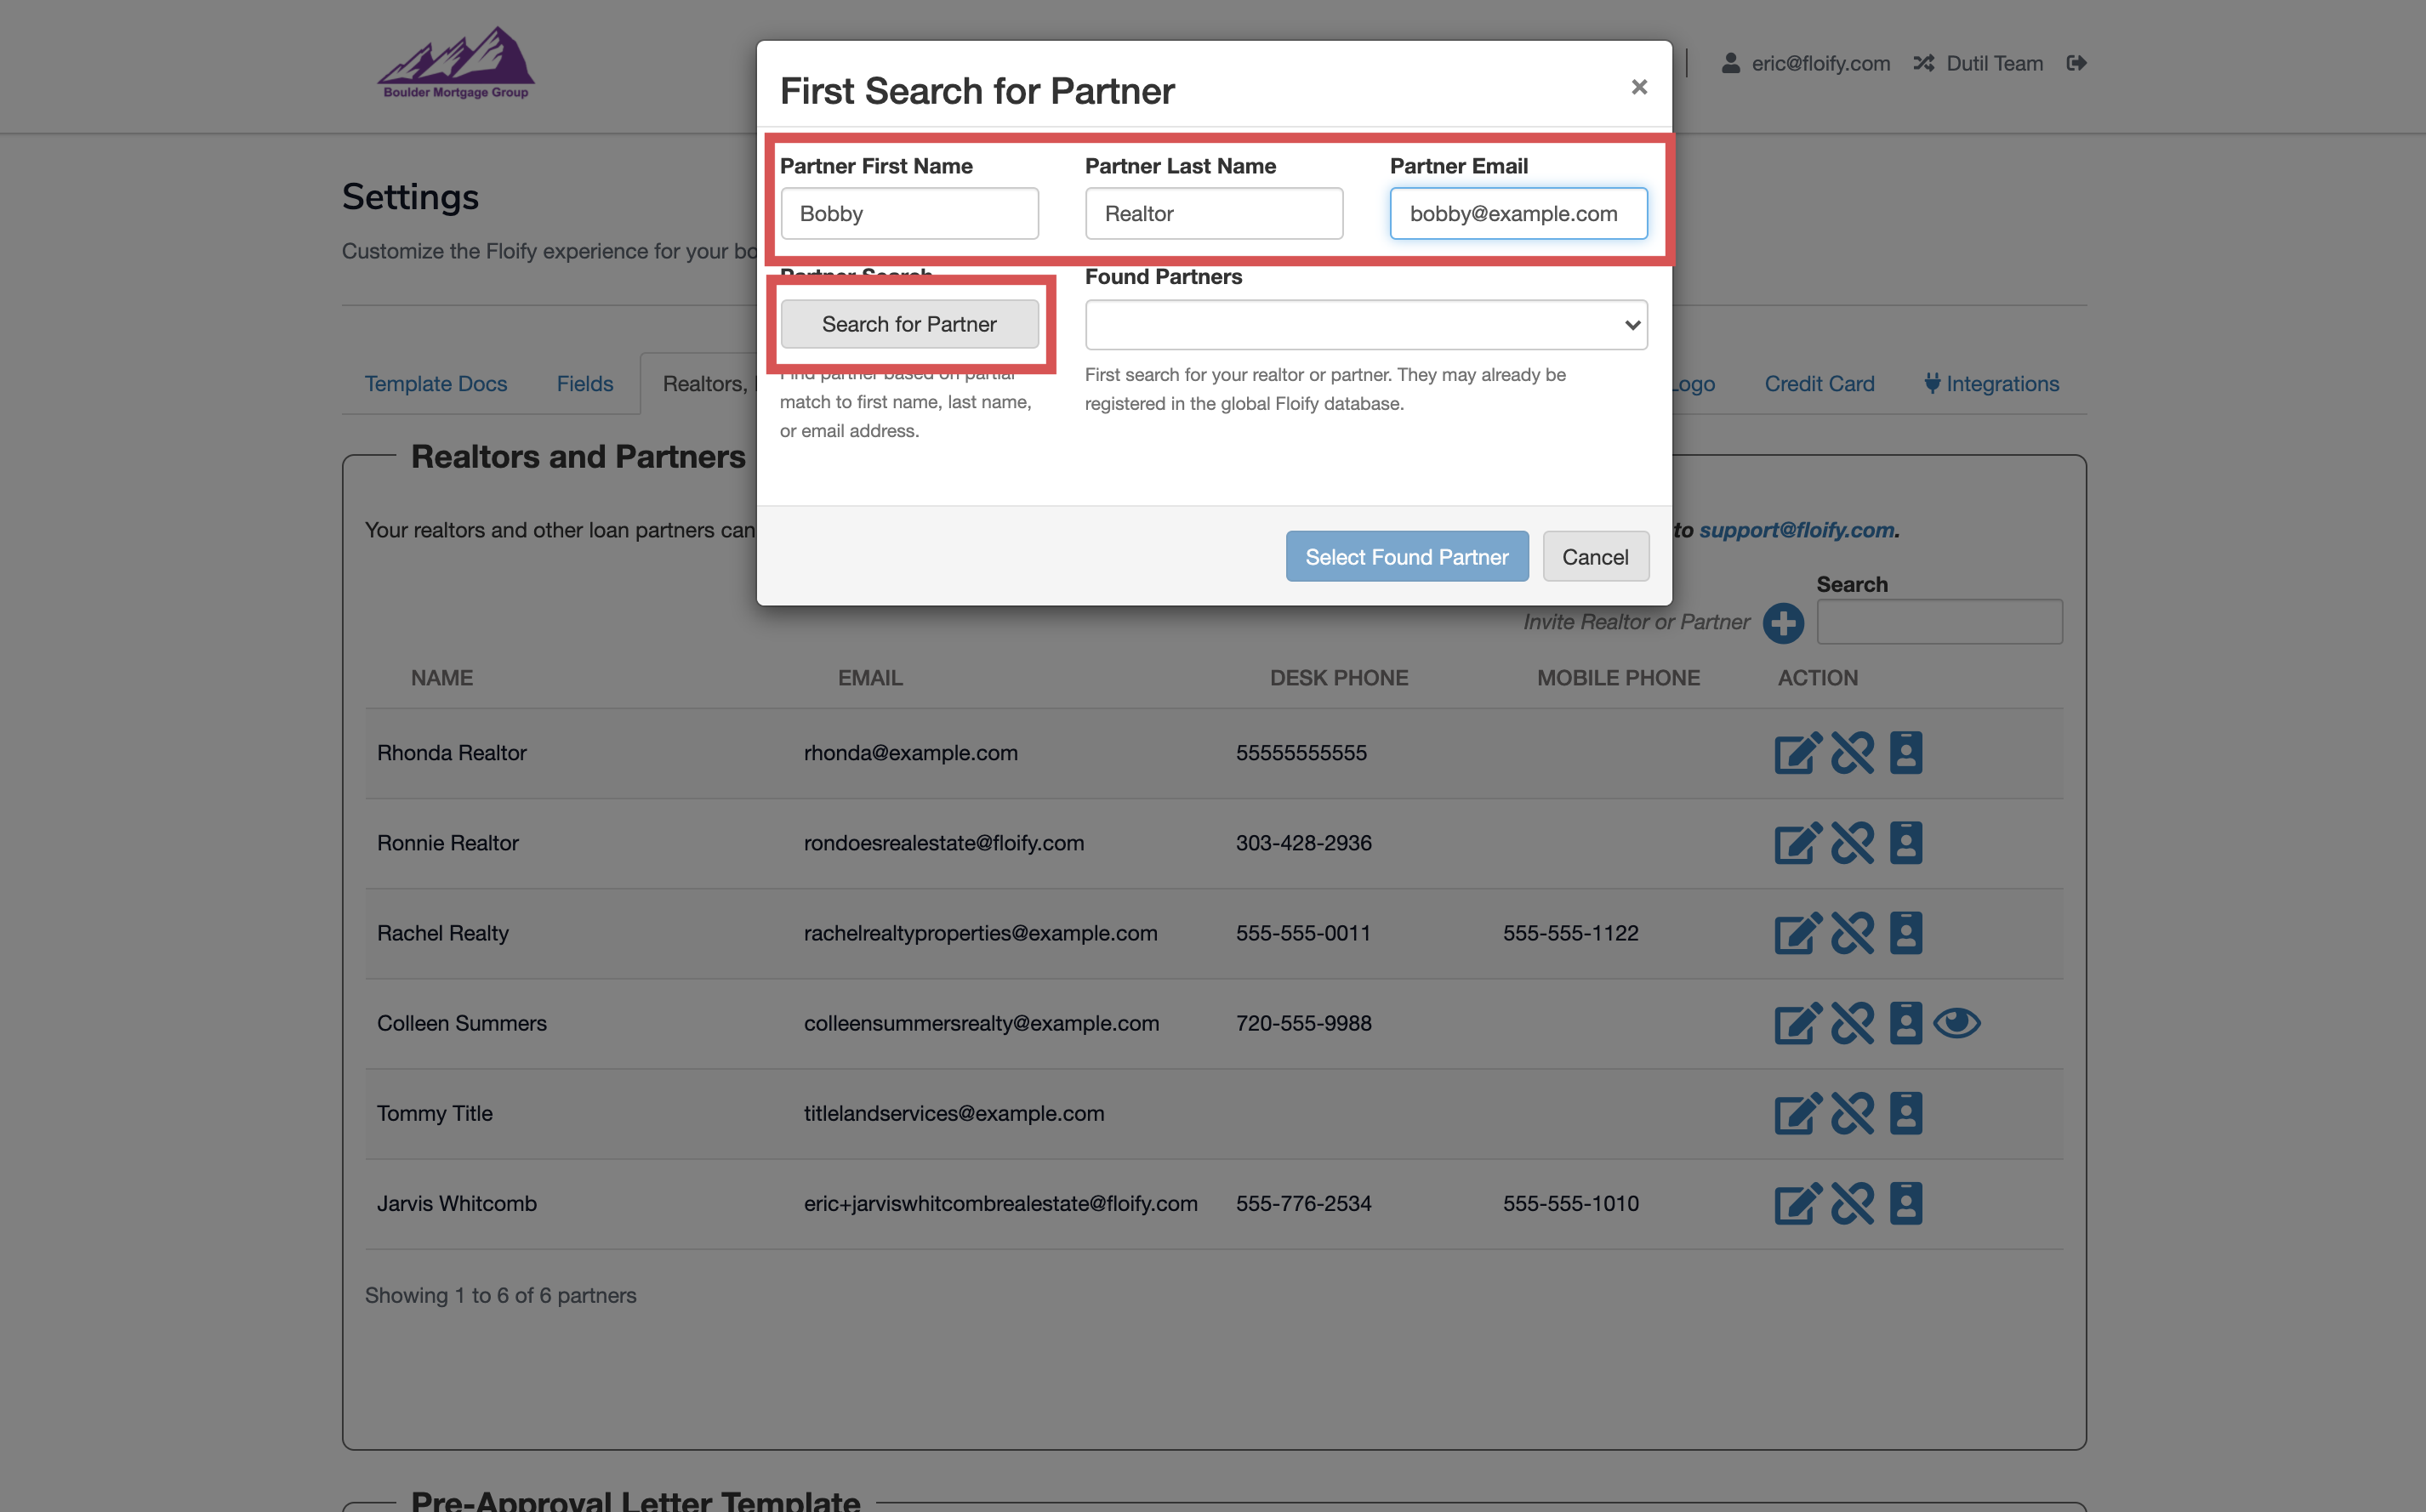
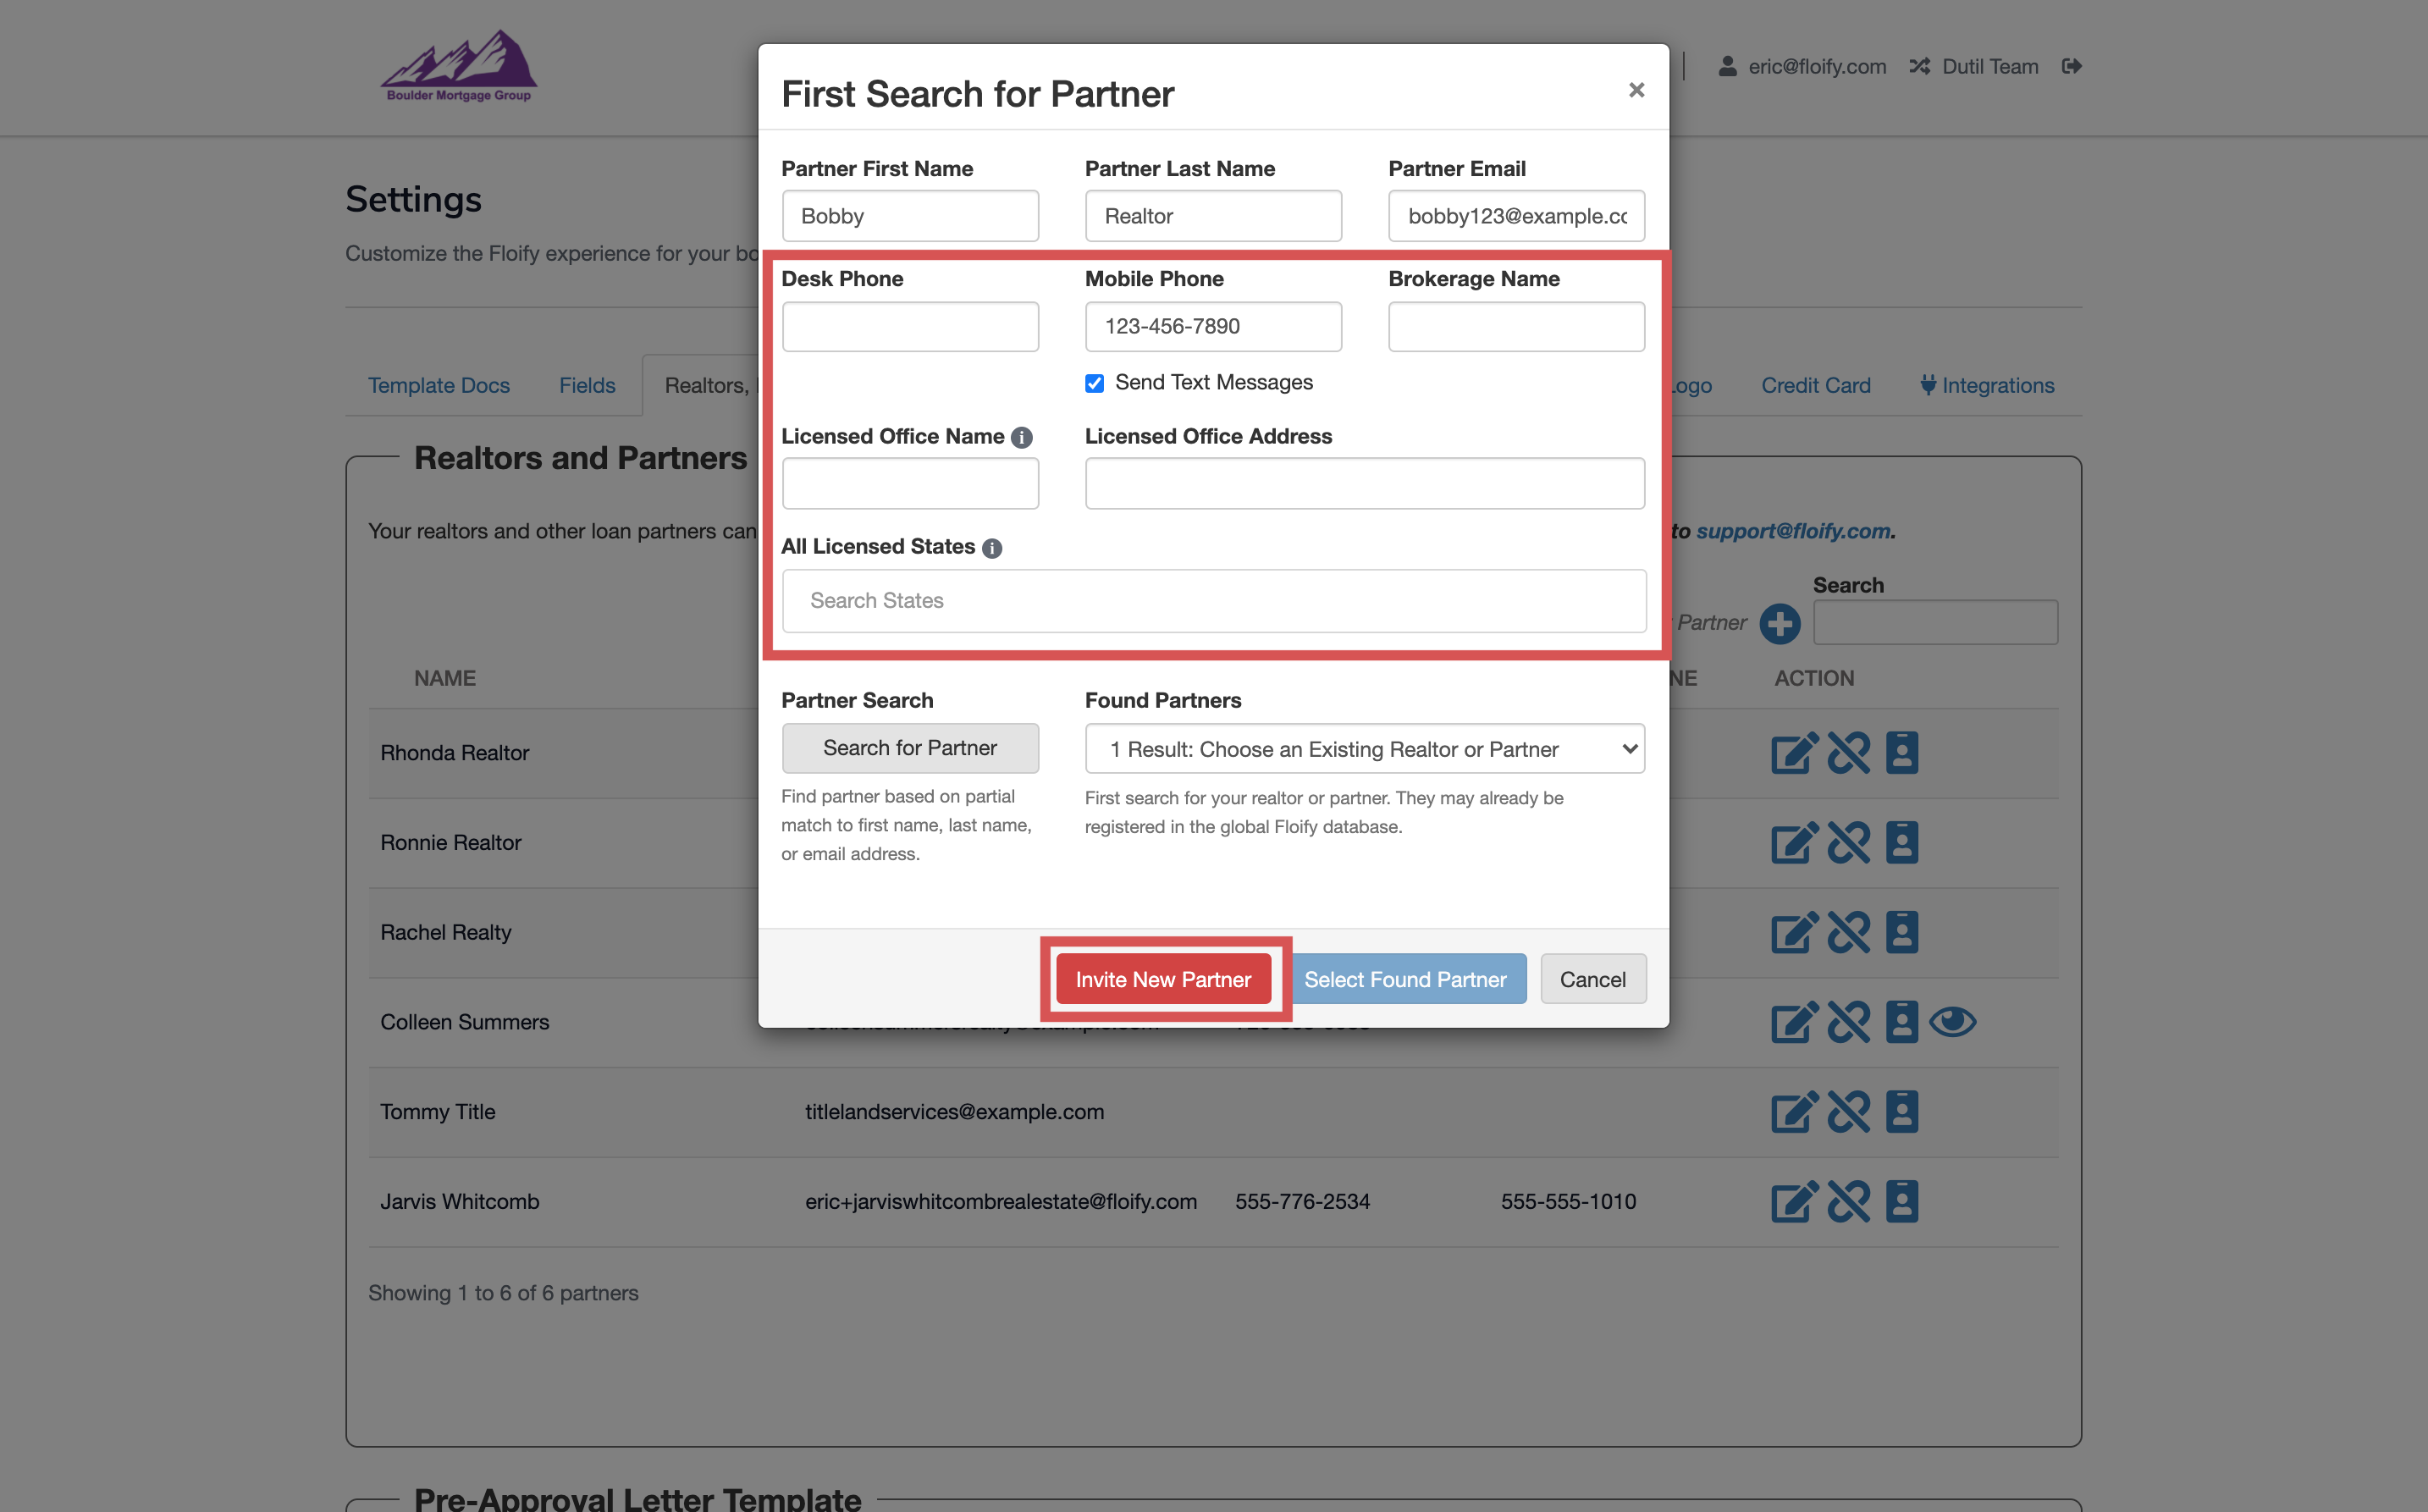
Enter the Partner First Name, Partner Last Name, and/or Partner Email. Select the Search for Partner button to prompt any existing account results:
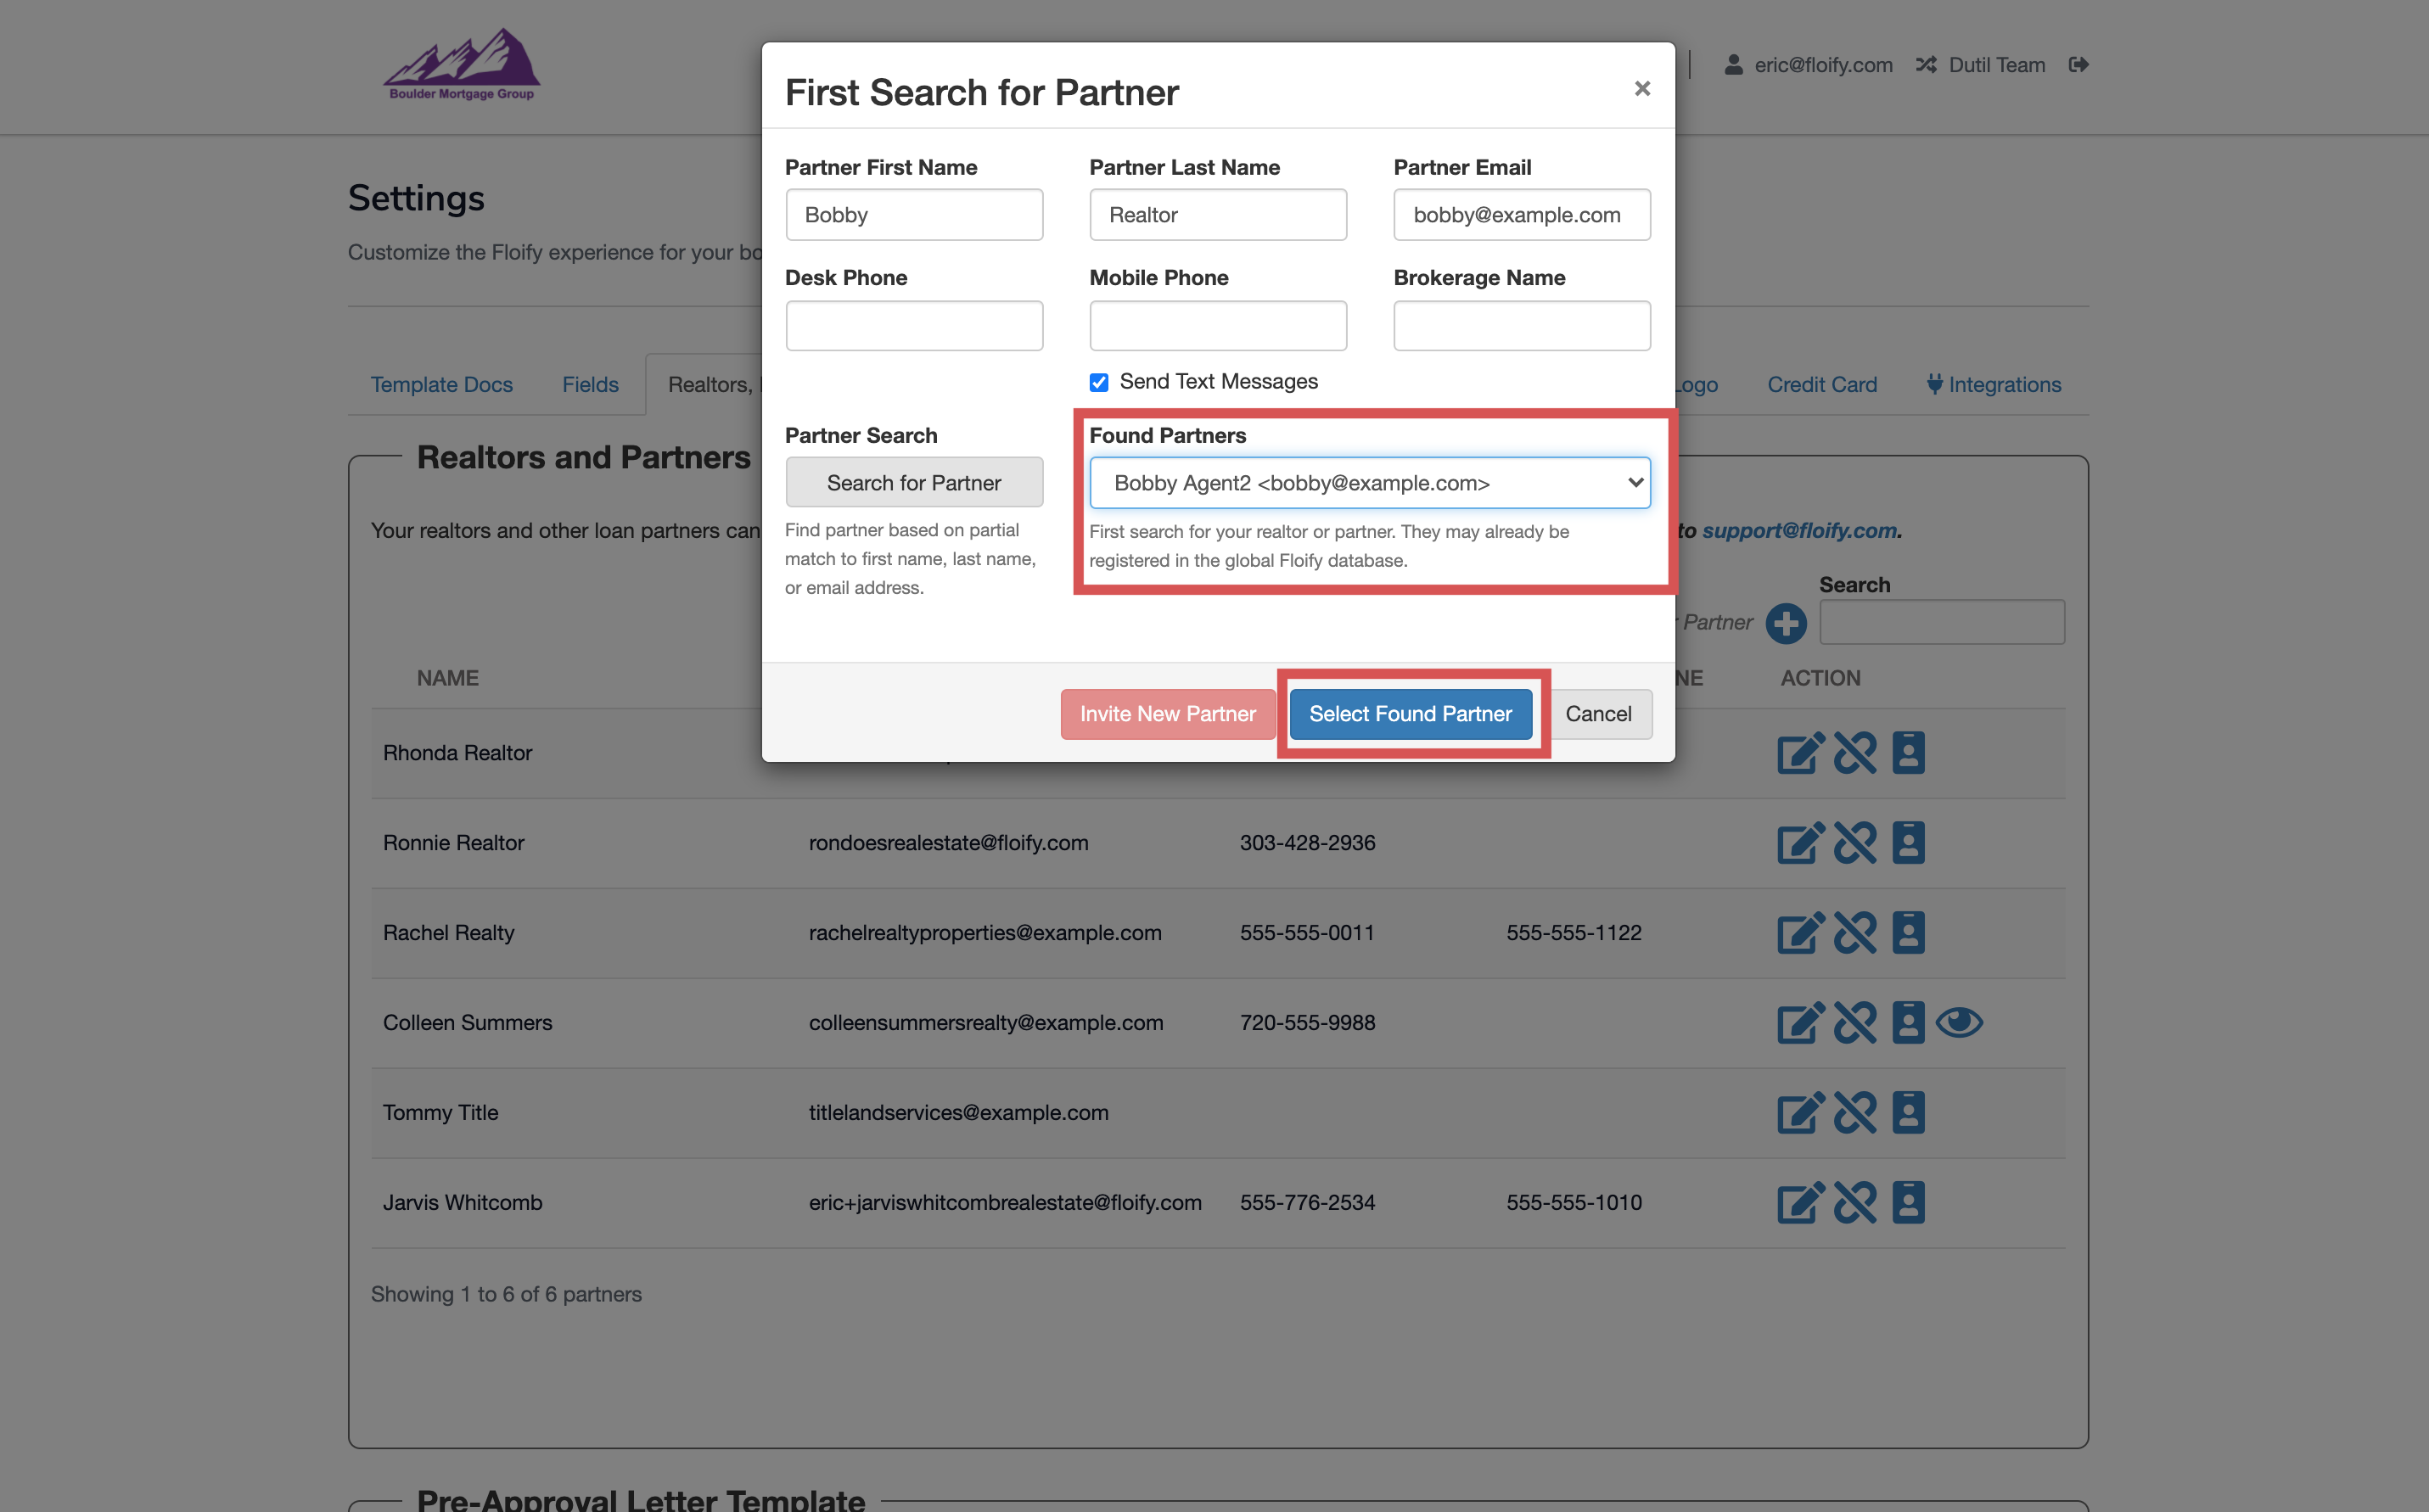
Any found partners will populate in the Found Partners dropdown. These are users that already have a registered account in the global Floify database. If you find the realtor or partner listed here, select the result and then Select Found Partner to finish adding them:
If your realtor or partner doesn't have an existing Floify account, you will be able to enter any additional details for their account including Desk Phone, Mobile Phone, Brokerage Name, Licensed Office Name, Licensed Office Address, and Licensed States. Select Invite New Partner to create their account and finish adding them:
Any realtors or partners you've added into your account will be listed here for review. You can search using the search bar on the right hand side as well:
Edit a Realtor or Partner
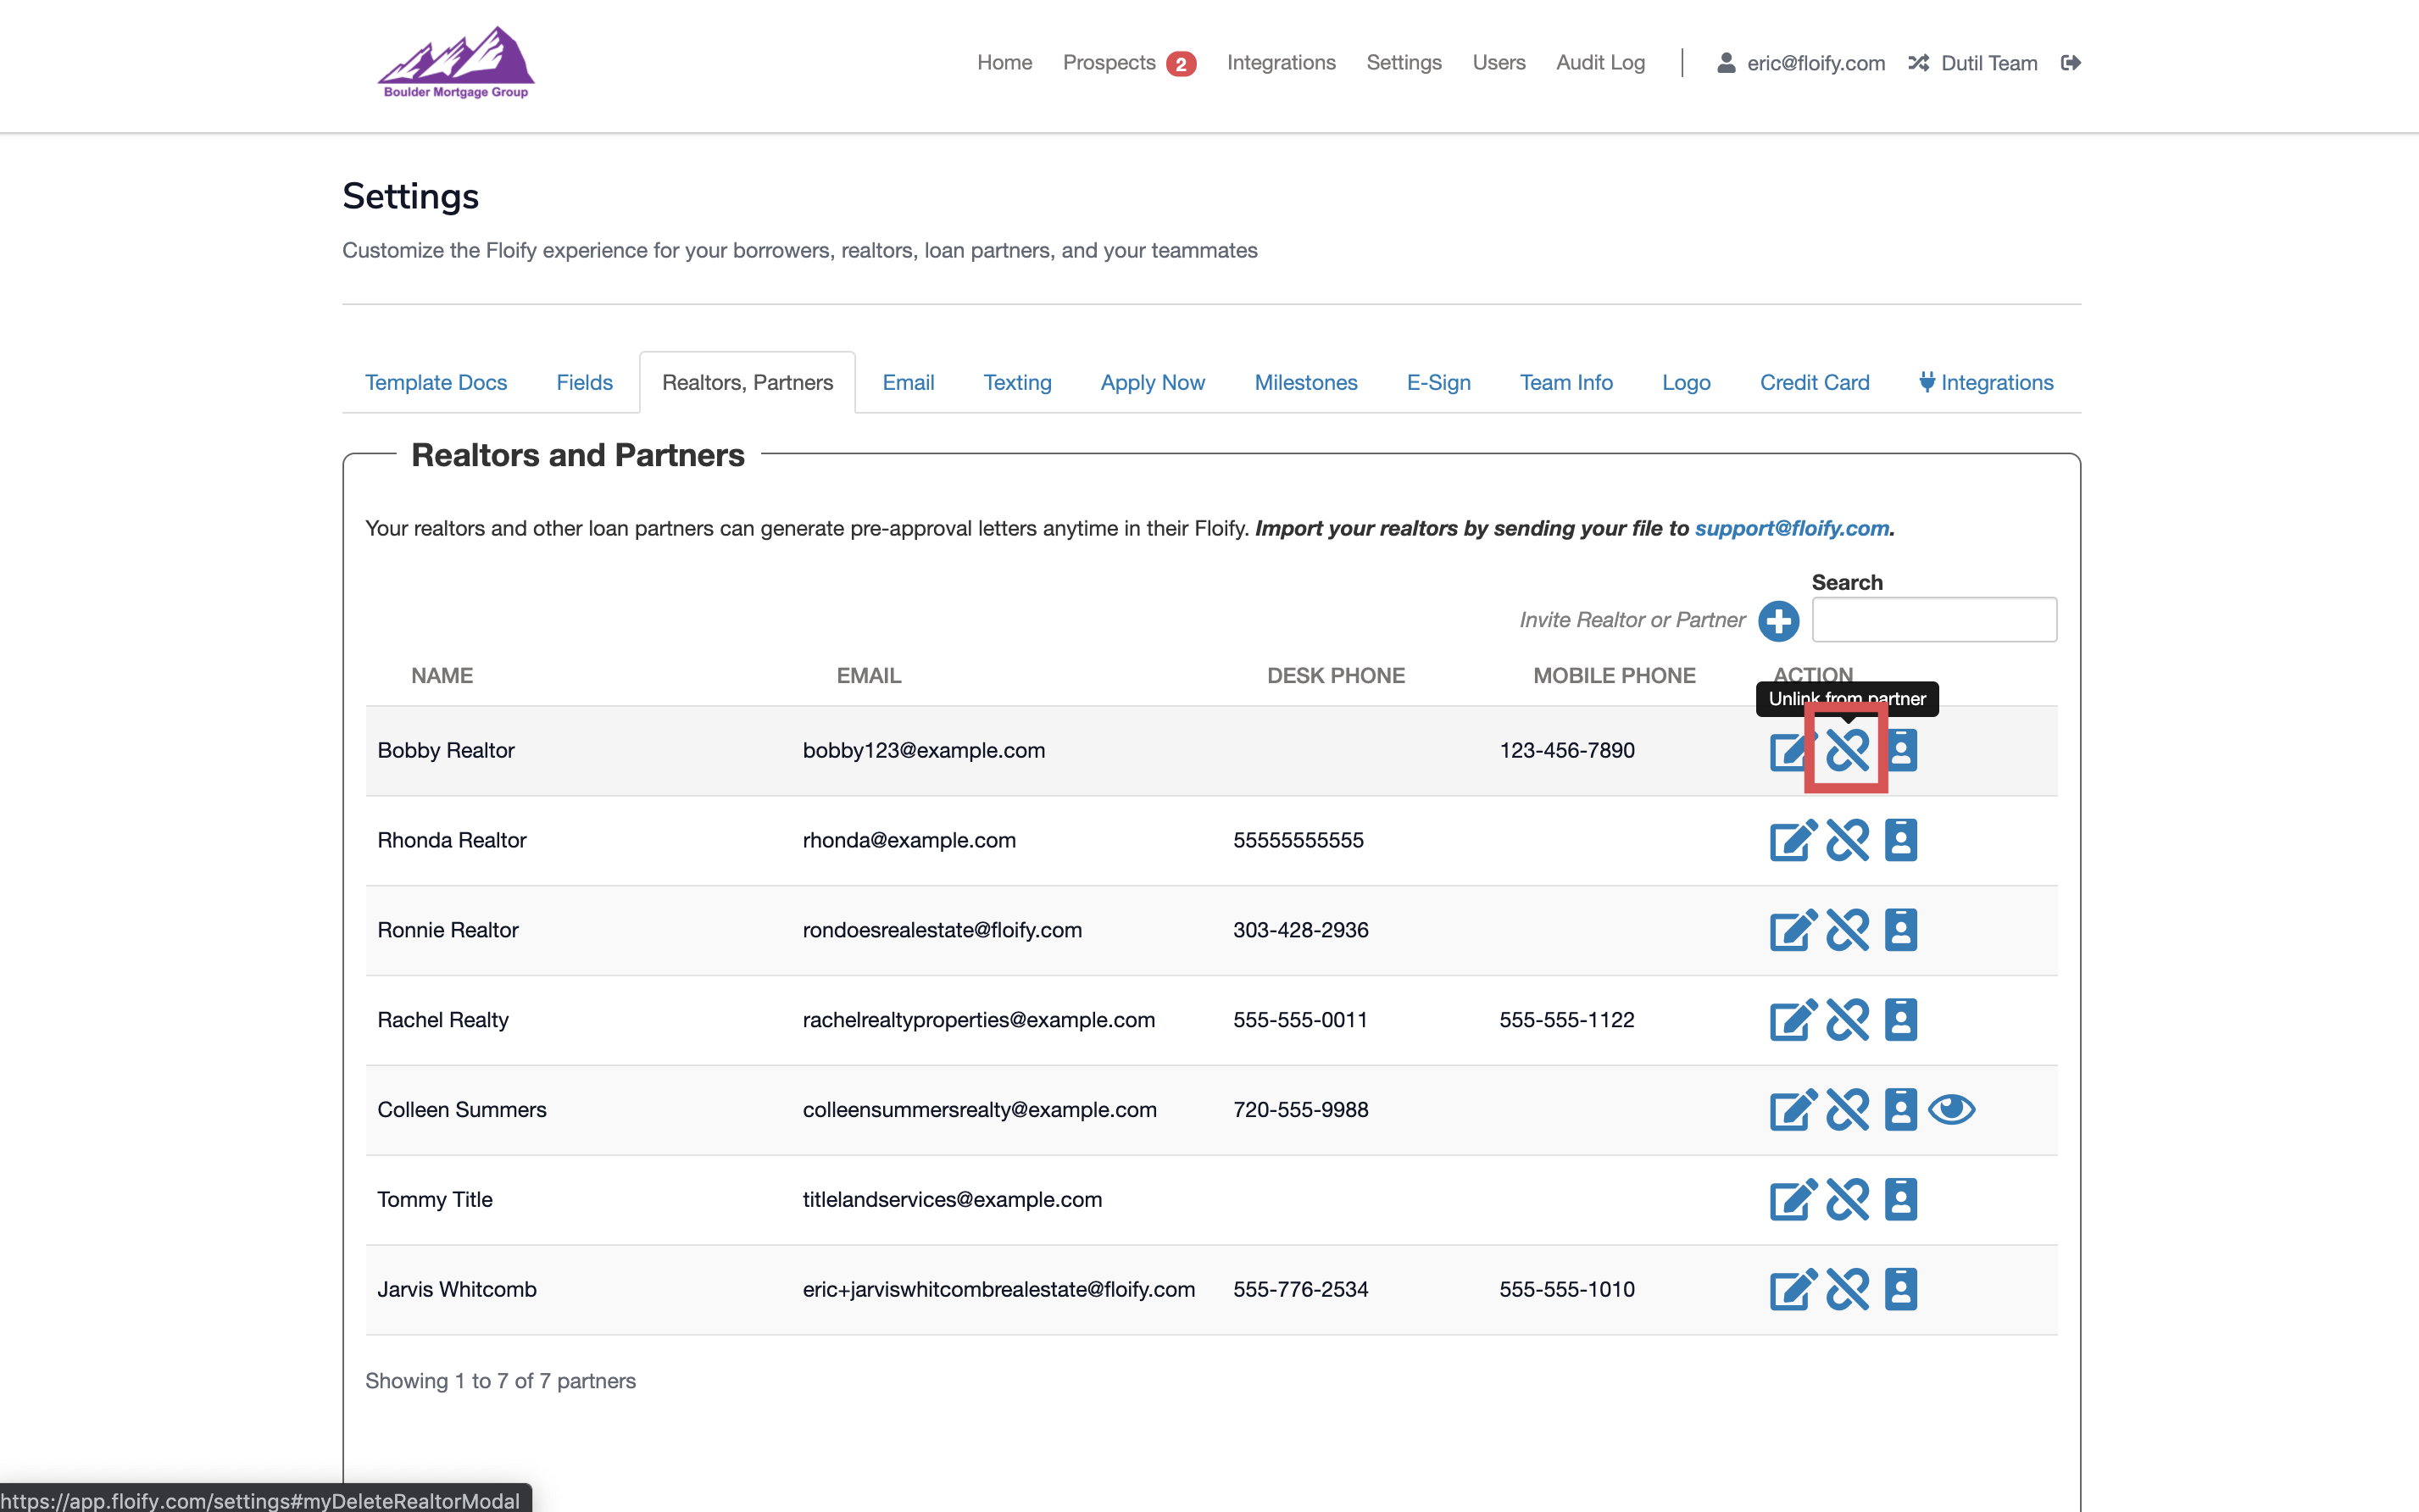
From your loan pipeline, navigate to Settings and select the Realtors, Partners tab:
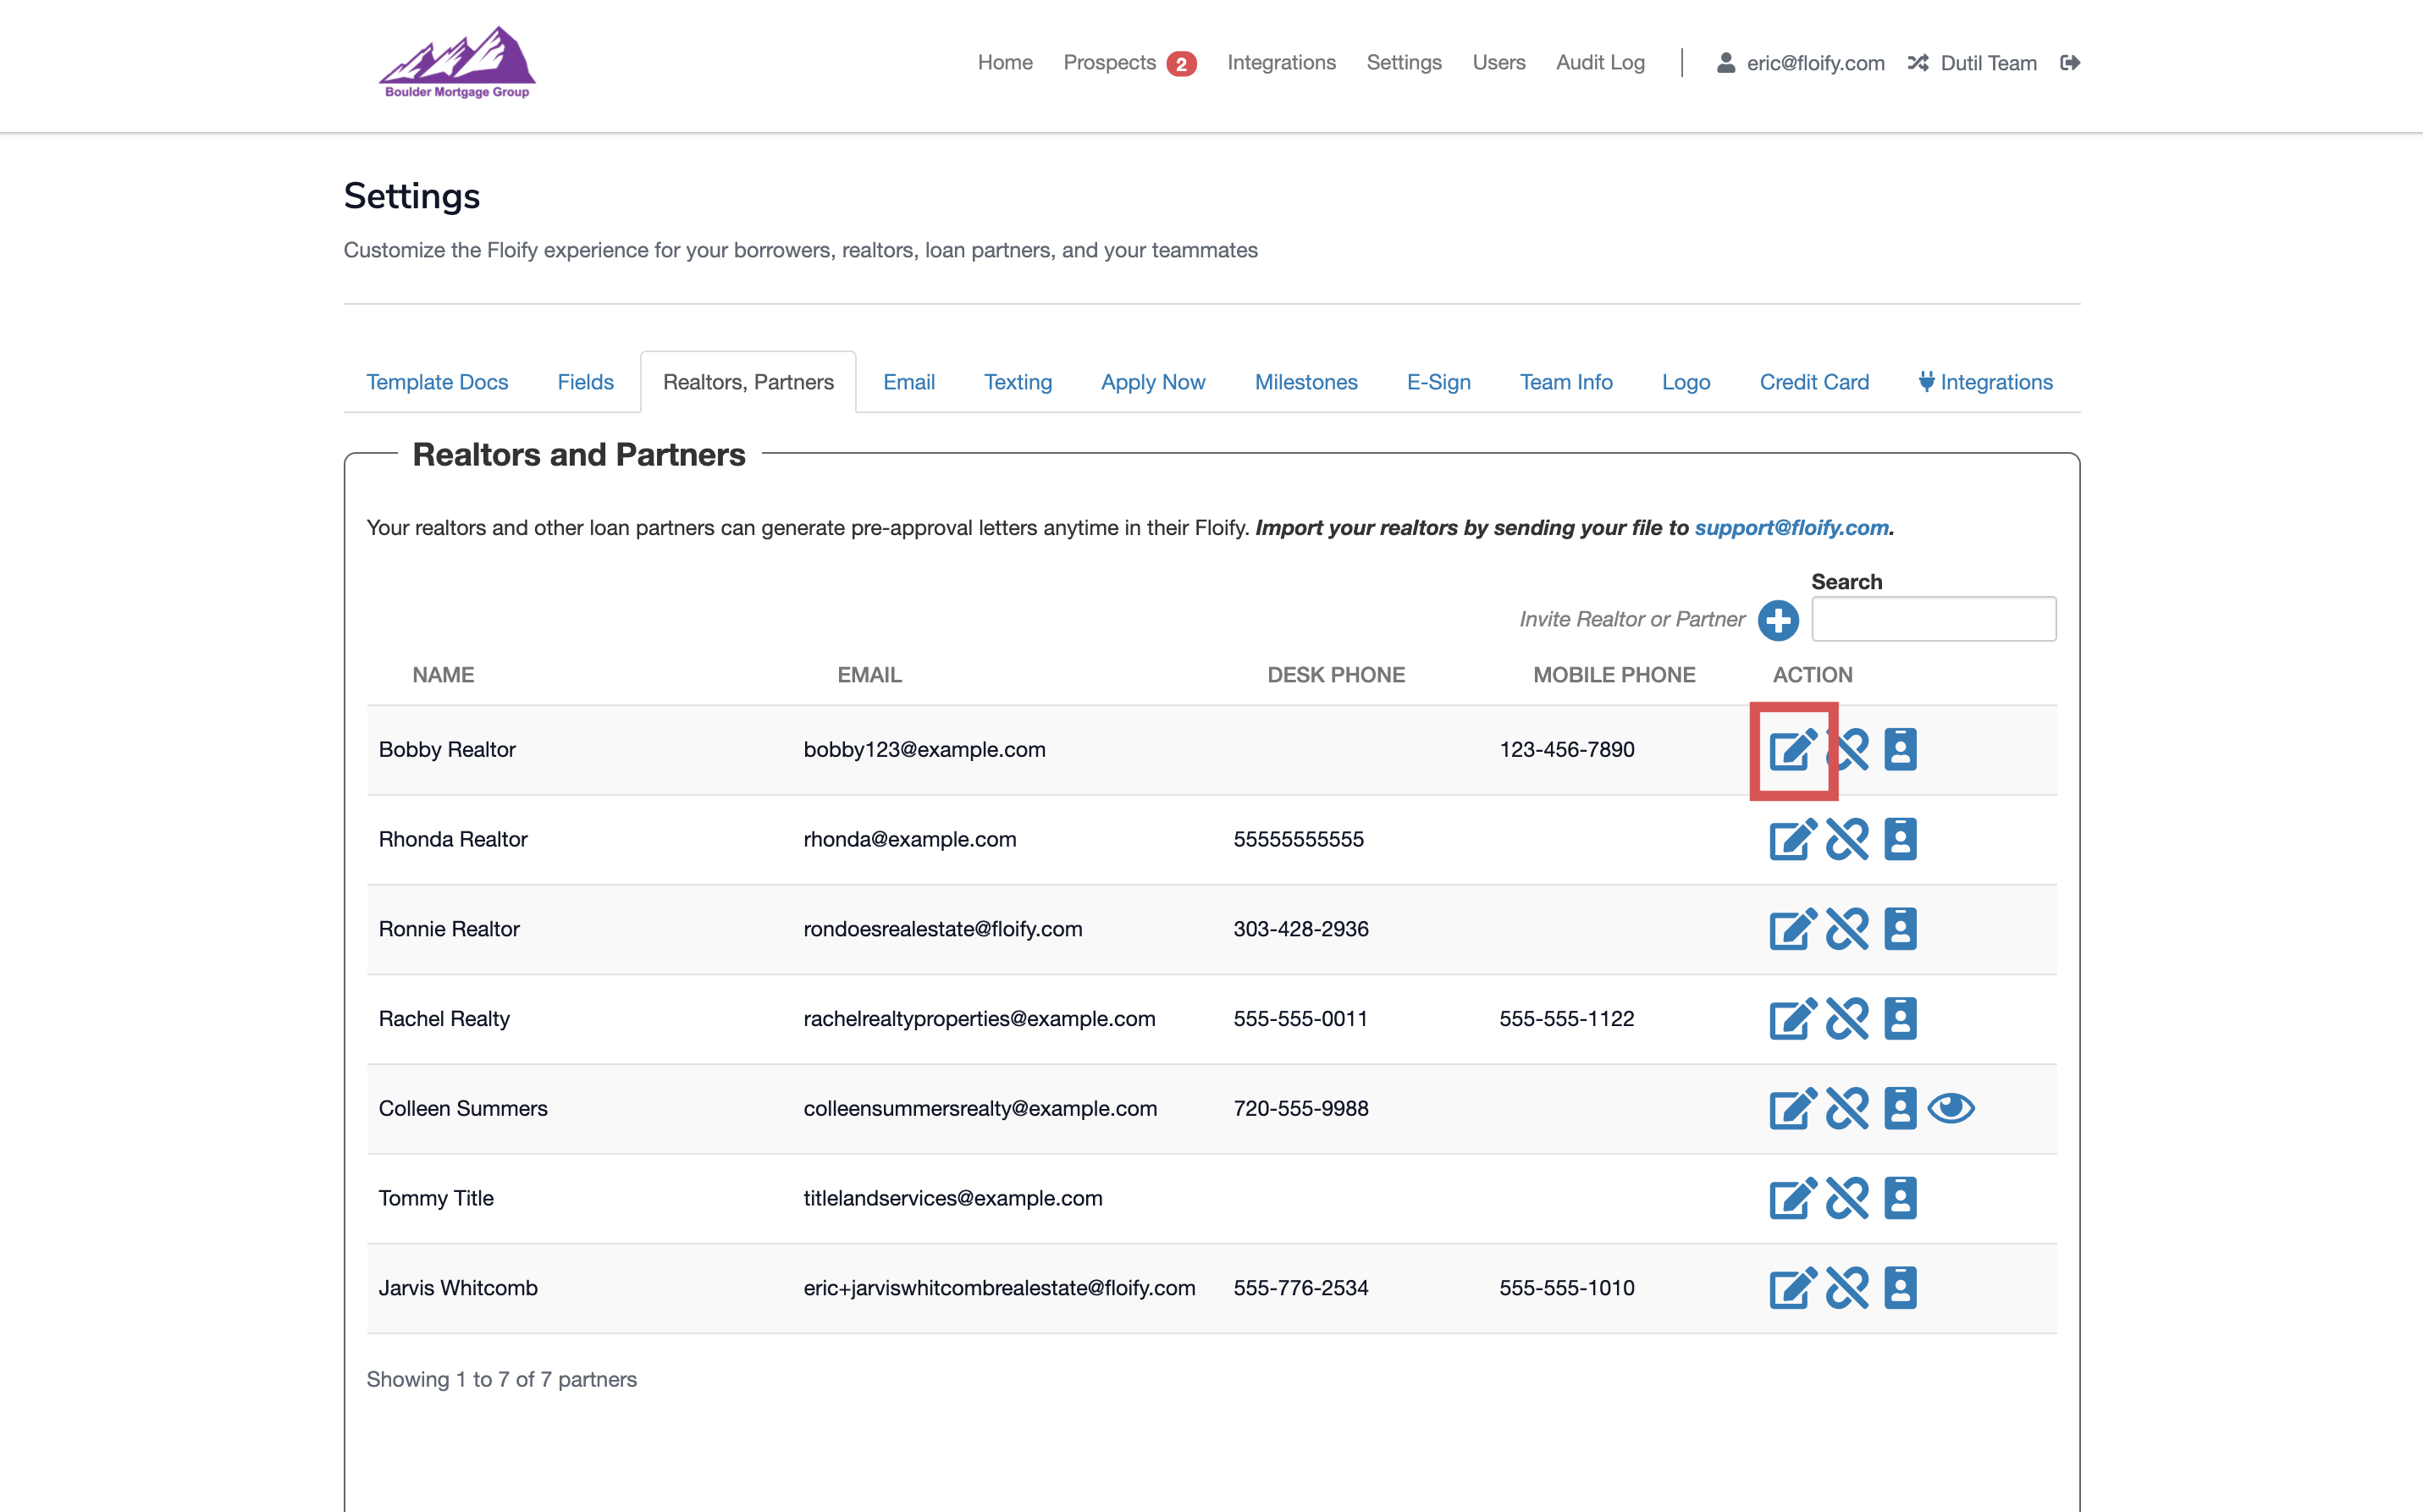
Select the pencil/paper icon towards the right hand side of the realtor or partner's name:
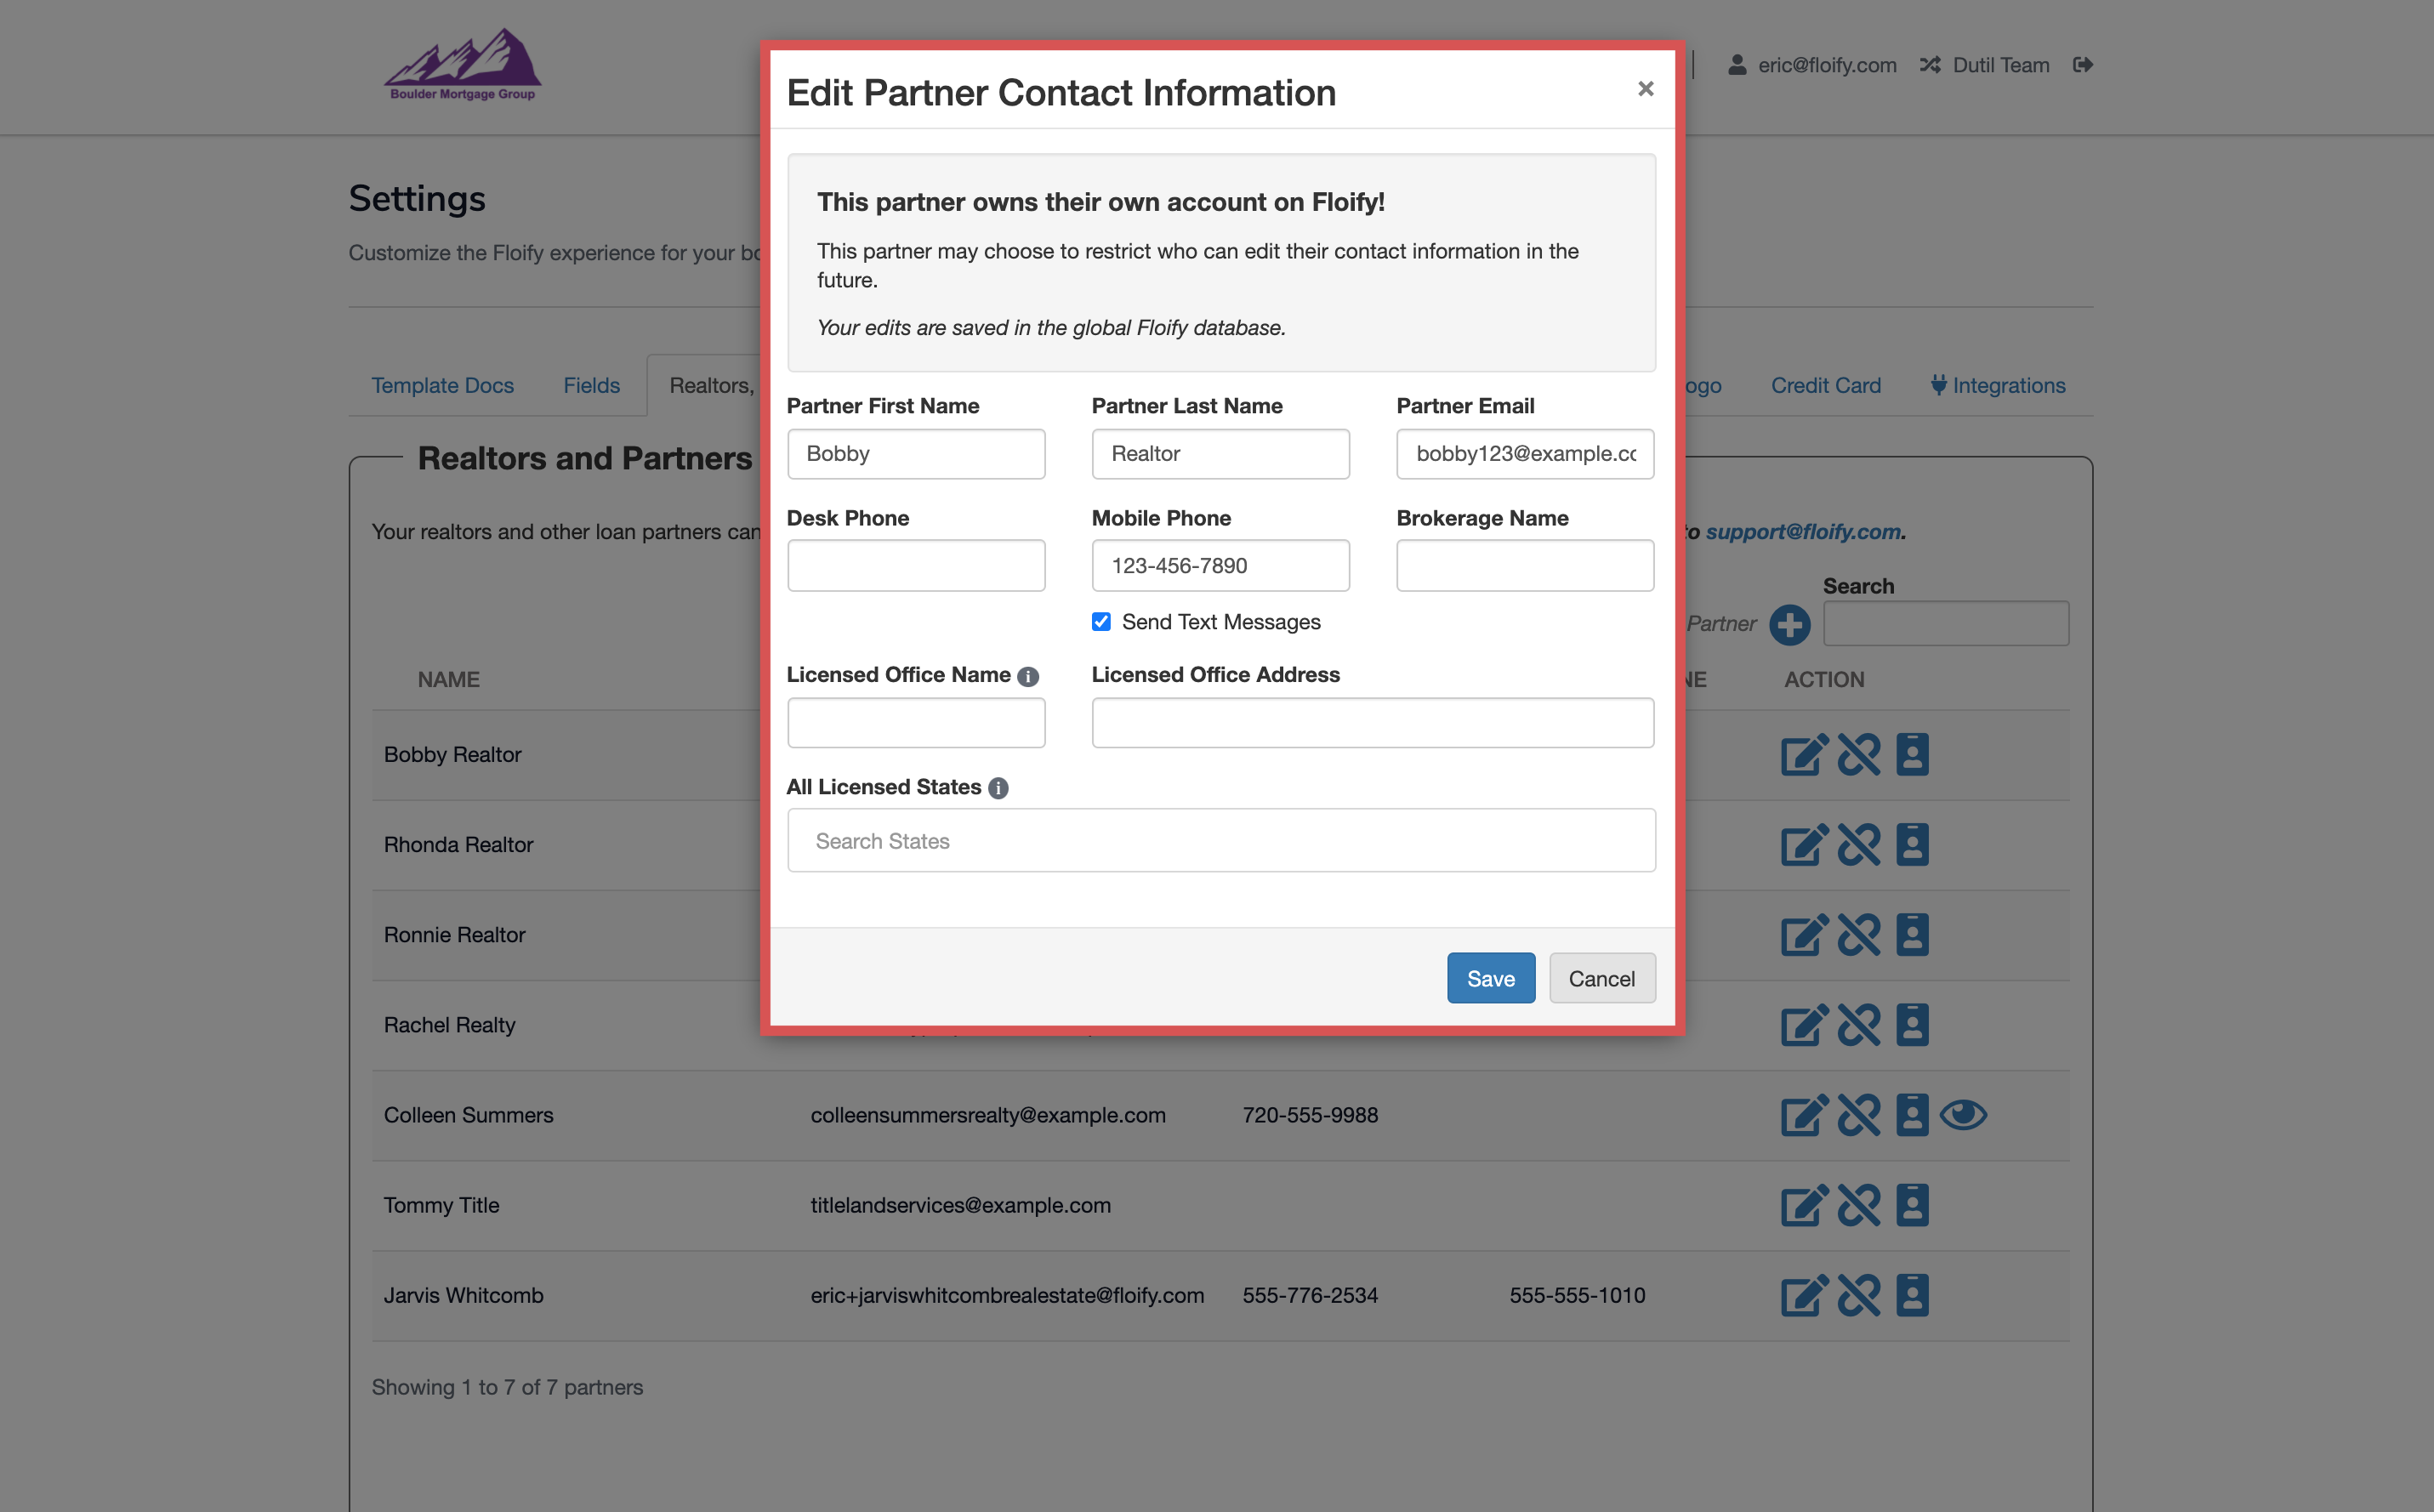
Make any adjustments you need to the contact and select Save to confirm the changes:
Note: Realtors/partners can restrict who can edit their contact information in their own profile, so you may not have access to make adjustments if this is the case.
You can also unlink a realtor or partner from your account if you need to with the chain link icon towards the right hand side of the realtor or partner's name:
Invite a Realtor or Partner to a Loan Flow
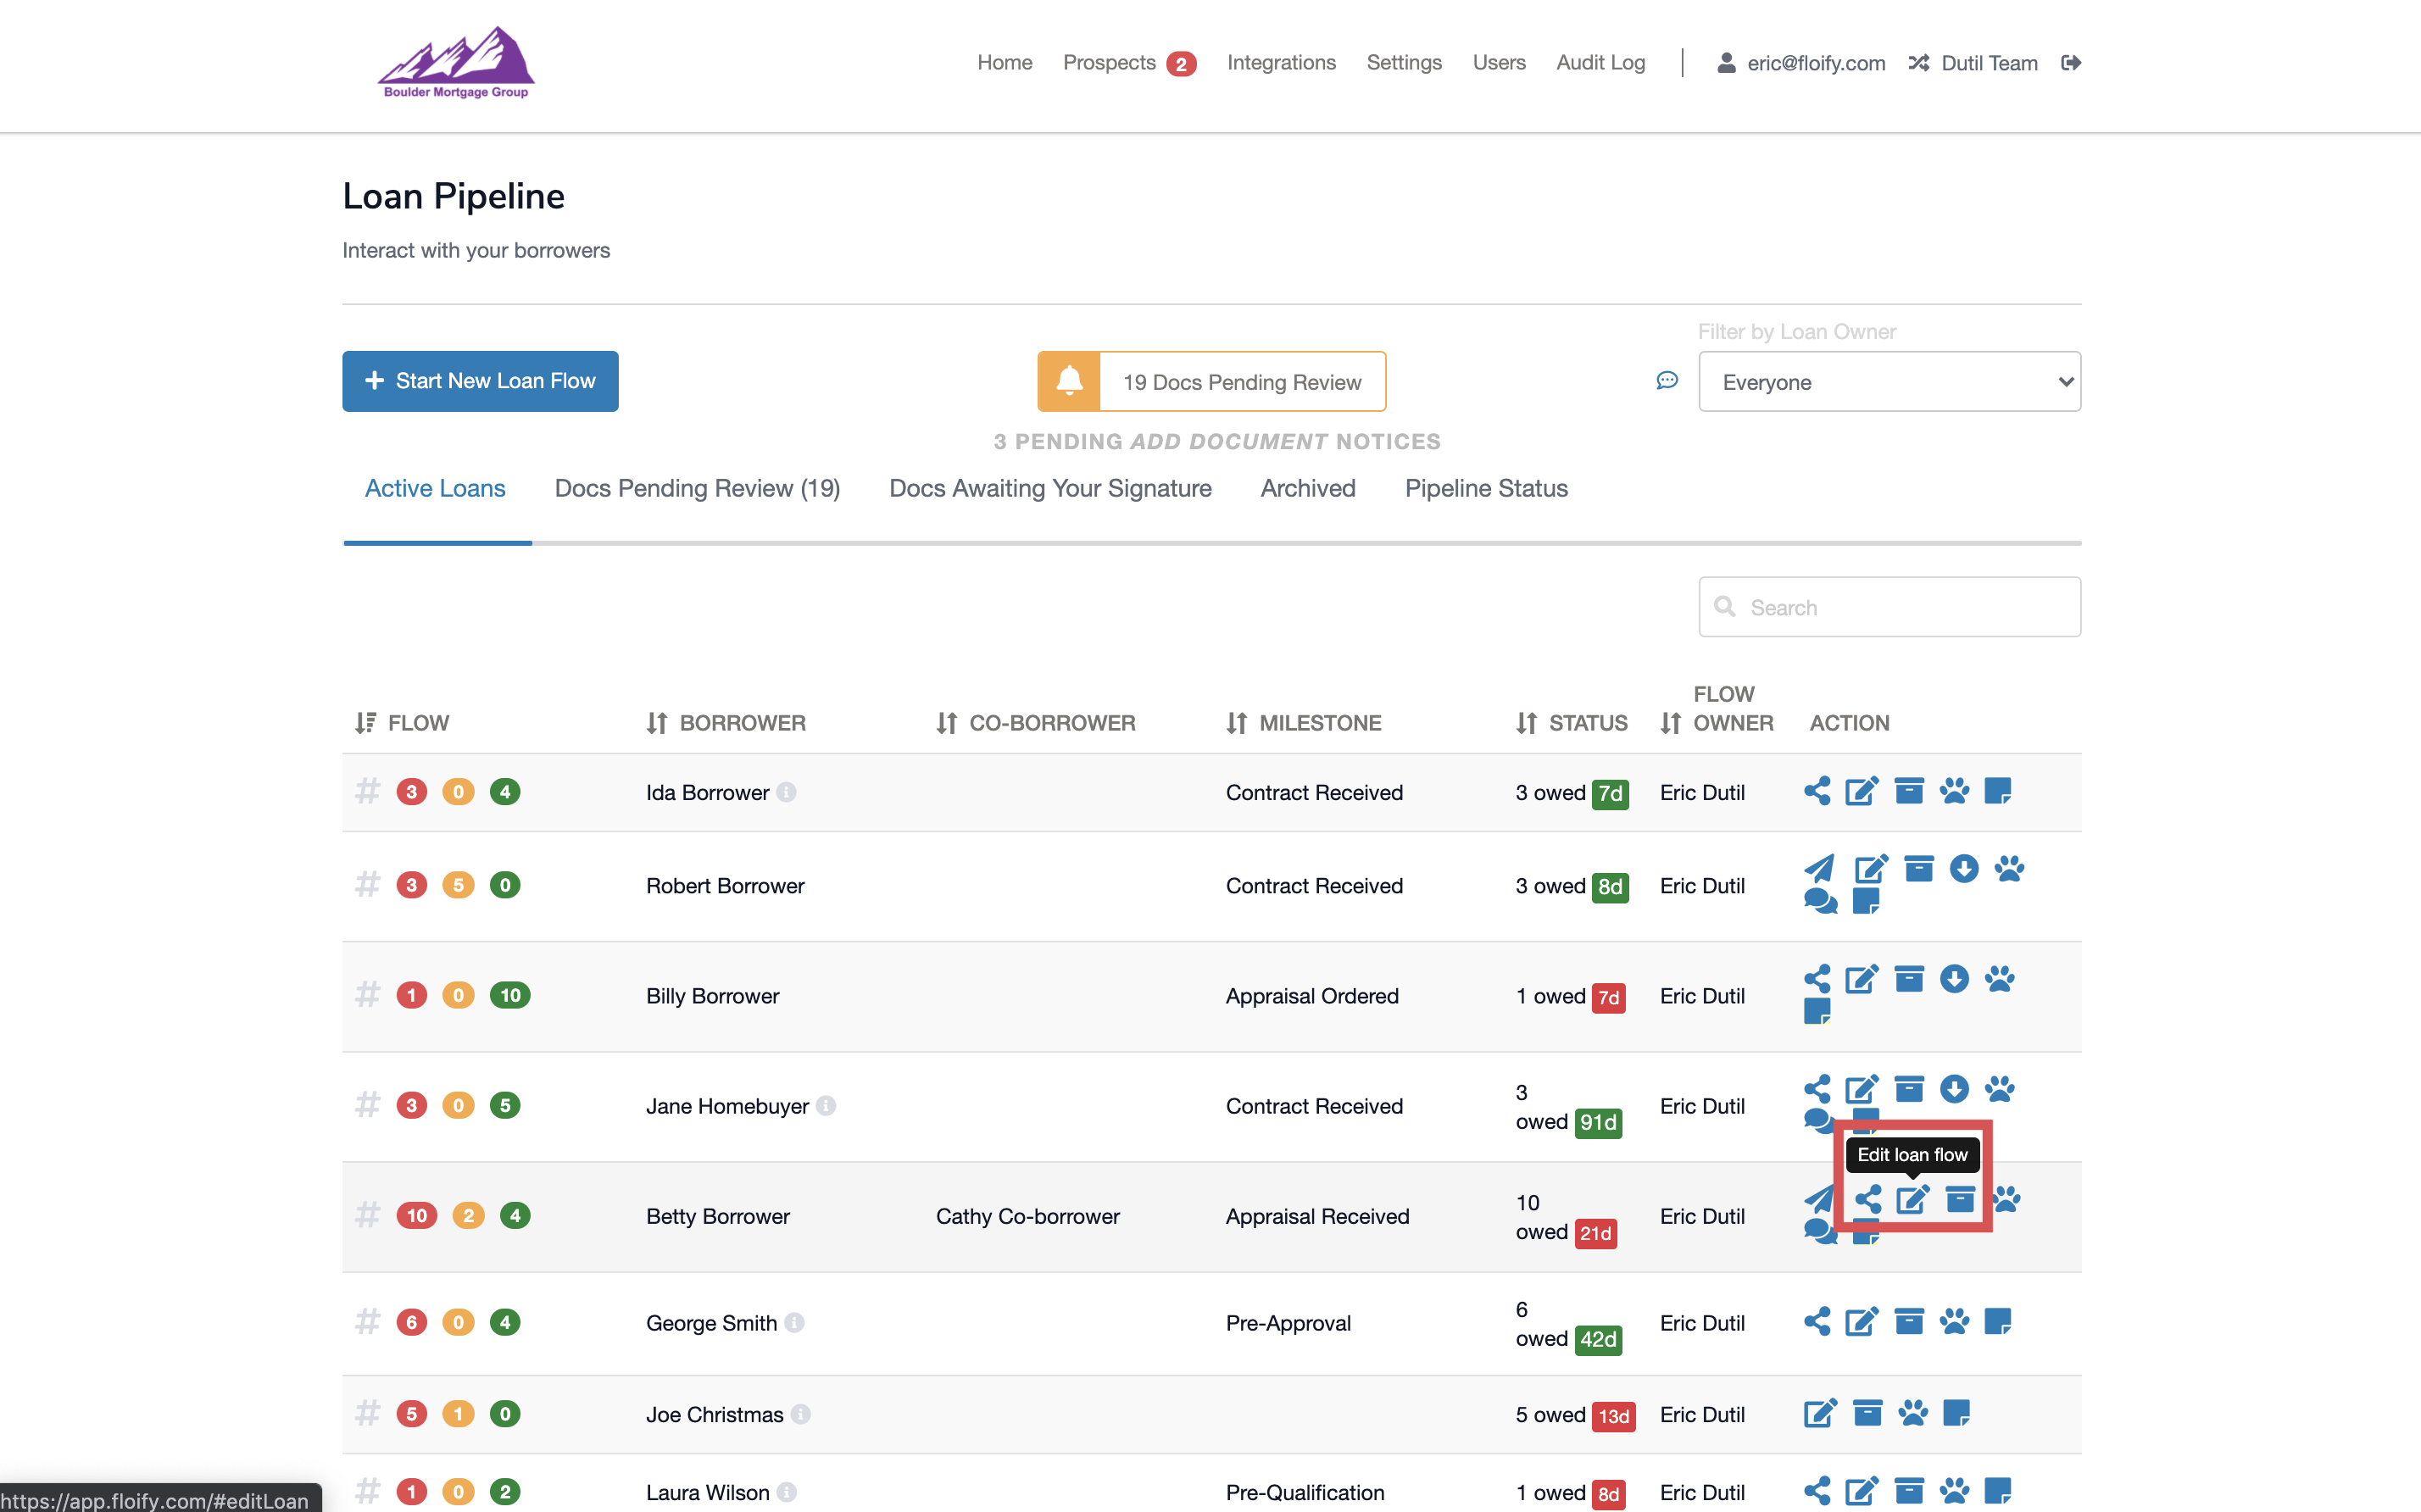
From the loan pipeline, select the Edit Loan Flow icon:
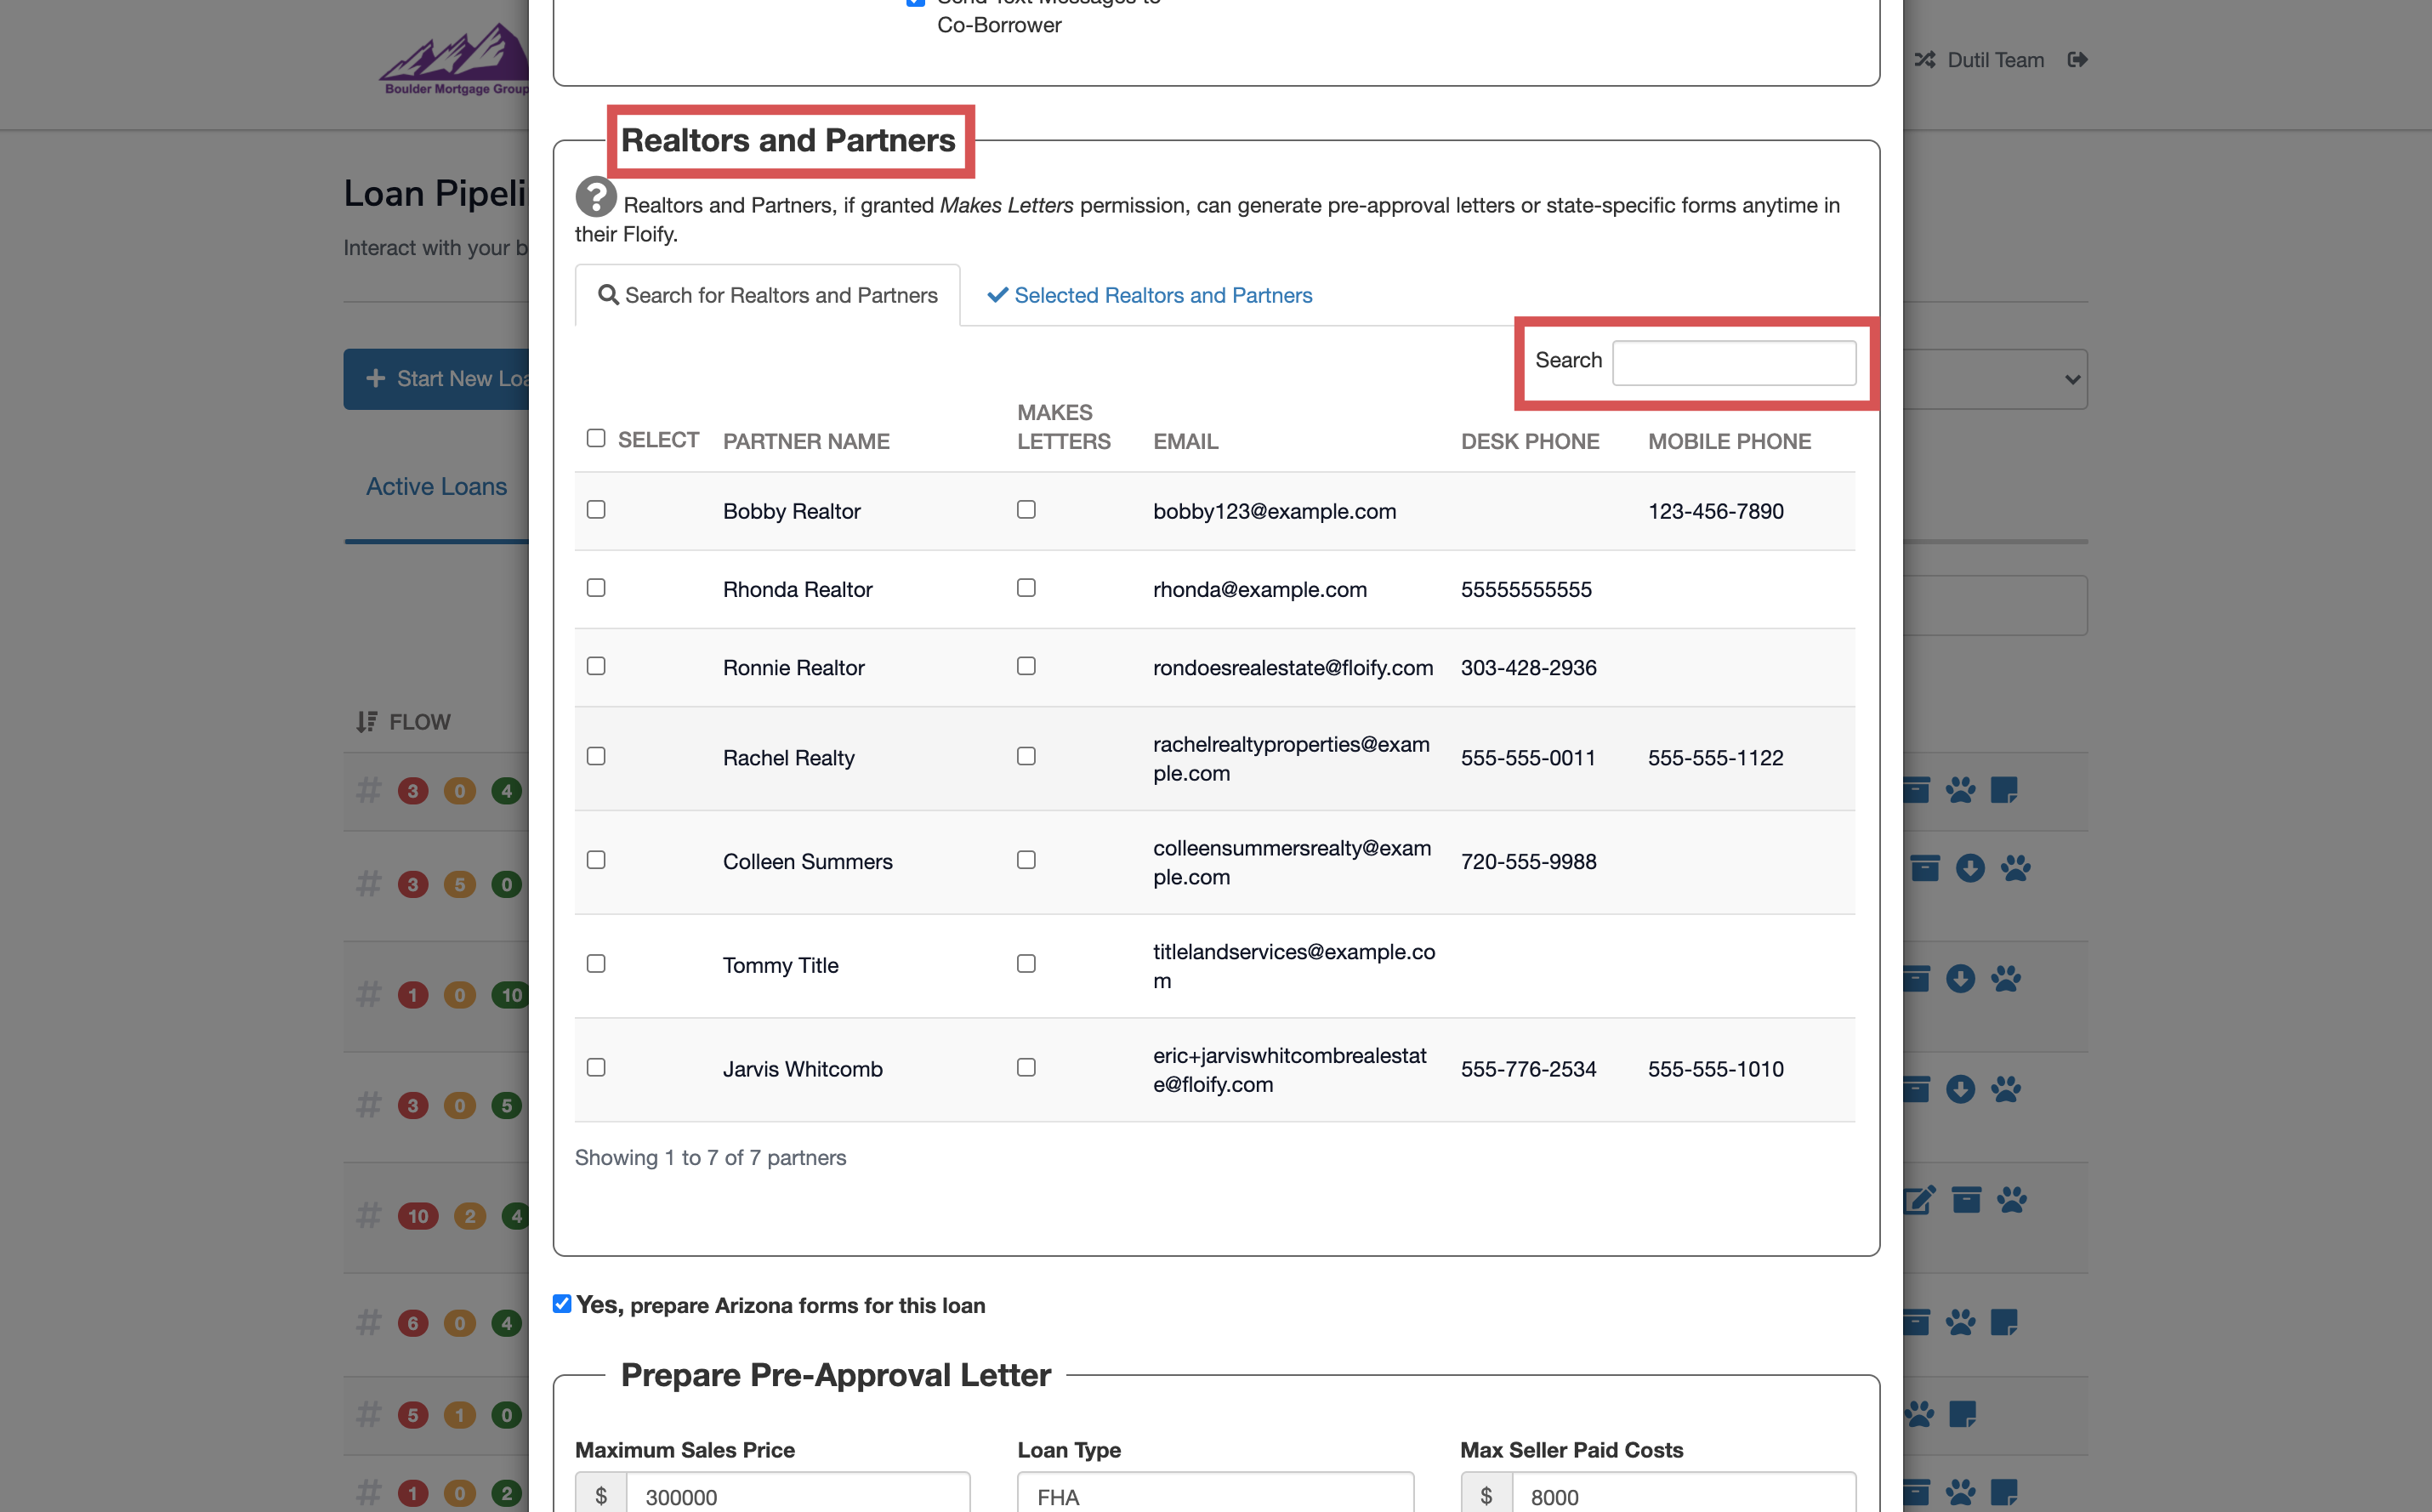
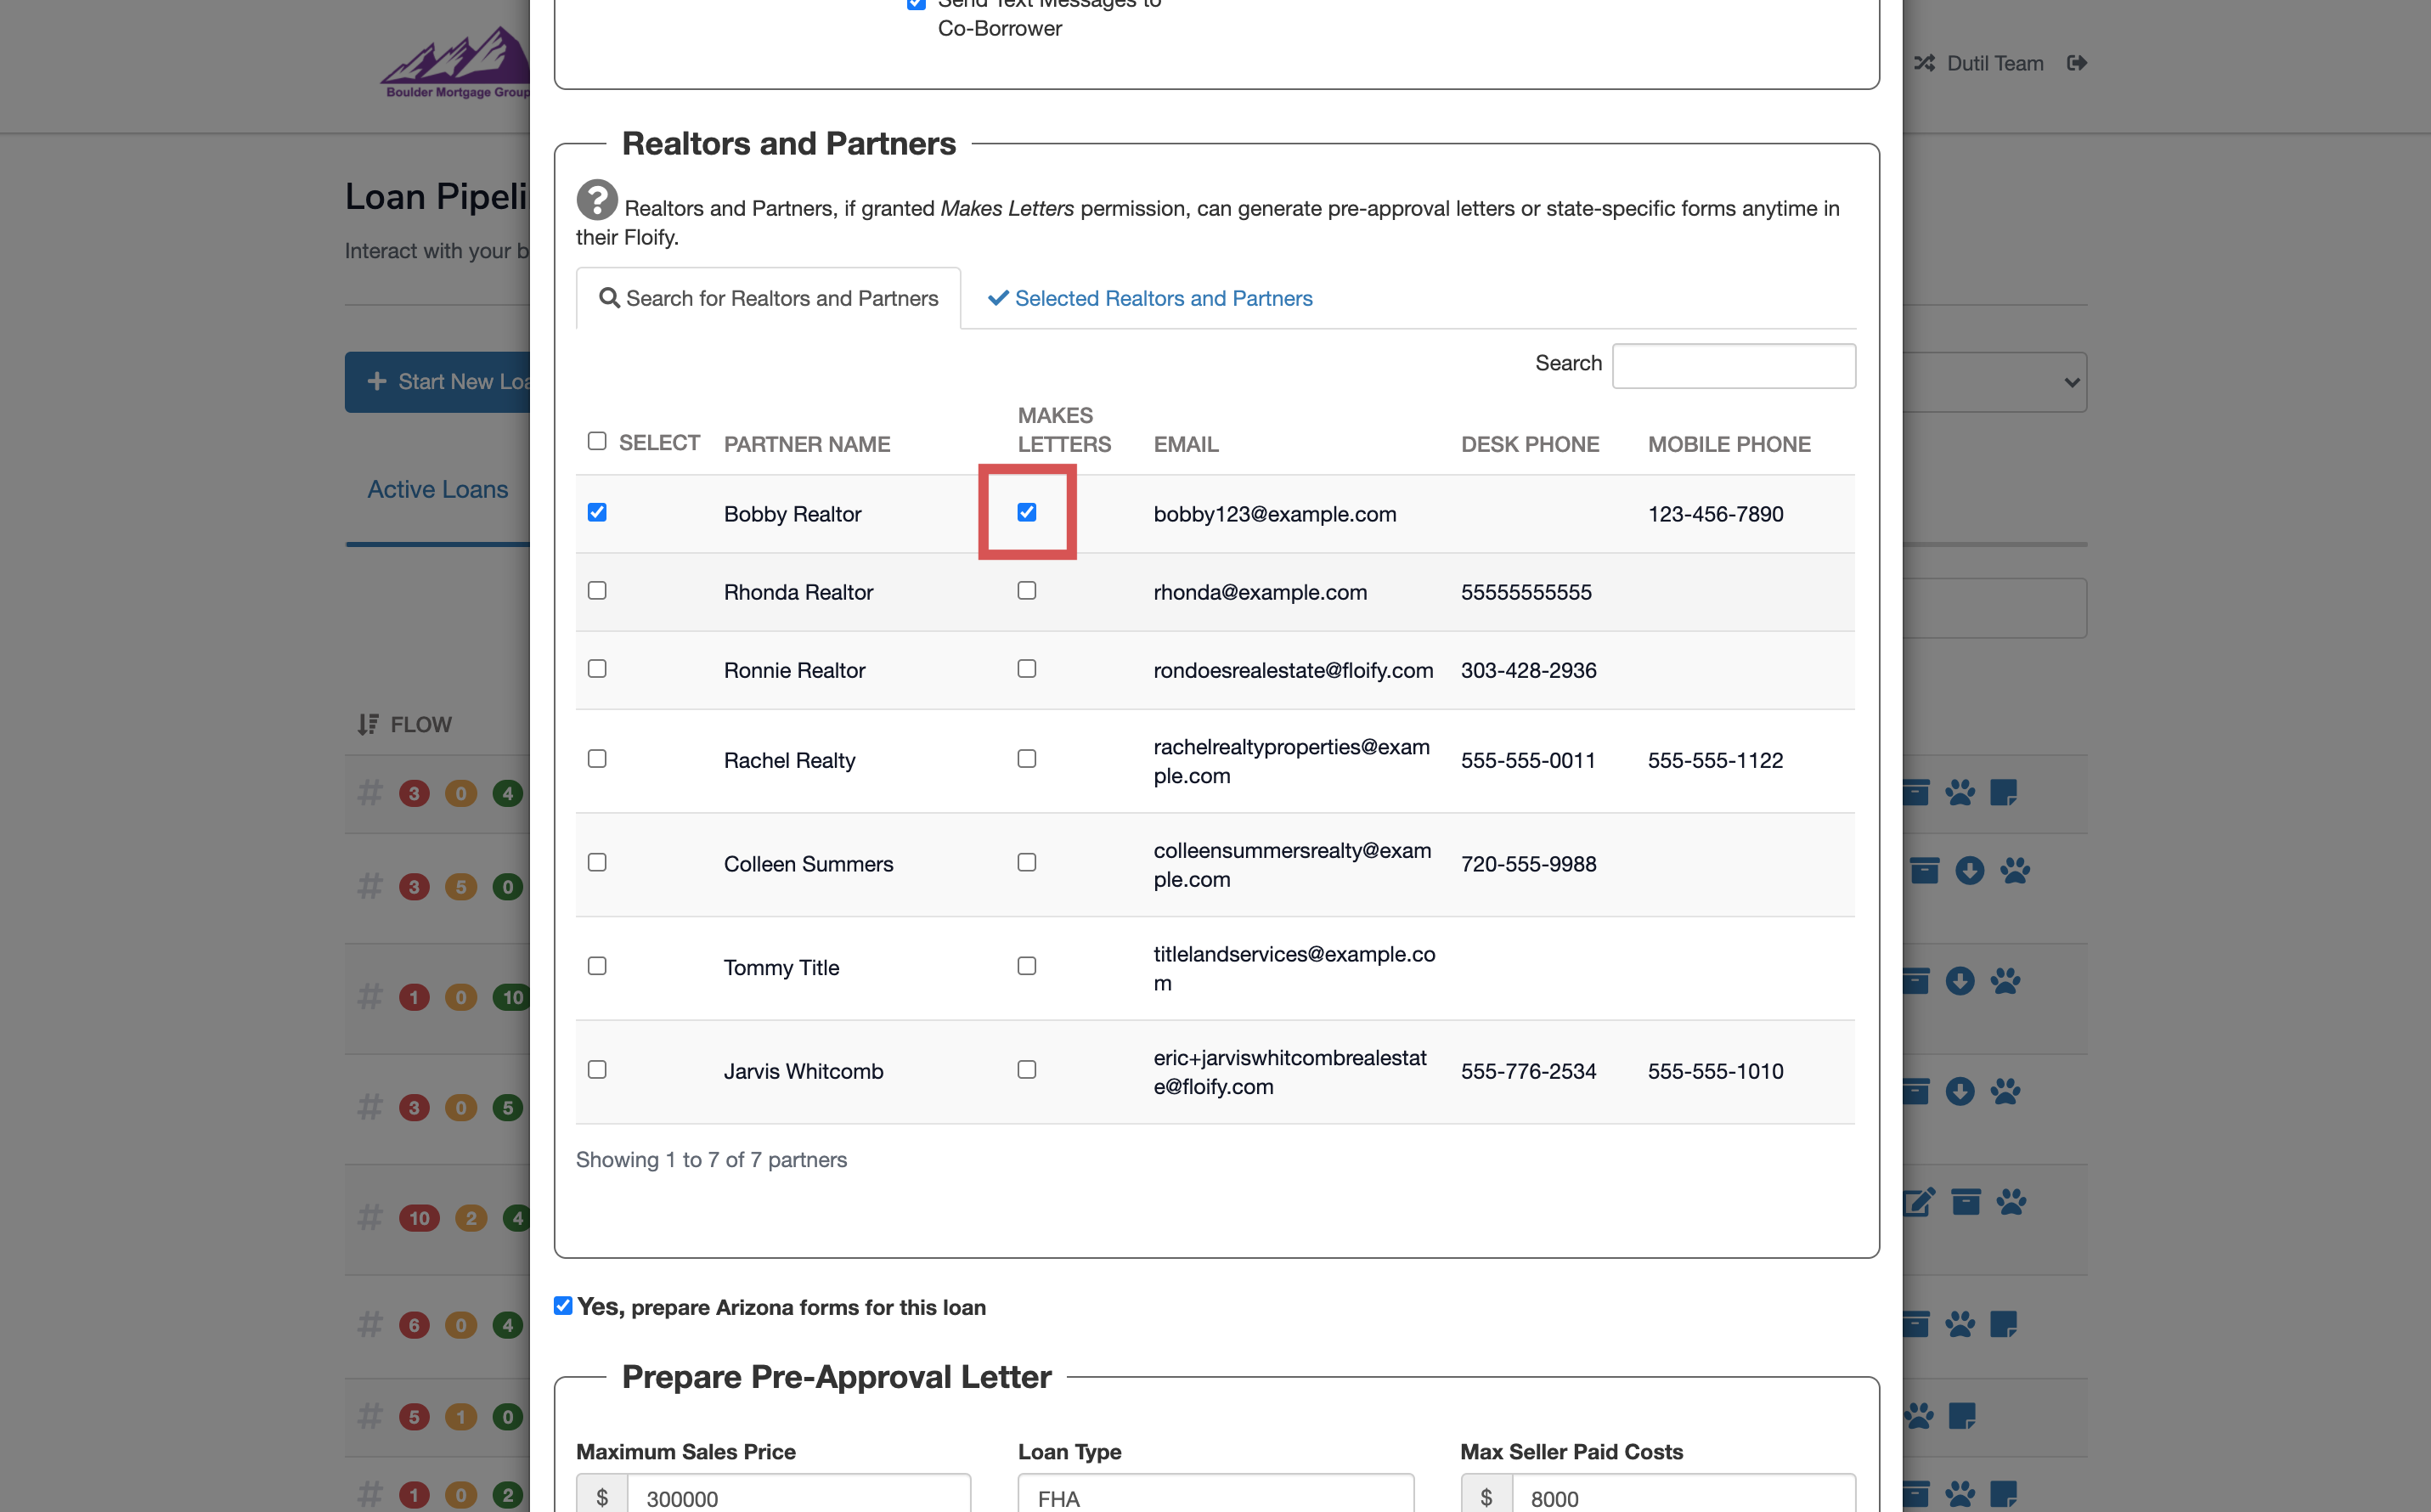
Scroll down to the Realtors and Partners section. You will see a list of all the realtors and partners in your account listed here. You can also use the search bar on the right to find a specific name:
Select the checkbox on the left hand side of the realtor or partner's name to invite them into the loan flow for this borrower. This will give them basic permissions including access to the milestone updates and the option to upload documents to you directly:
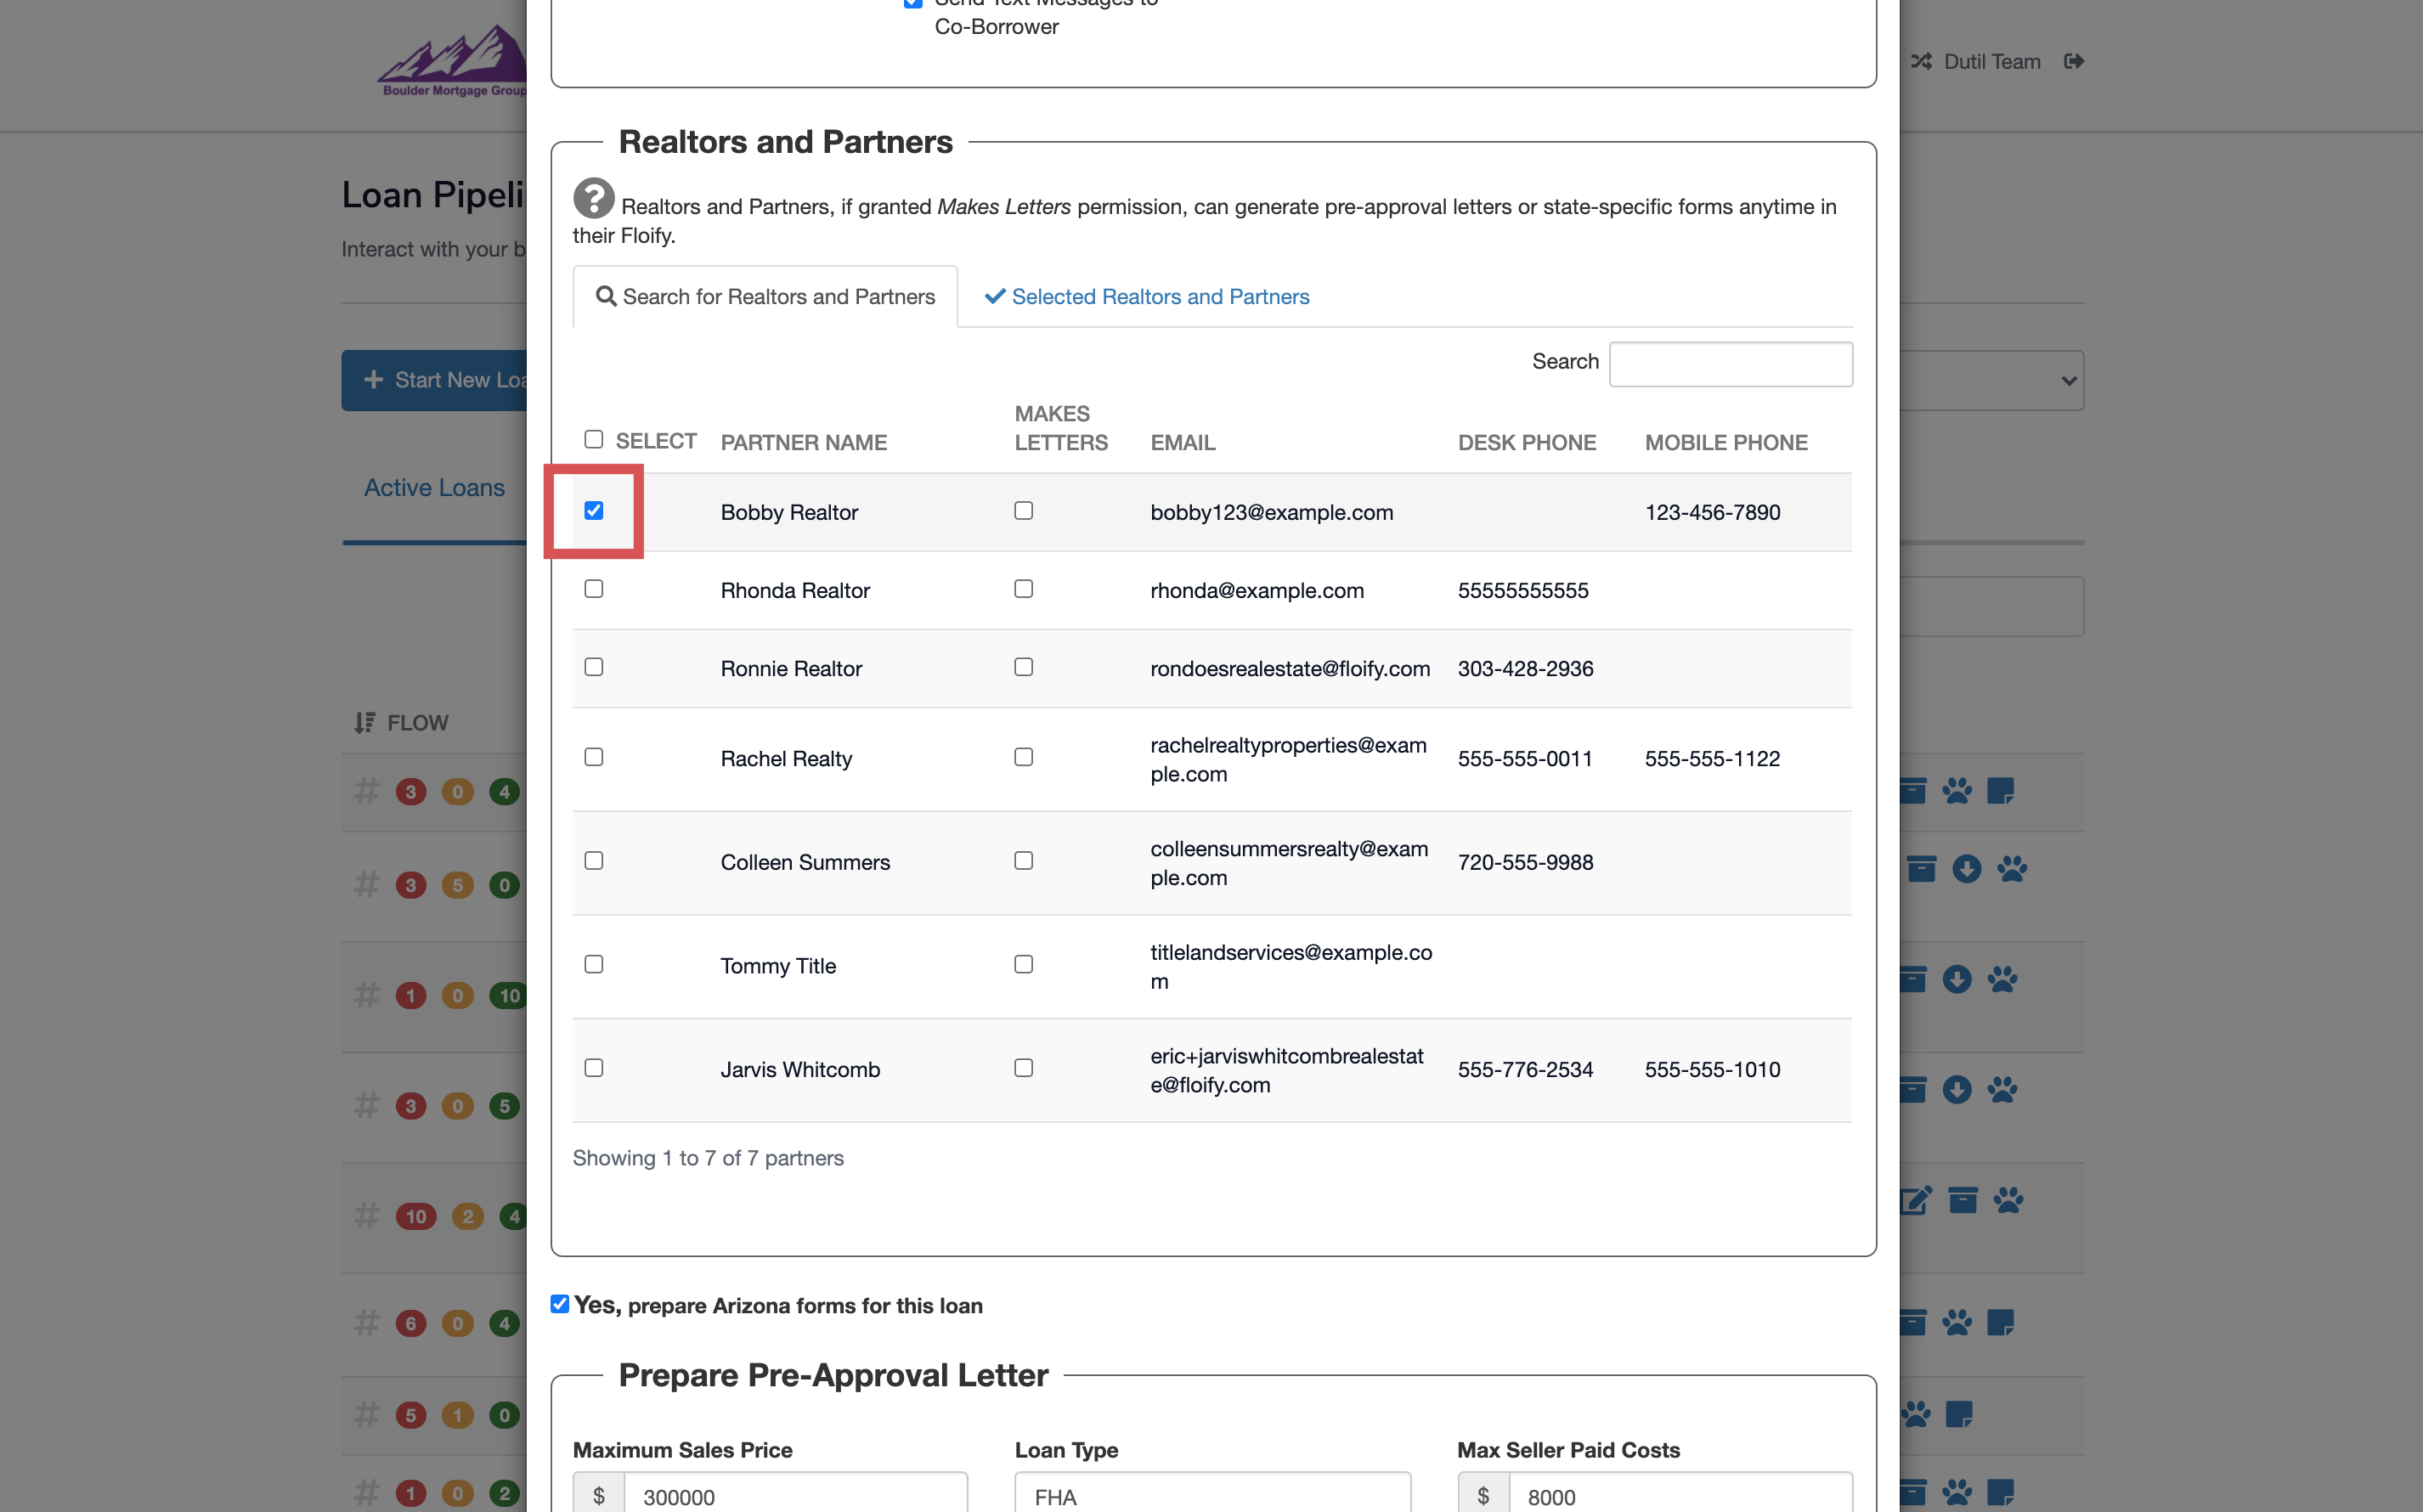
Select the checkbox in the Makes Letters column to allow your realtor or partner to generate a pre-approval letter in their portal in additional to the basic permissions:
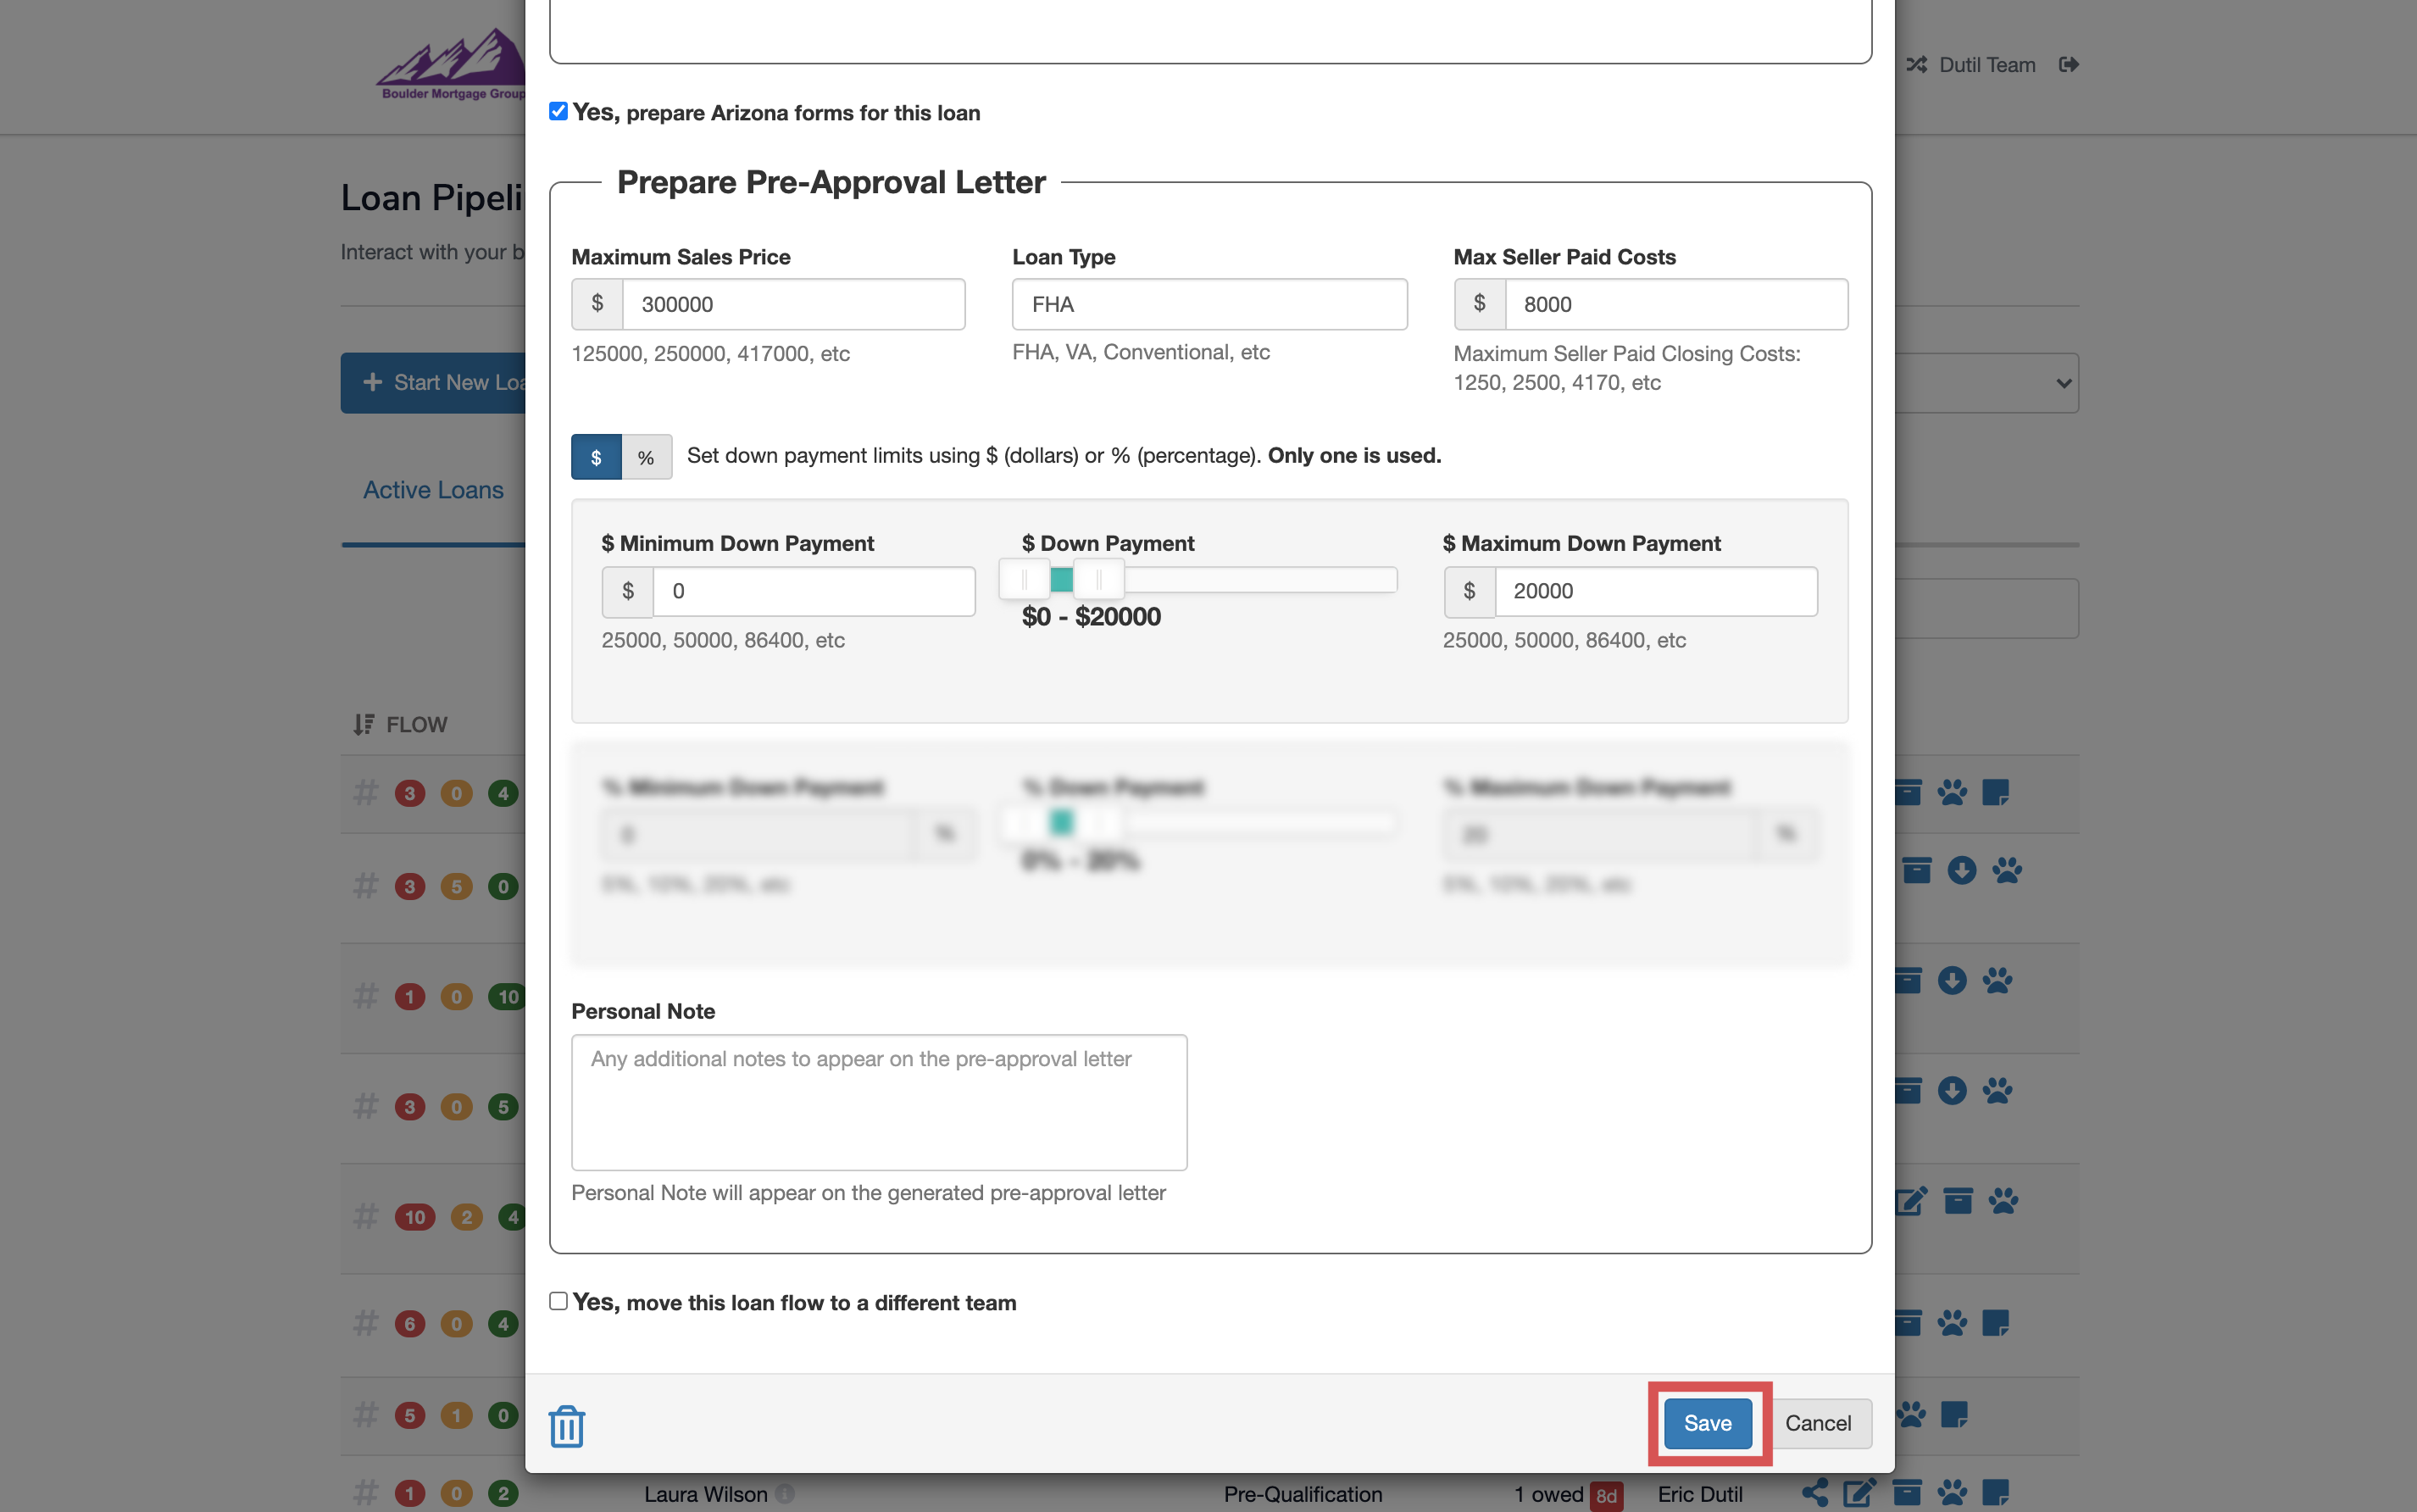
Make sure you select Save at the bottom of the page to confirm the changes:
Set Up Realtor/Partner Co-Branding
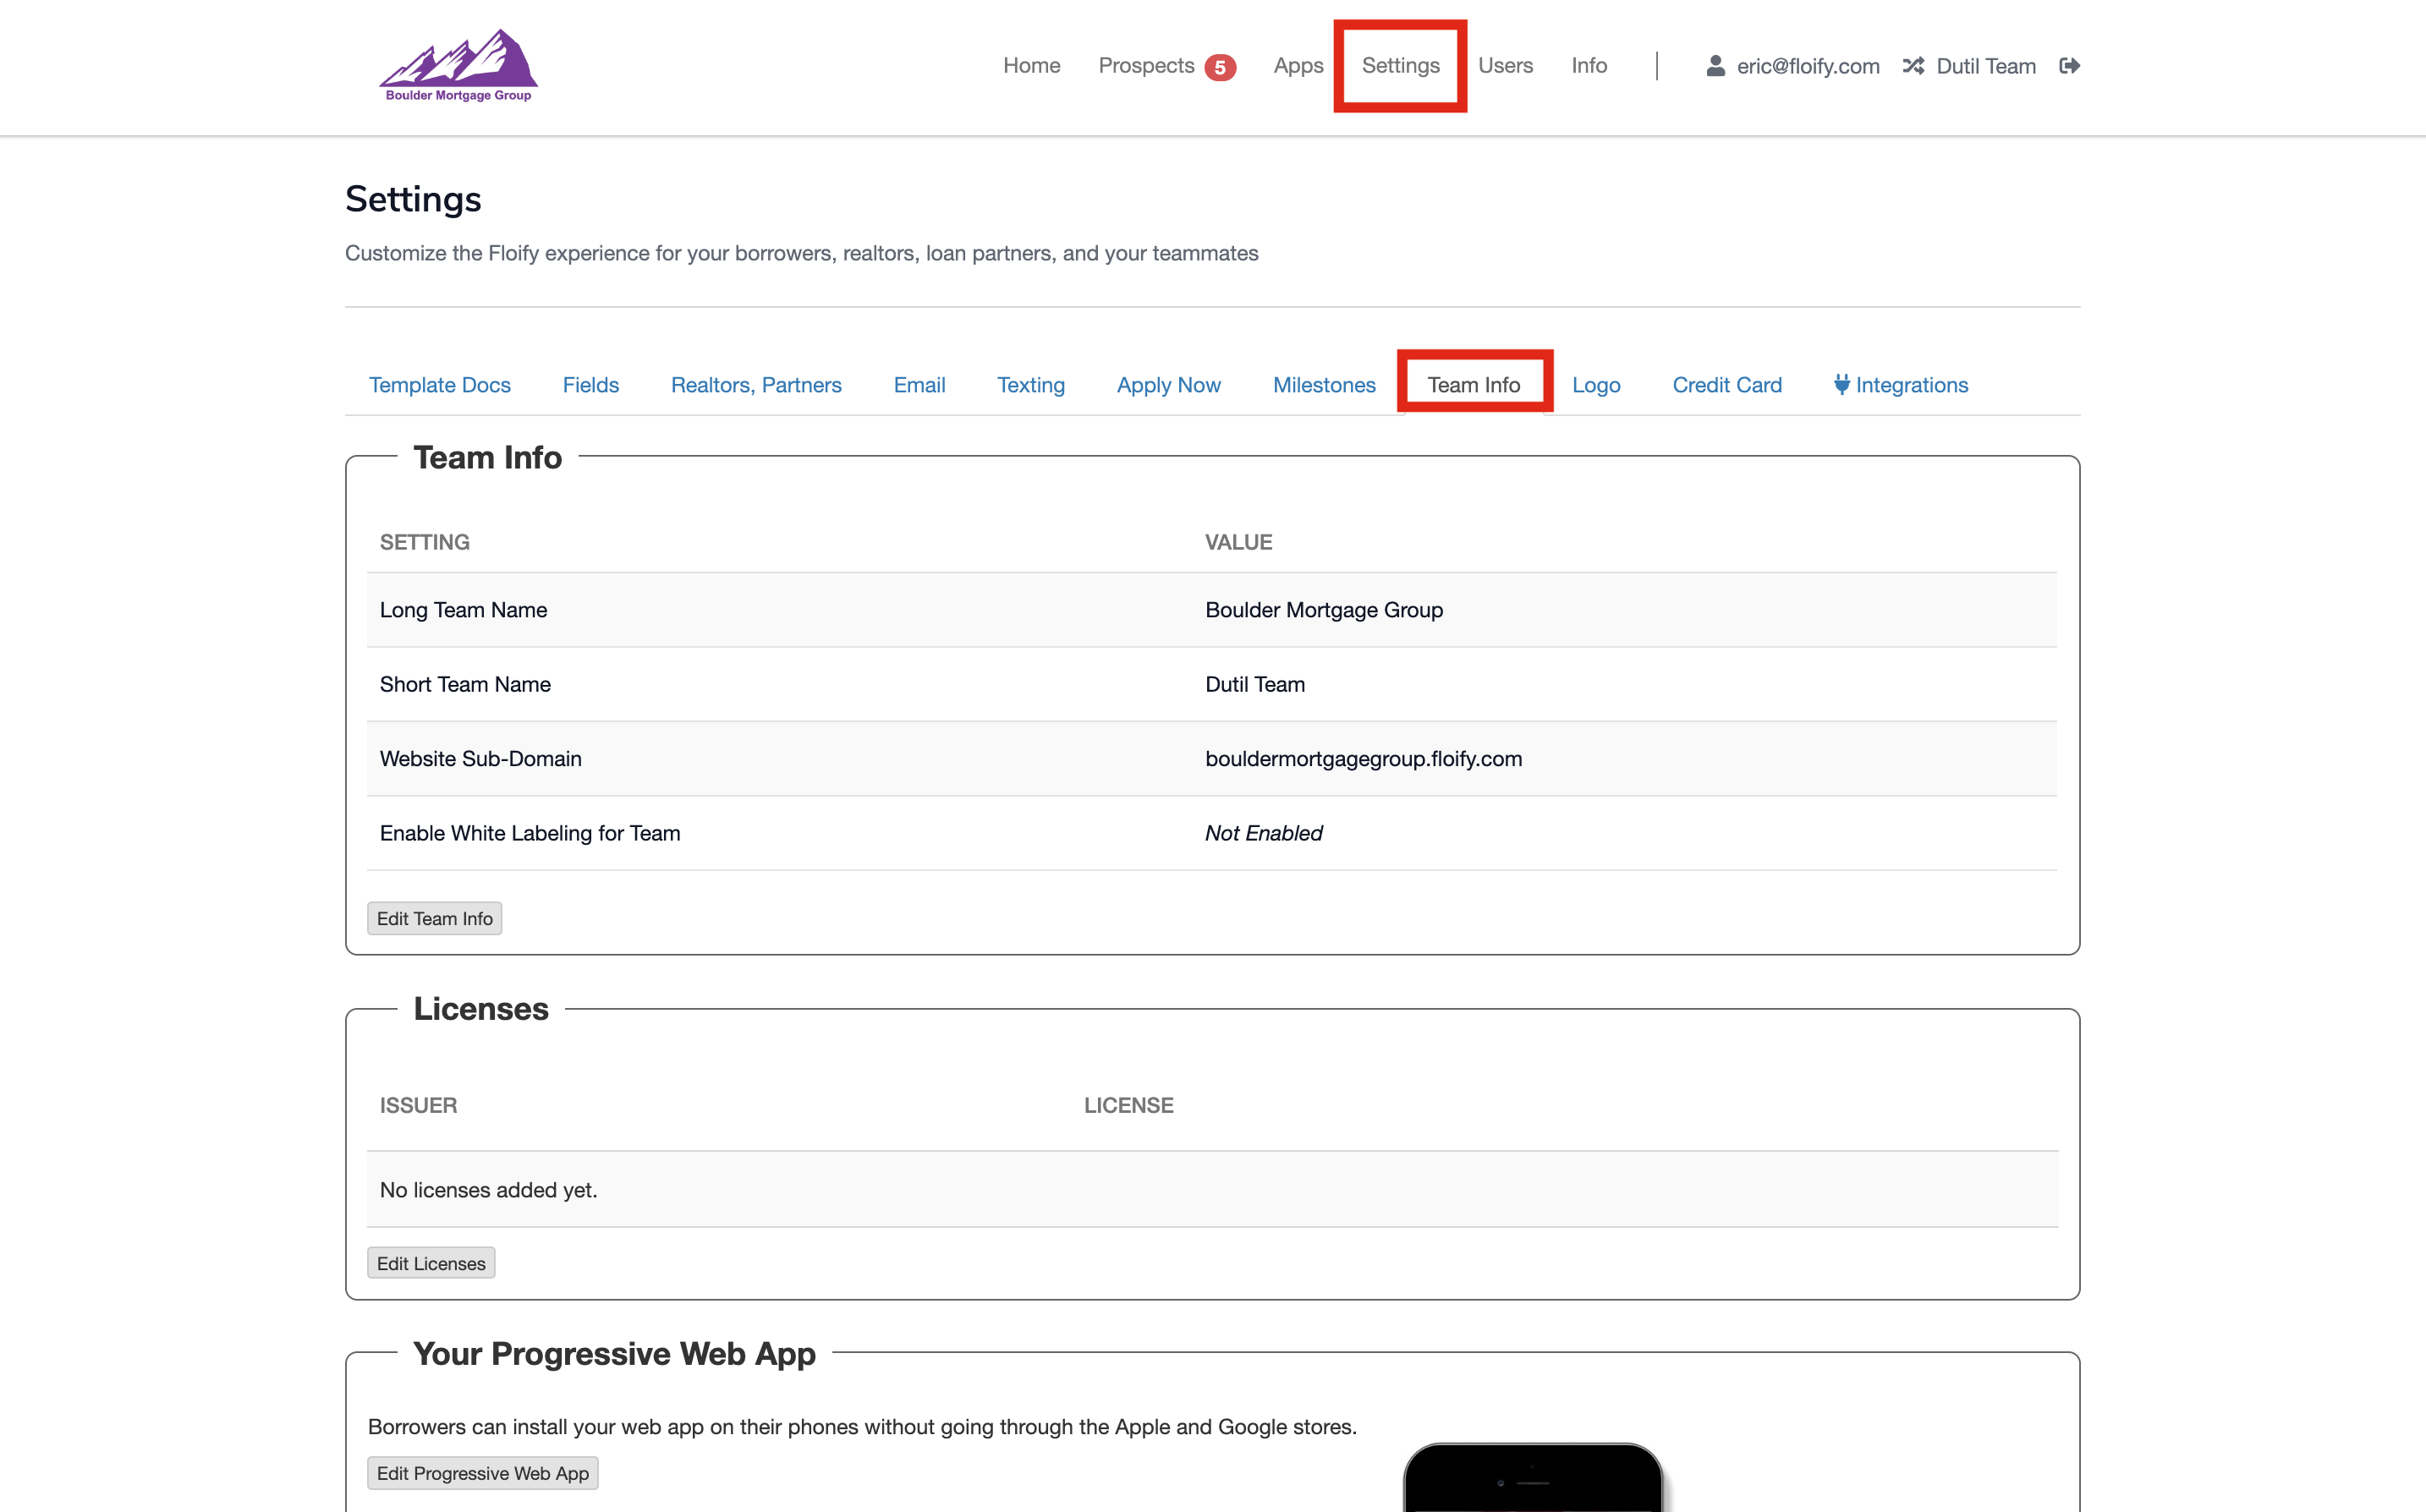
From your loan pipeline, navigate to Settings and select the Team Info tab:
Scroll down to Landing Page Configuration and select the option to Edit Landing Page Configuration:
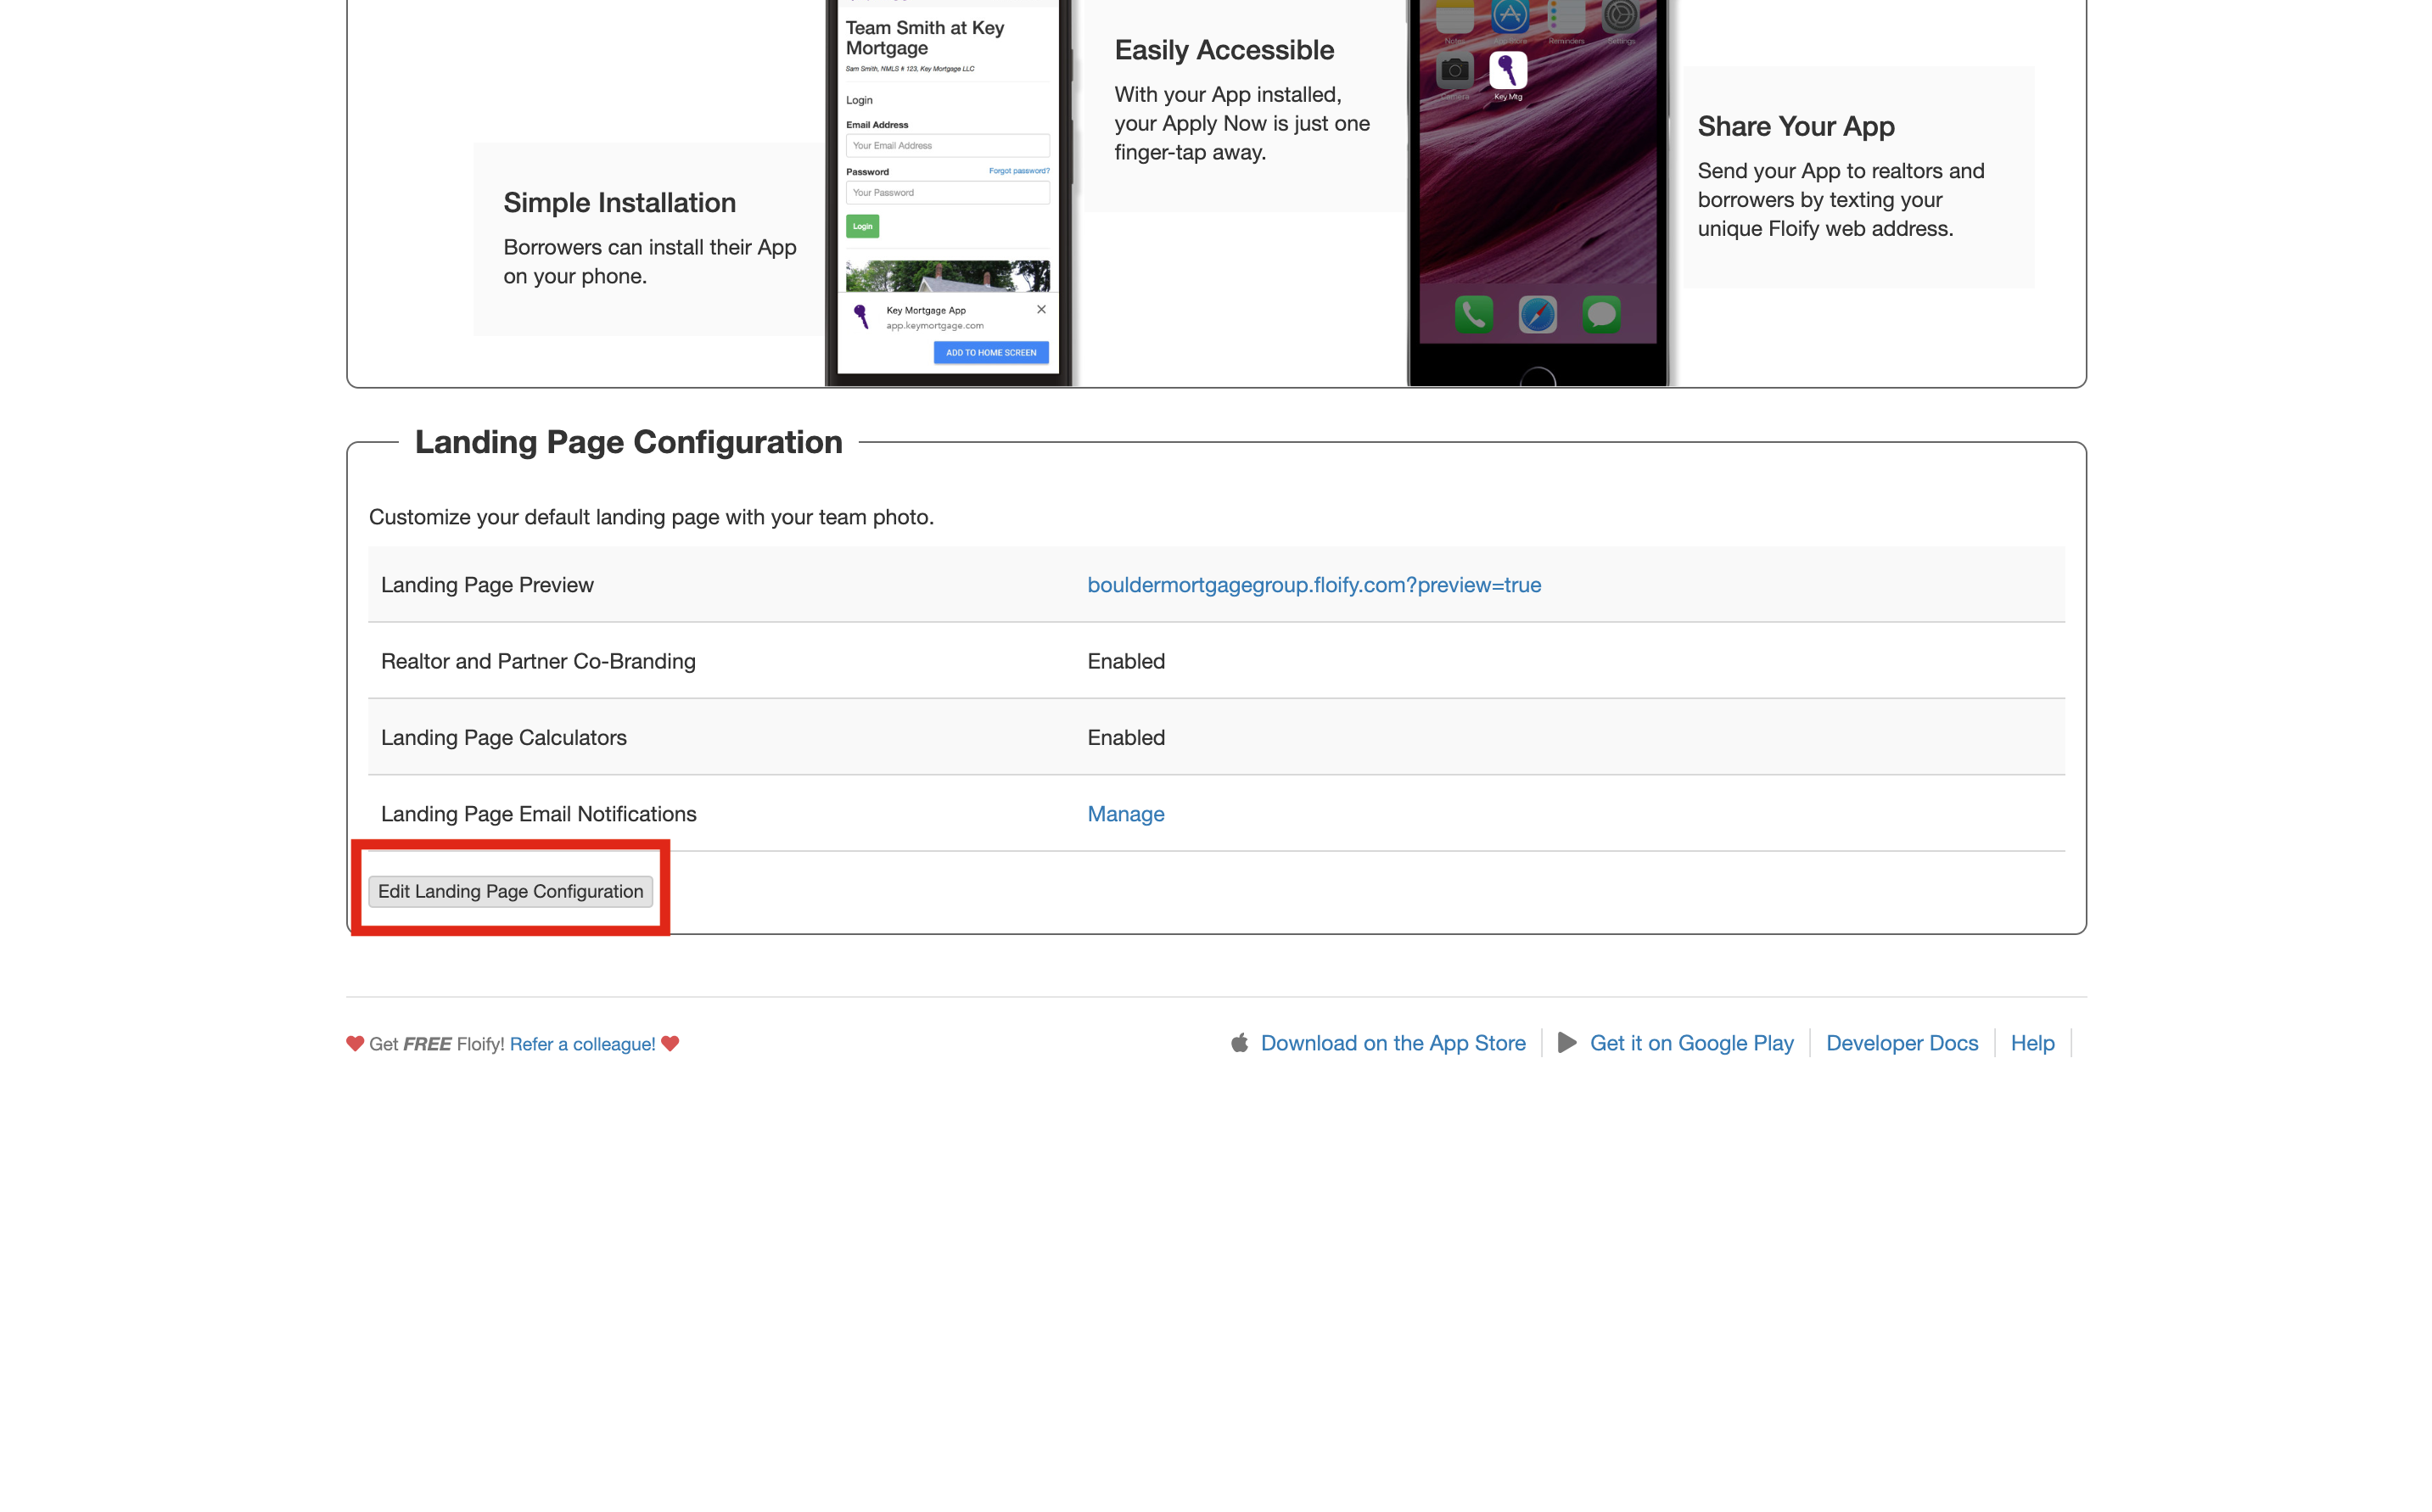
Settings will be enabled / disabled automatically based on what the company allows. If available, check the box to Enable Realtor and Partner Co-Branding:

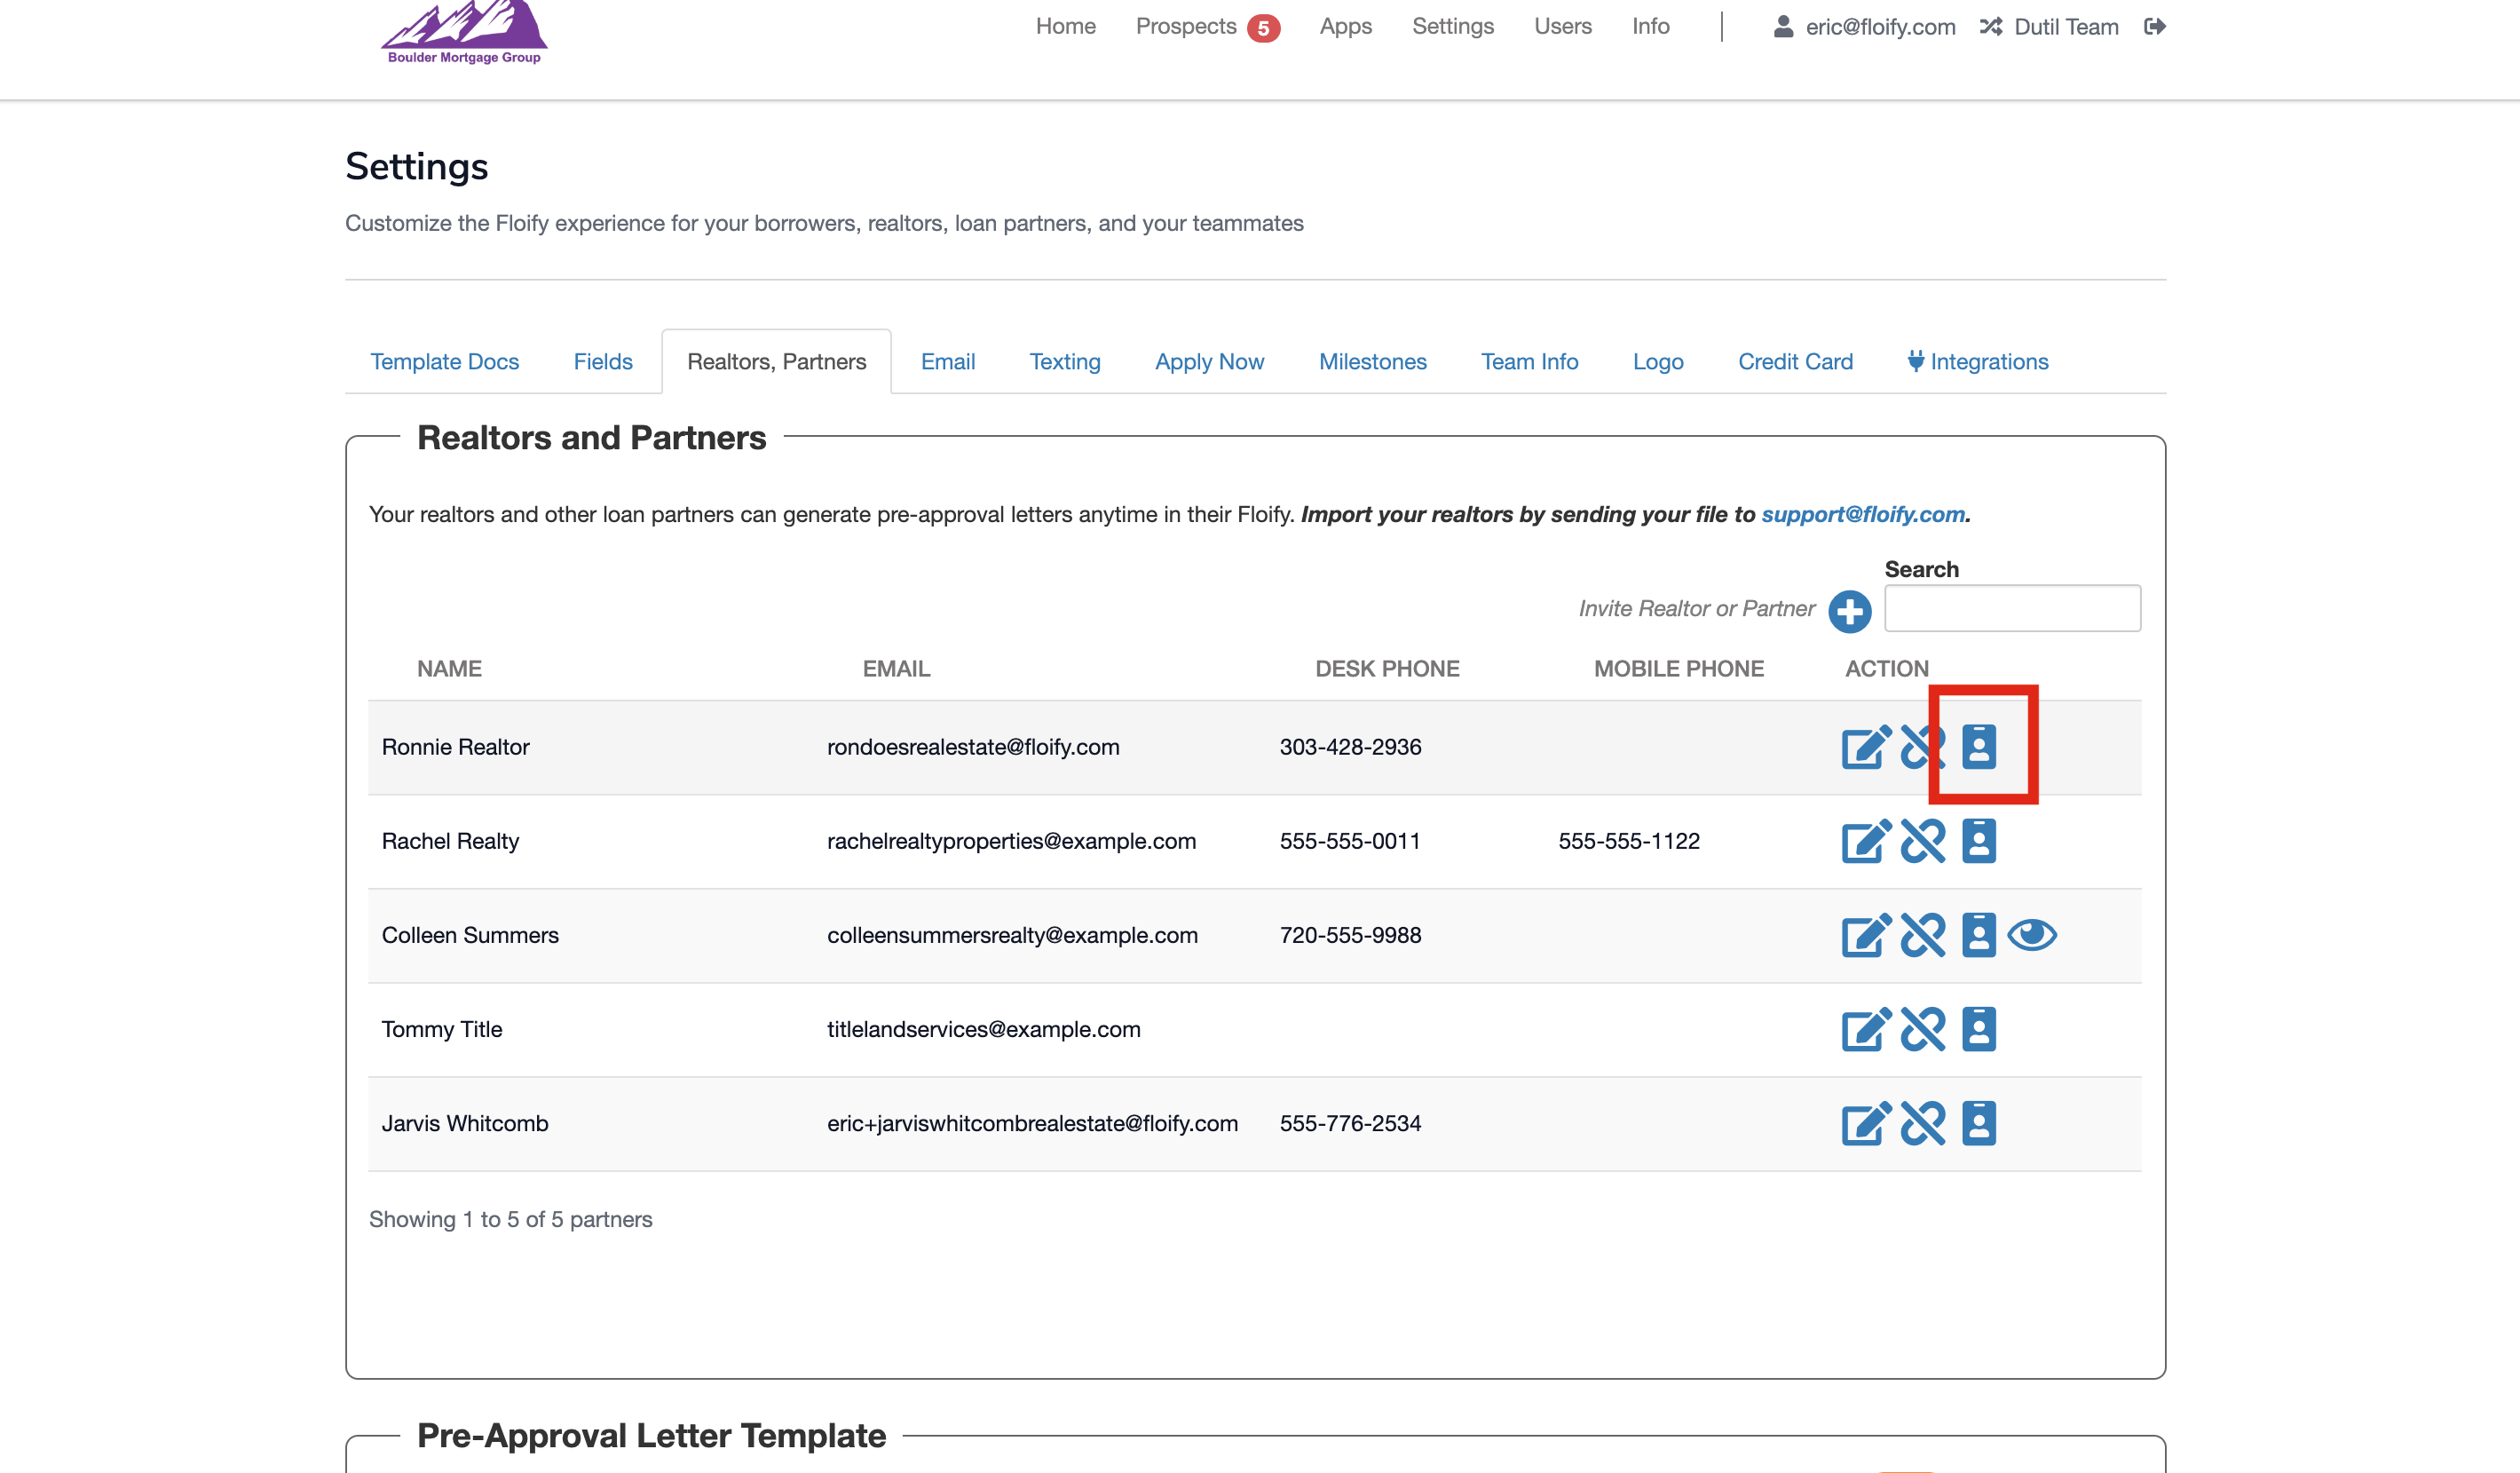
Navigate to Realtors, Partners and select the Edit Co-branding Settings icon towards the right of the realtor/partner's name:
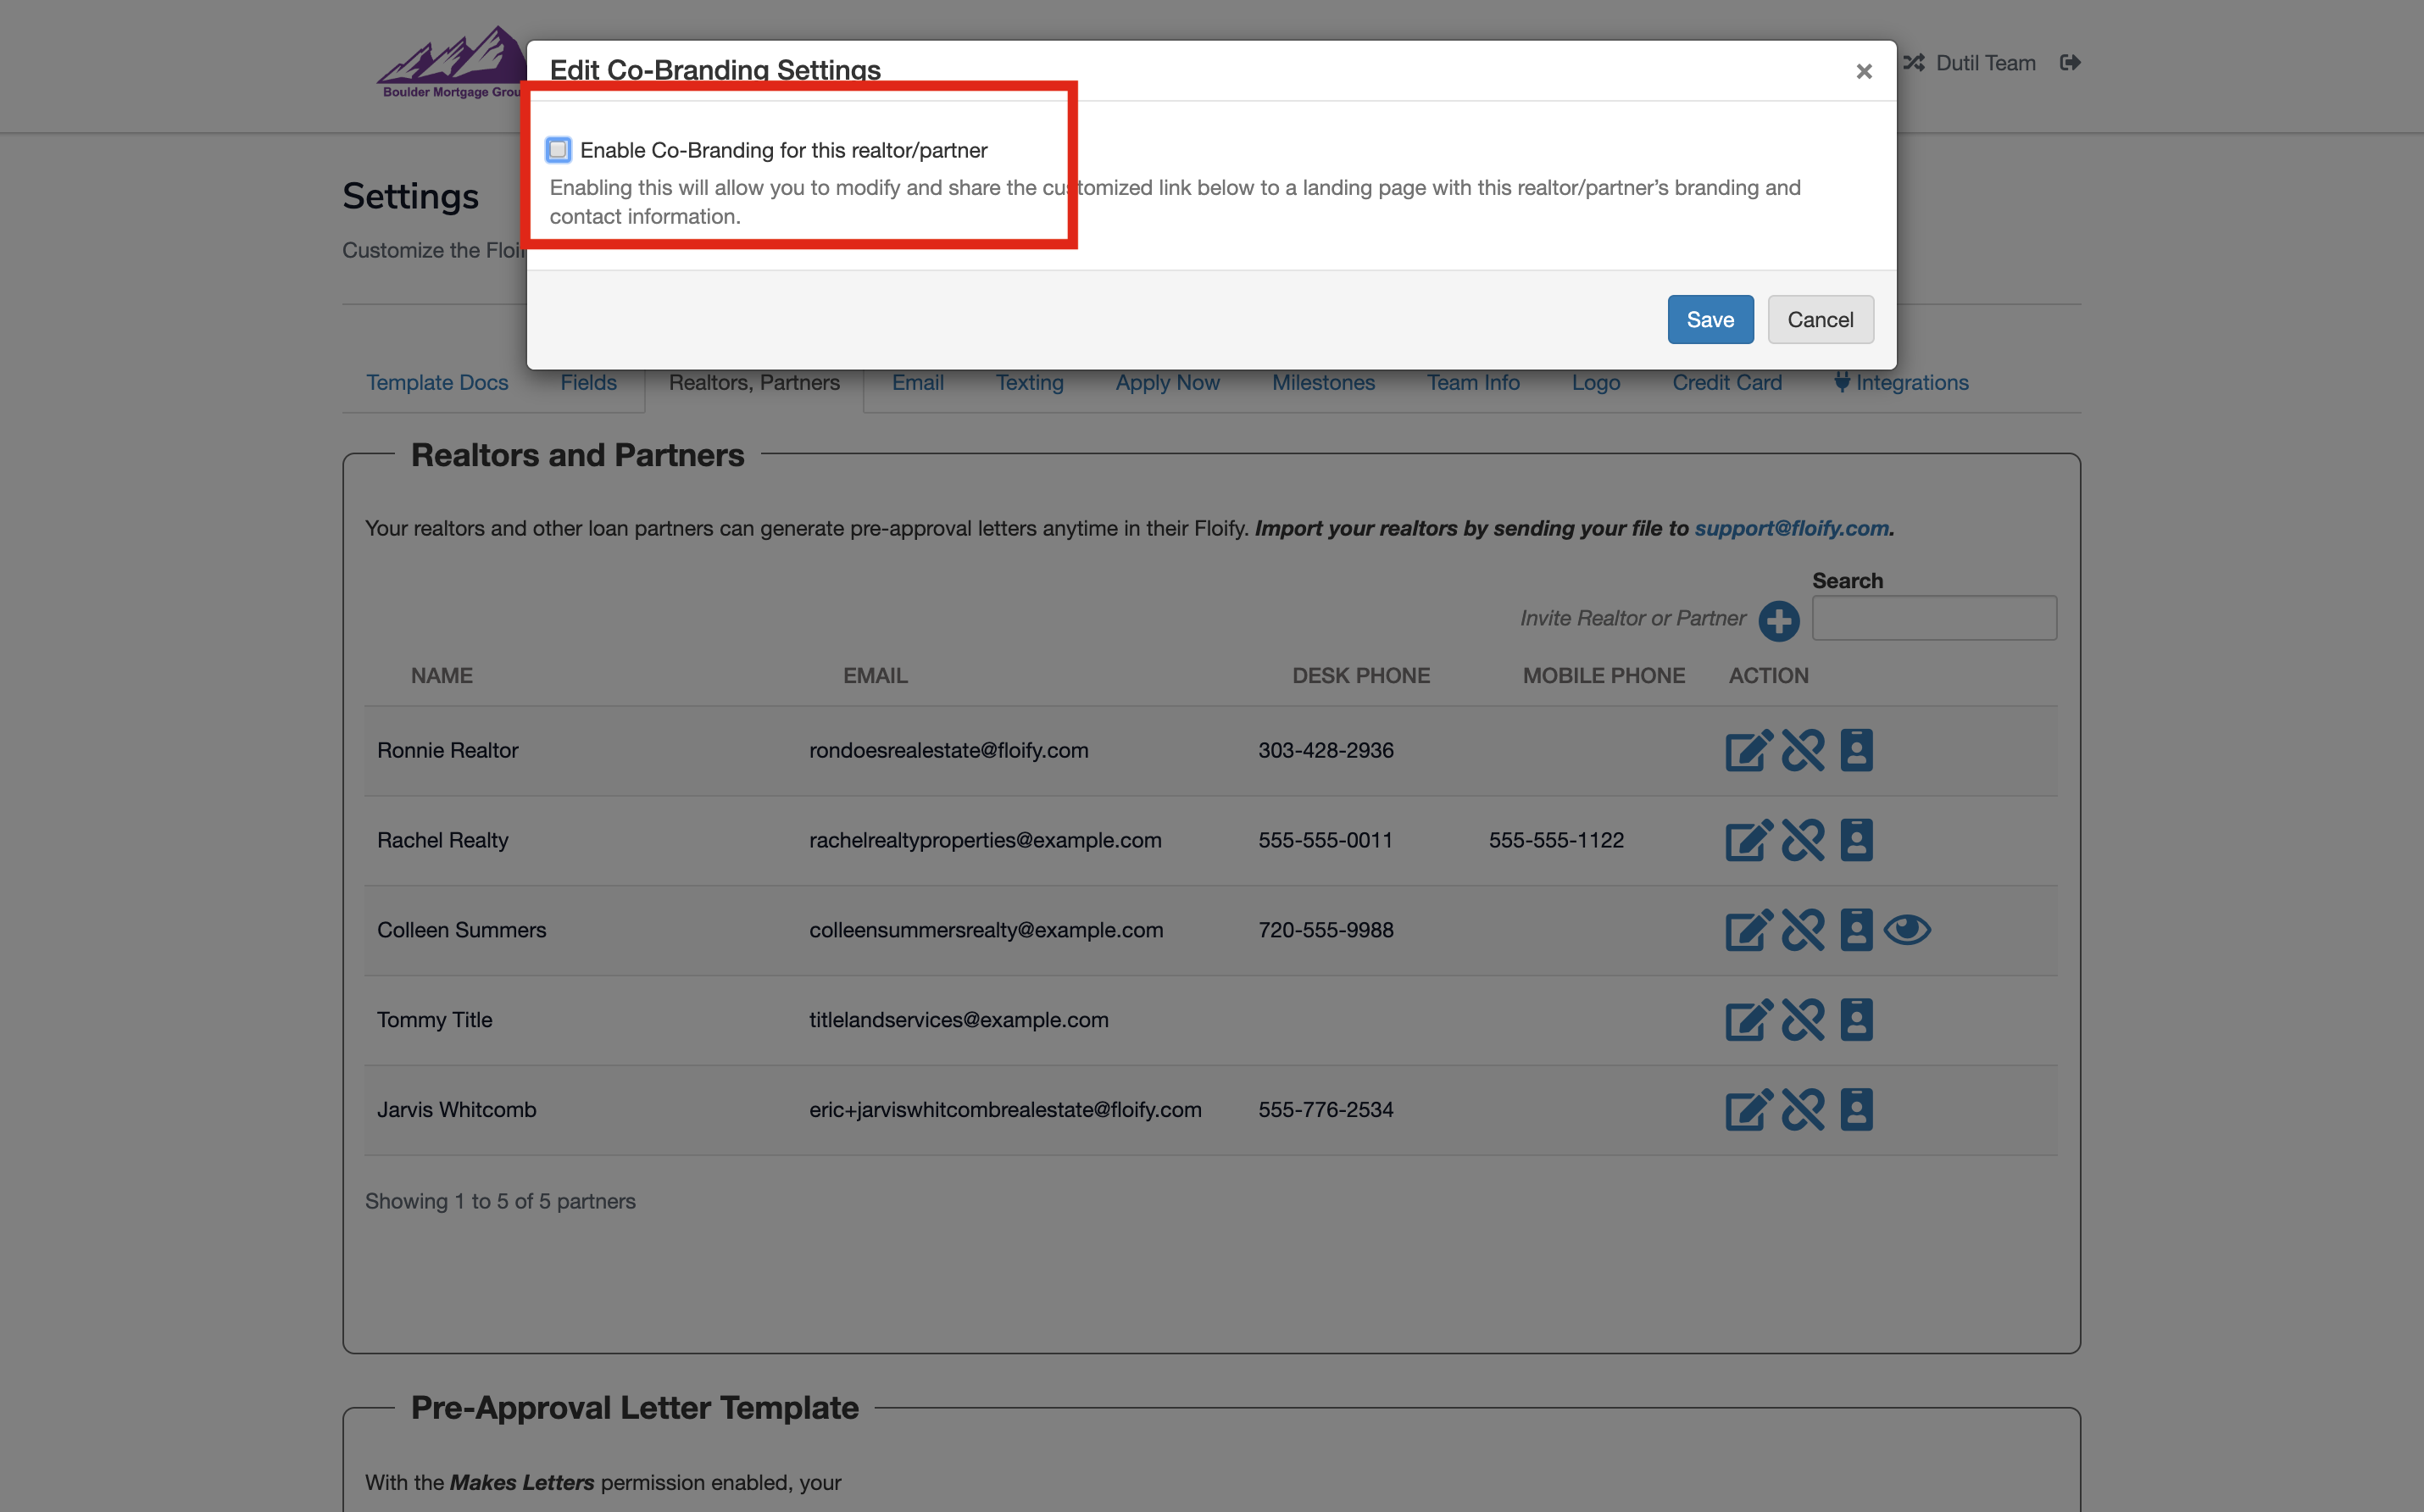
Click the icon and a modal will appear. Check the box to Enable Co-Branding for this realtor/partner:
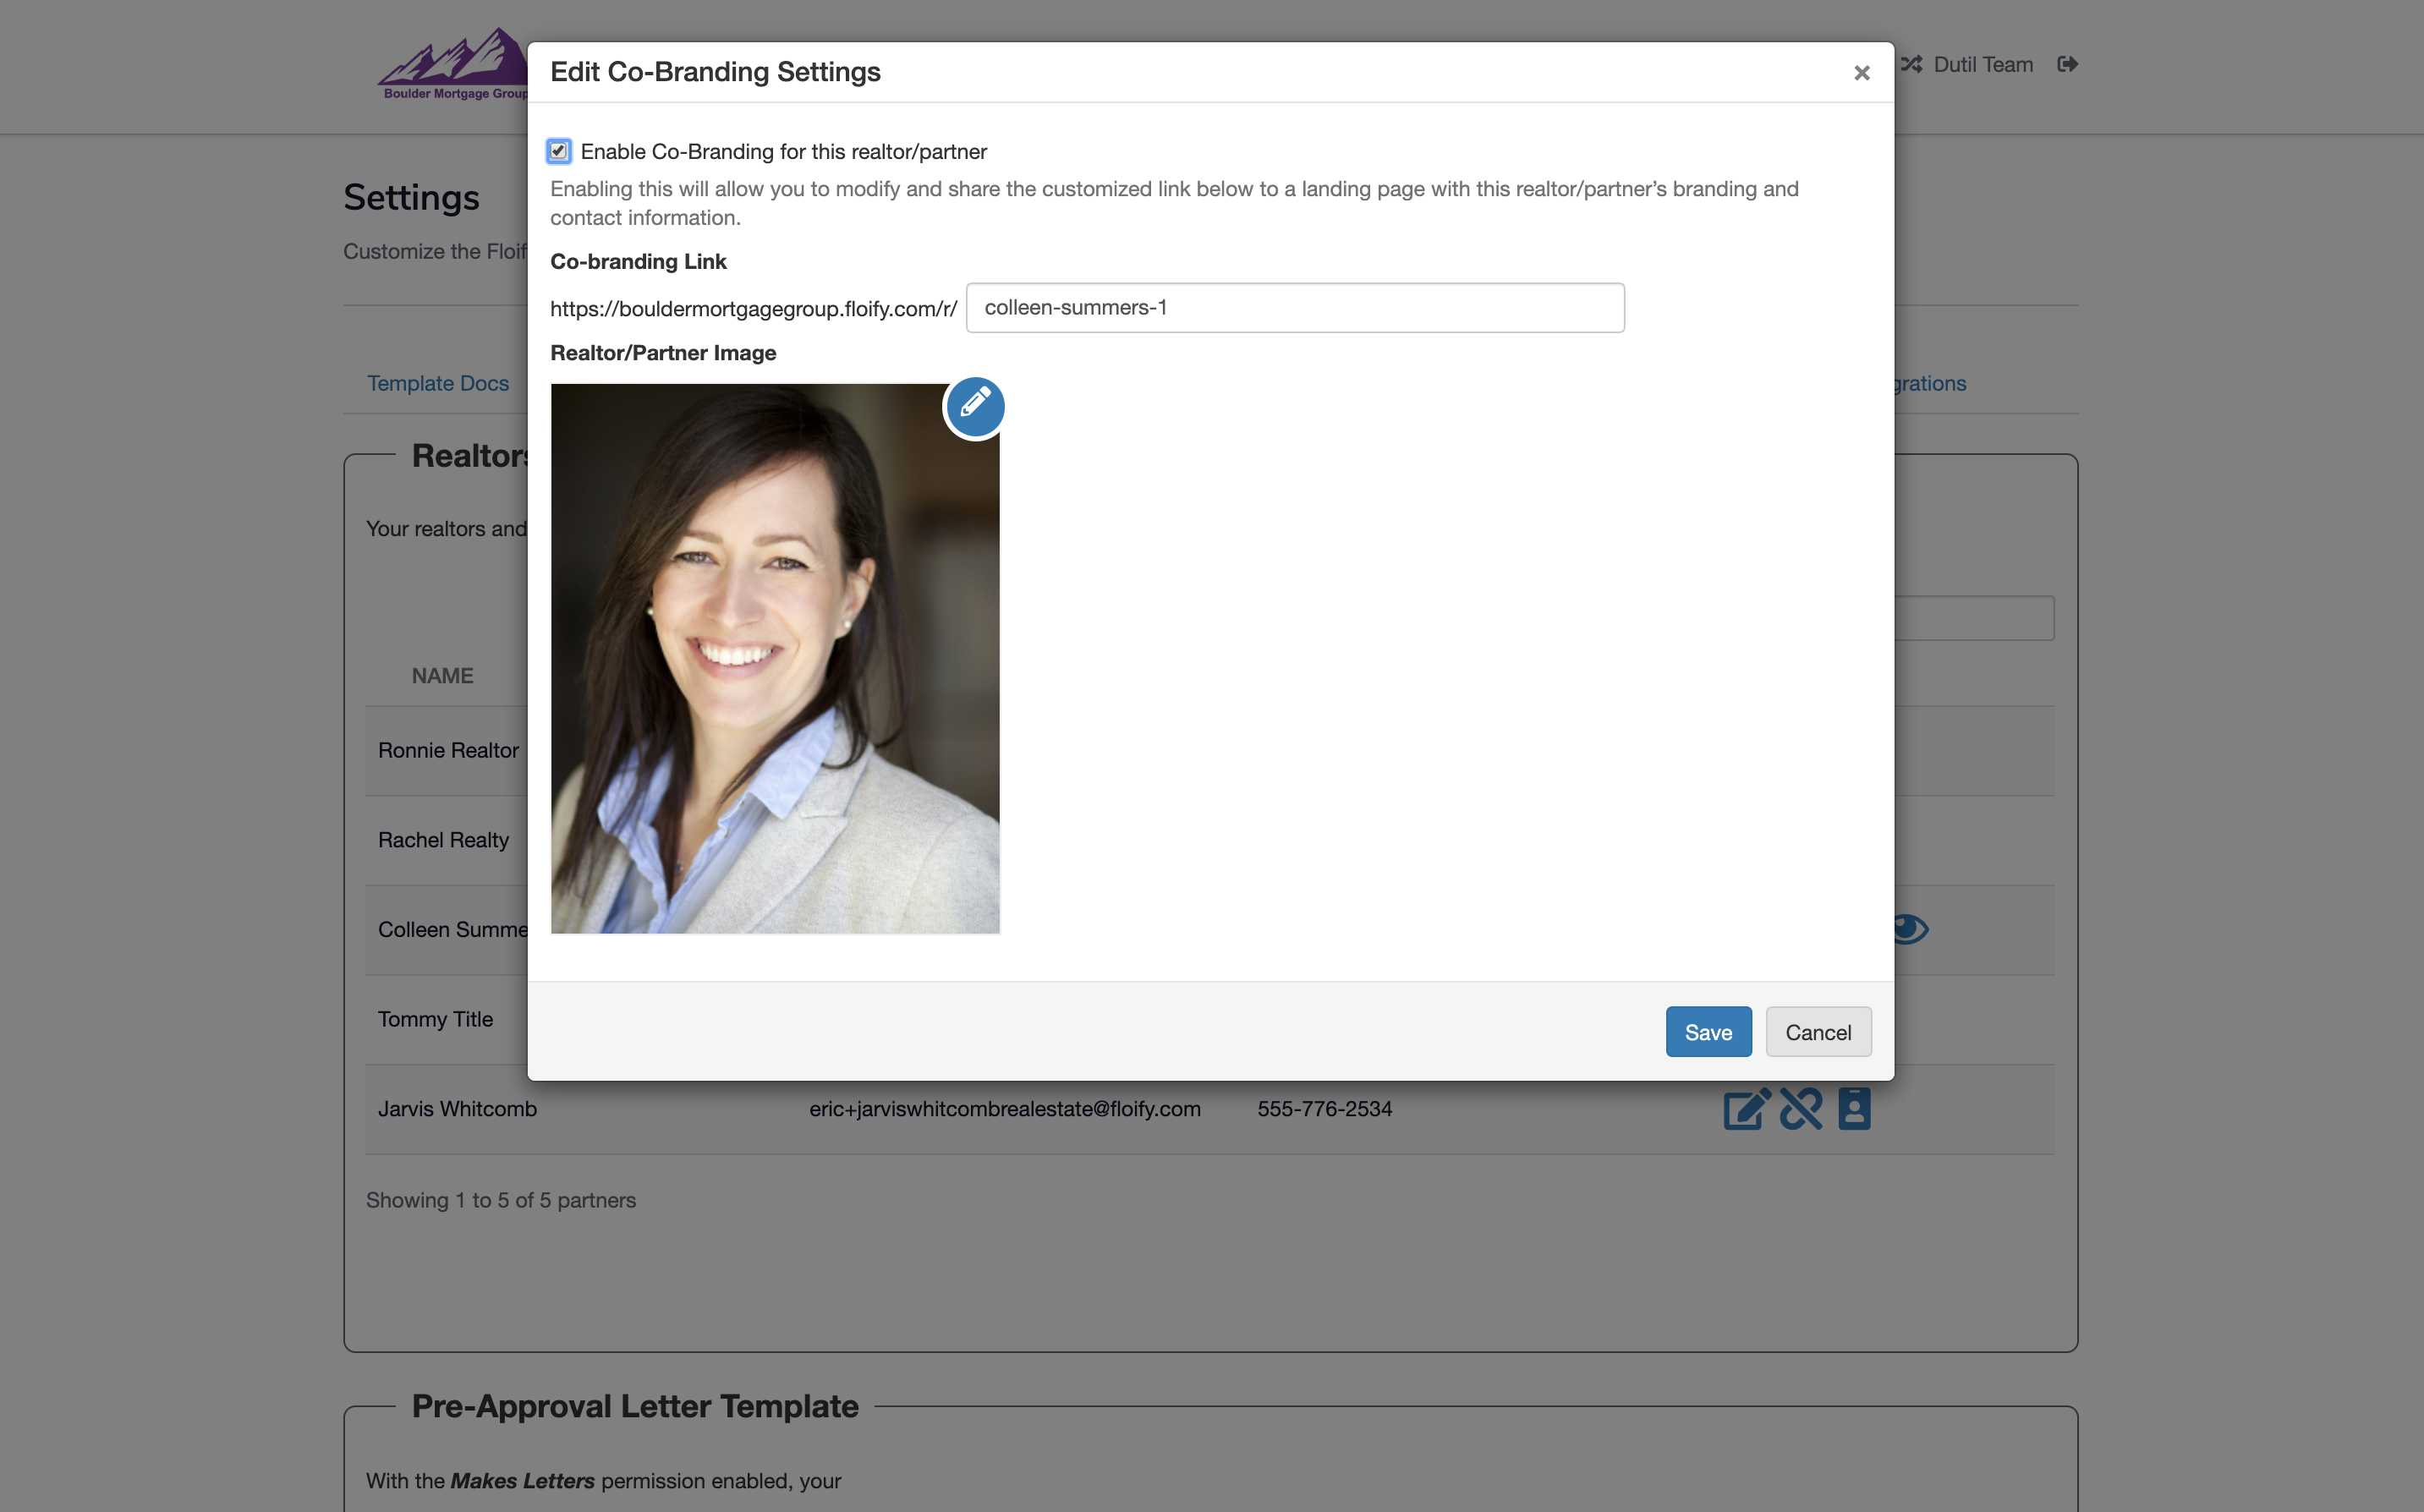
Additional information can be entered for the partner, including their photo and an option to customize the shareable URL:
Save the settings. A new preview icon for the partner will appear (this icon will display for any partner that has co-branding enabled):
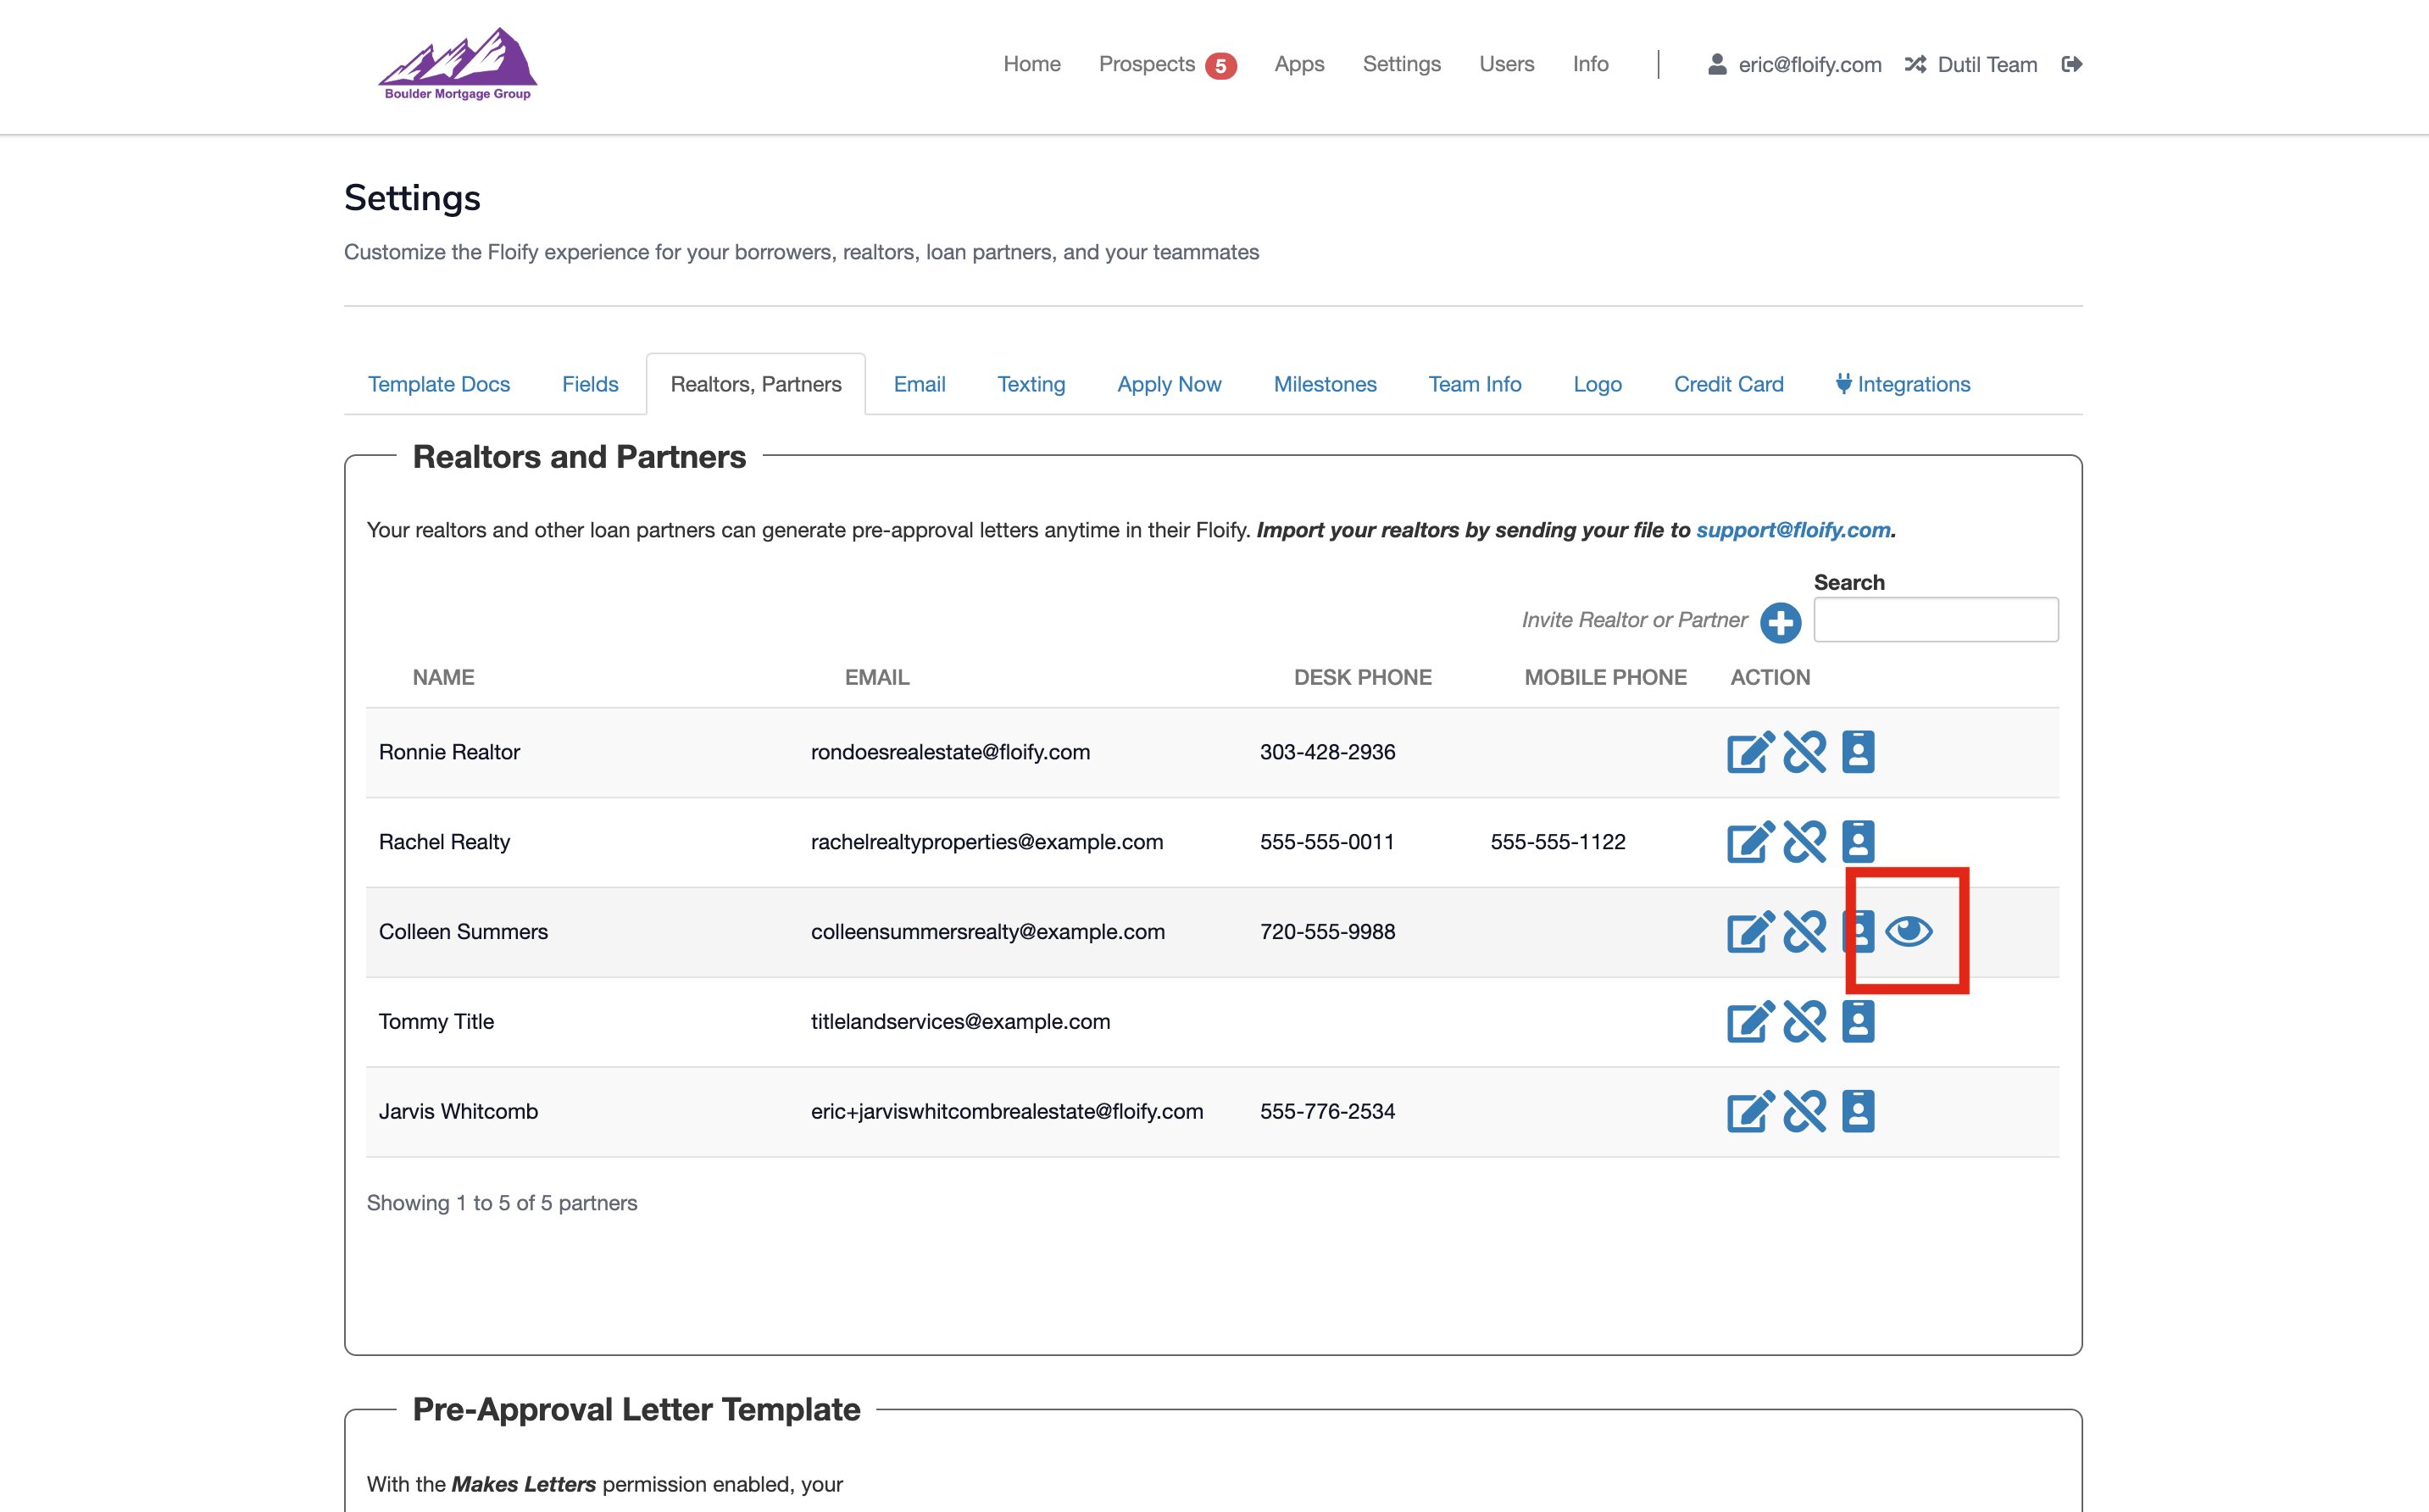
Click the icon to view the co-branded page:
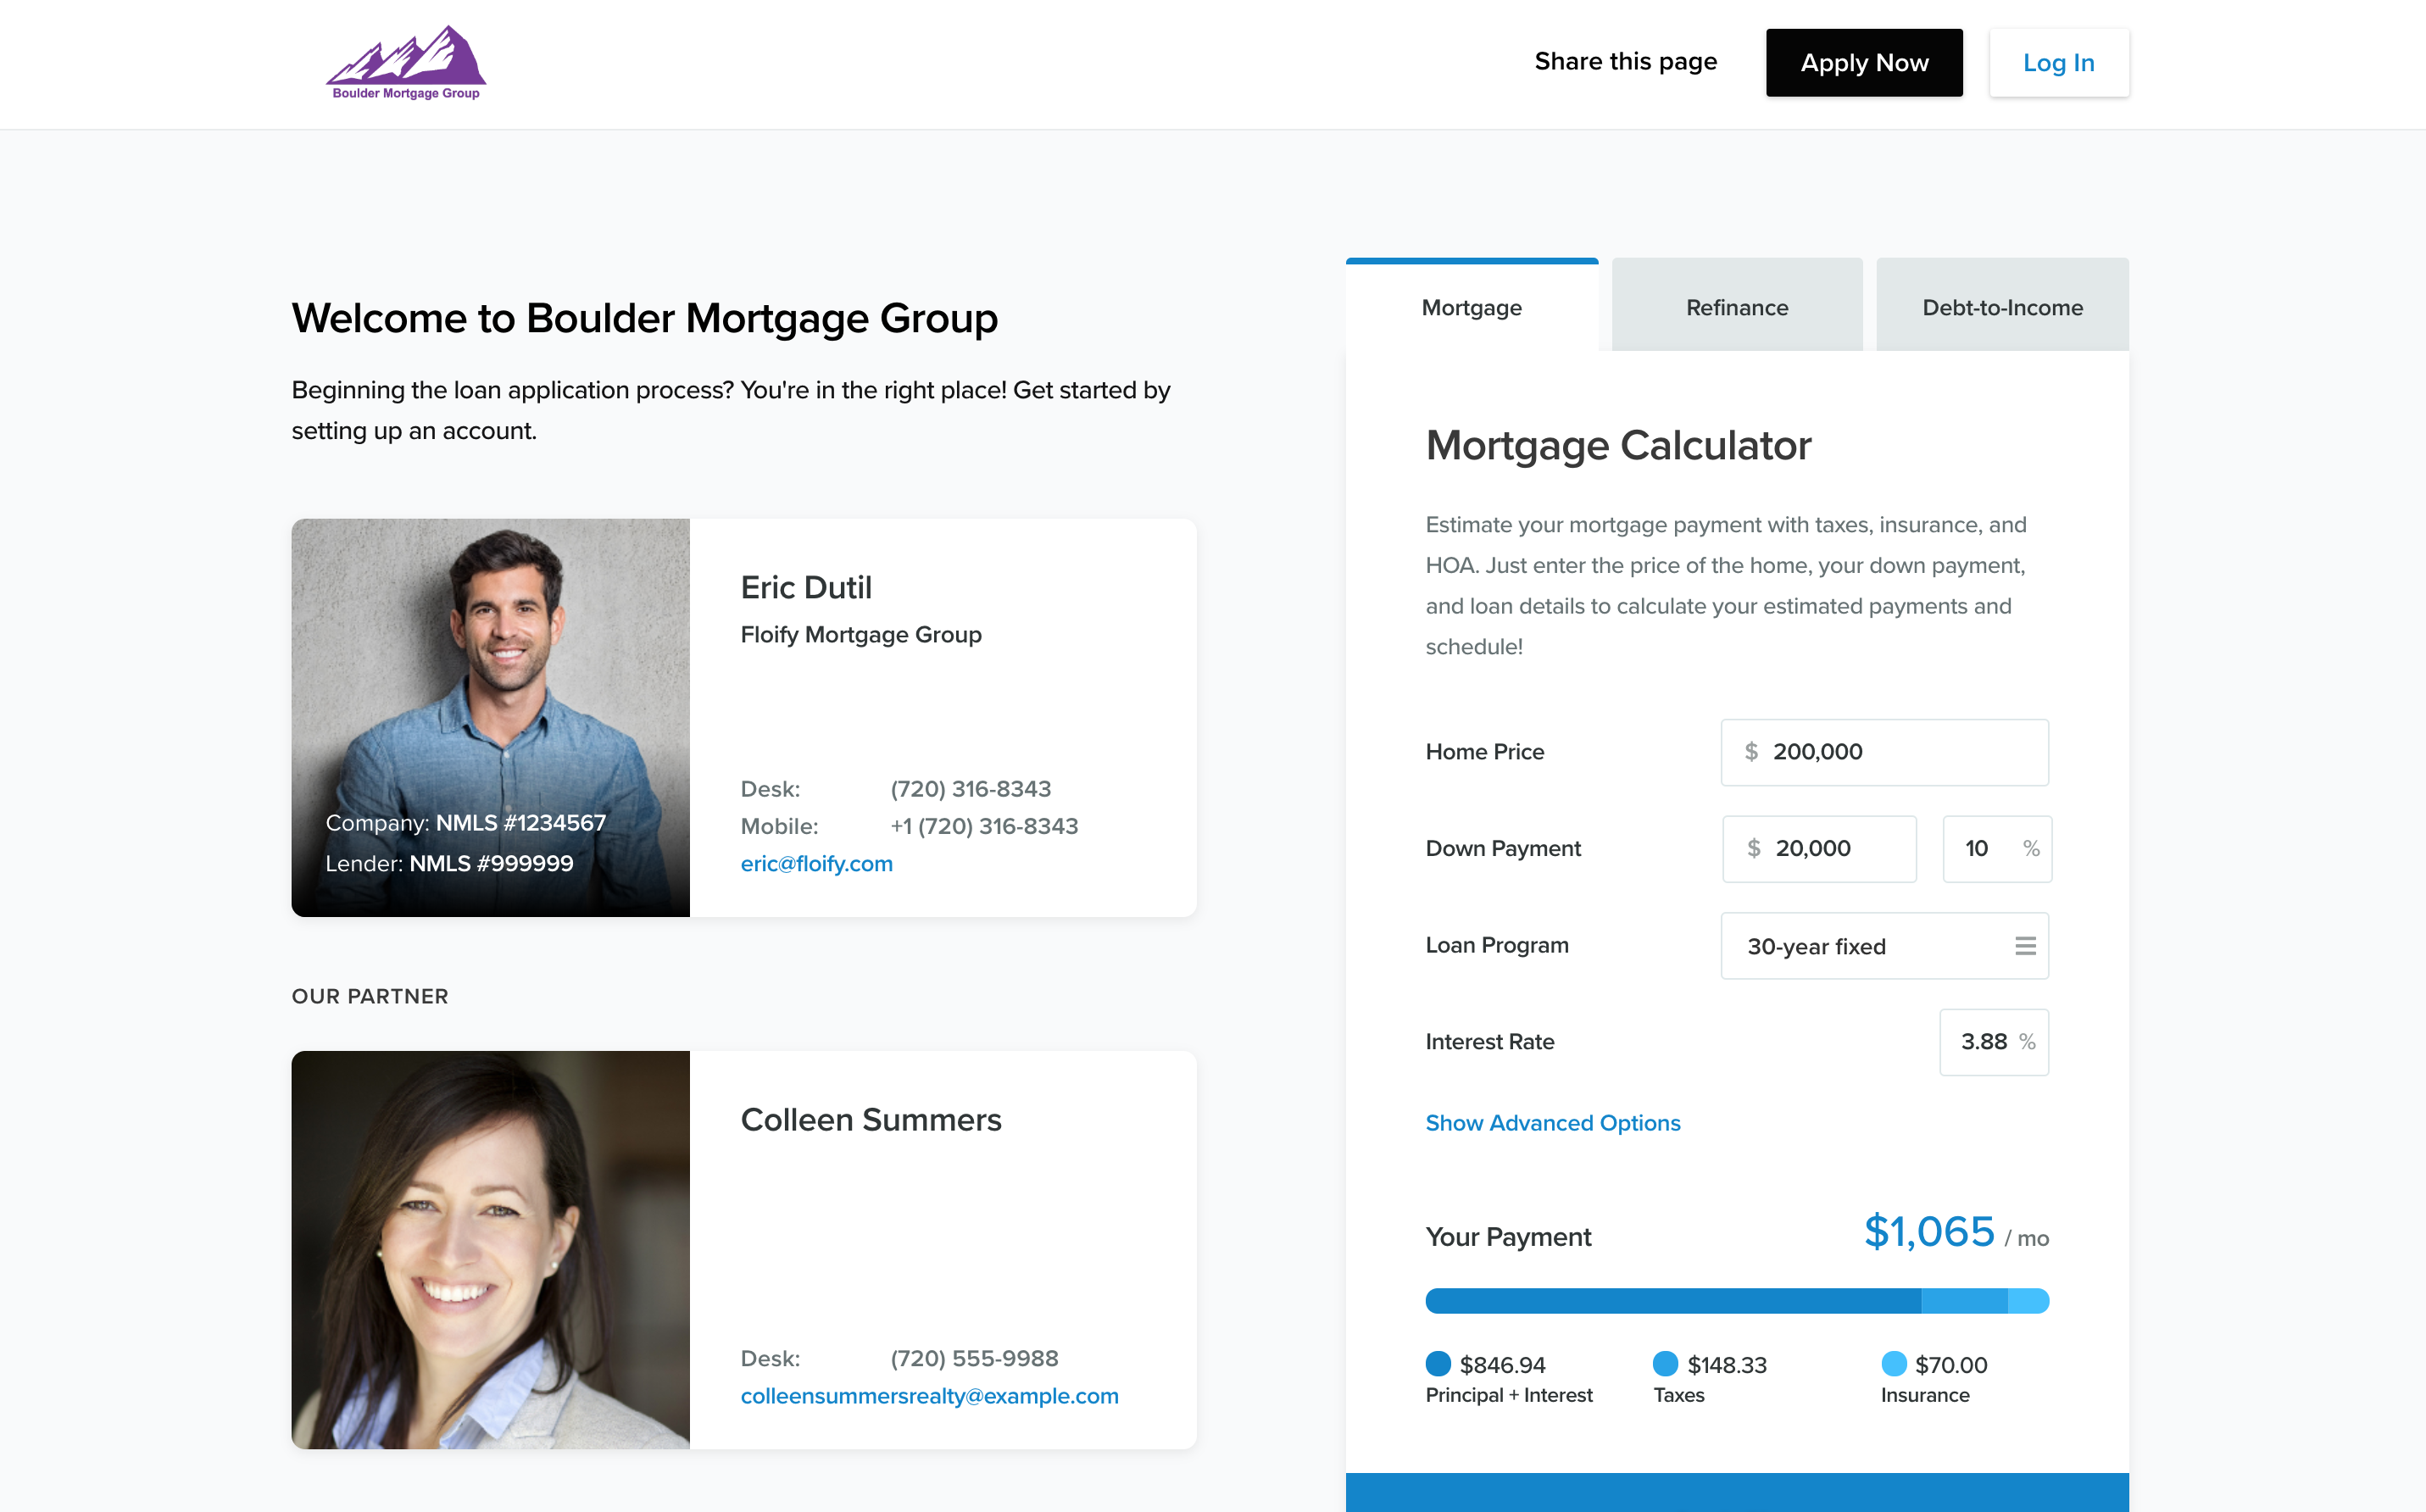
Please sign in to leave a comment.