Overview
Your landing page is set up in Floify for you to provide to your borrowers to review your information, start the application process, and log in to their existing portal.
There are several options you can configure to fit your specific needs at both the company level (which would apply for all teams and landing pages within the company) as well as at the team level (for just your landing page).
Please note that only company admins can configure the company level settings.
How to Customize
Company Level Configuration
Update My Company NMLS ID
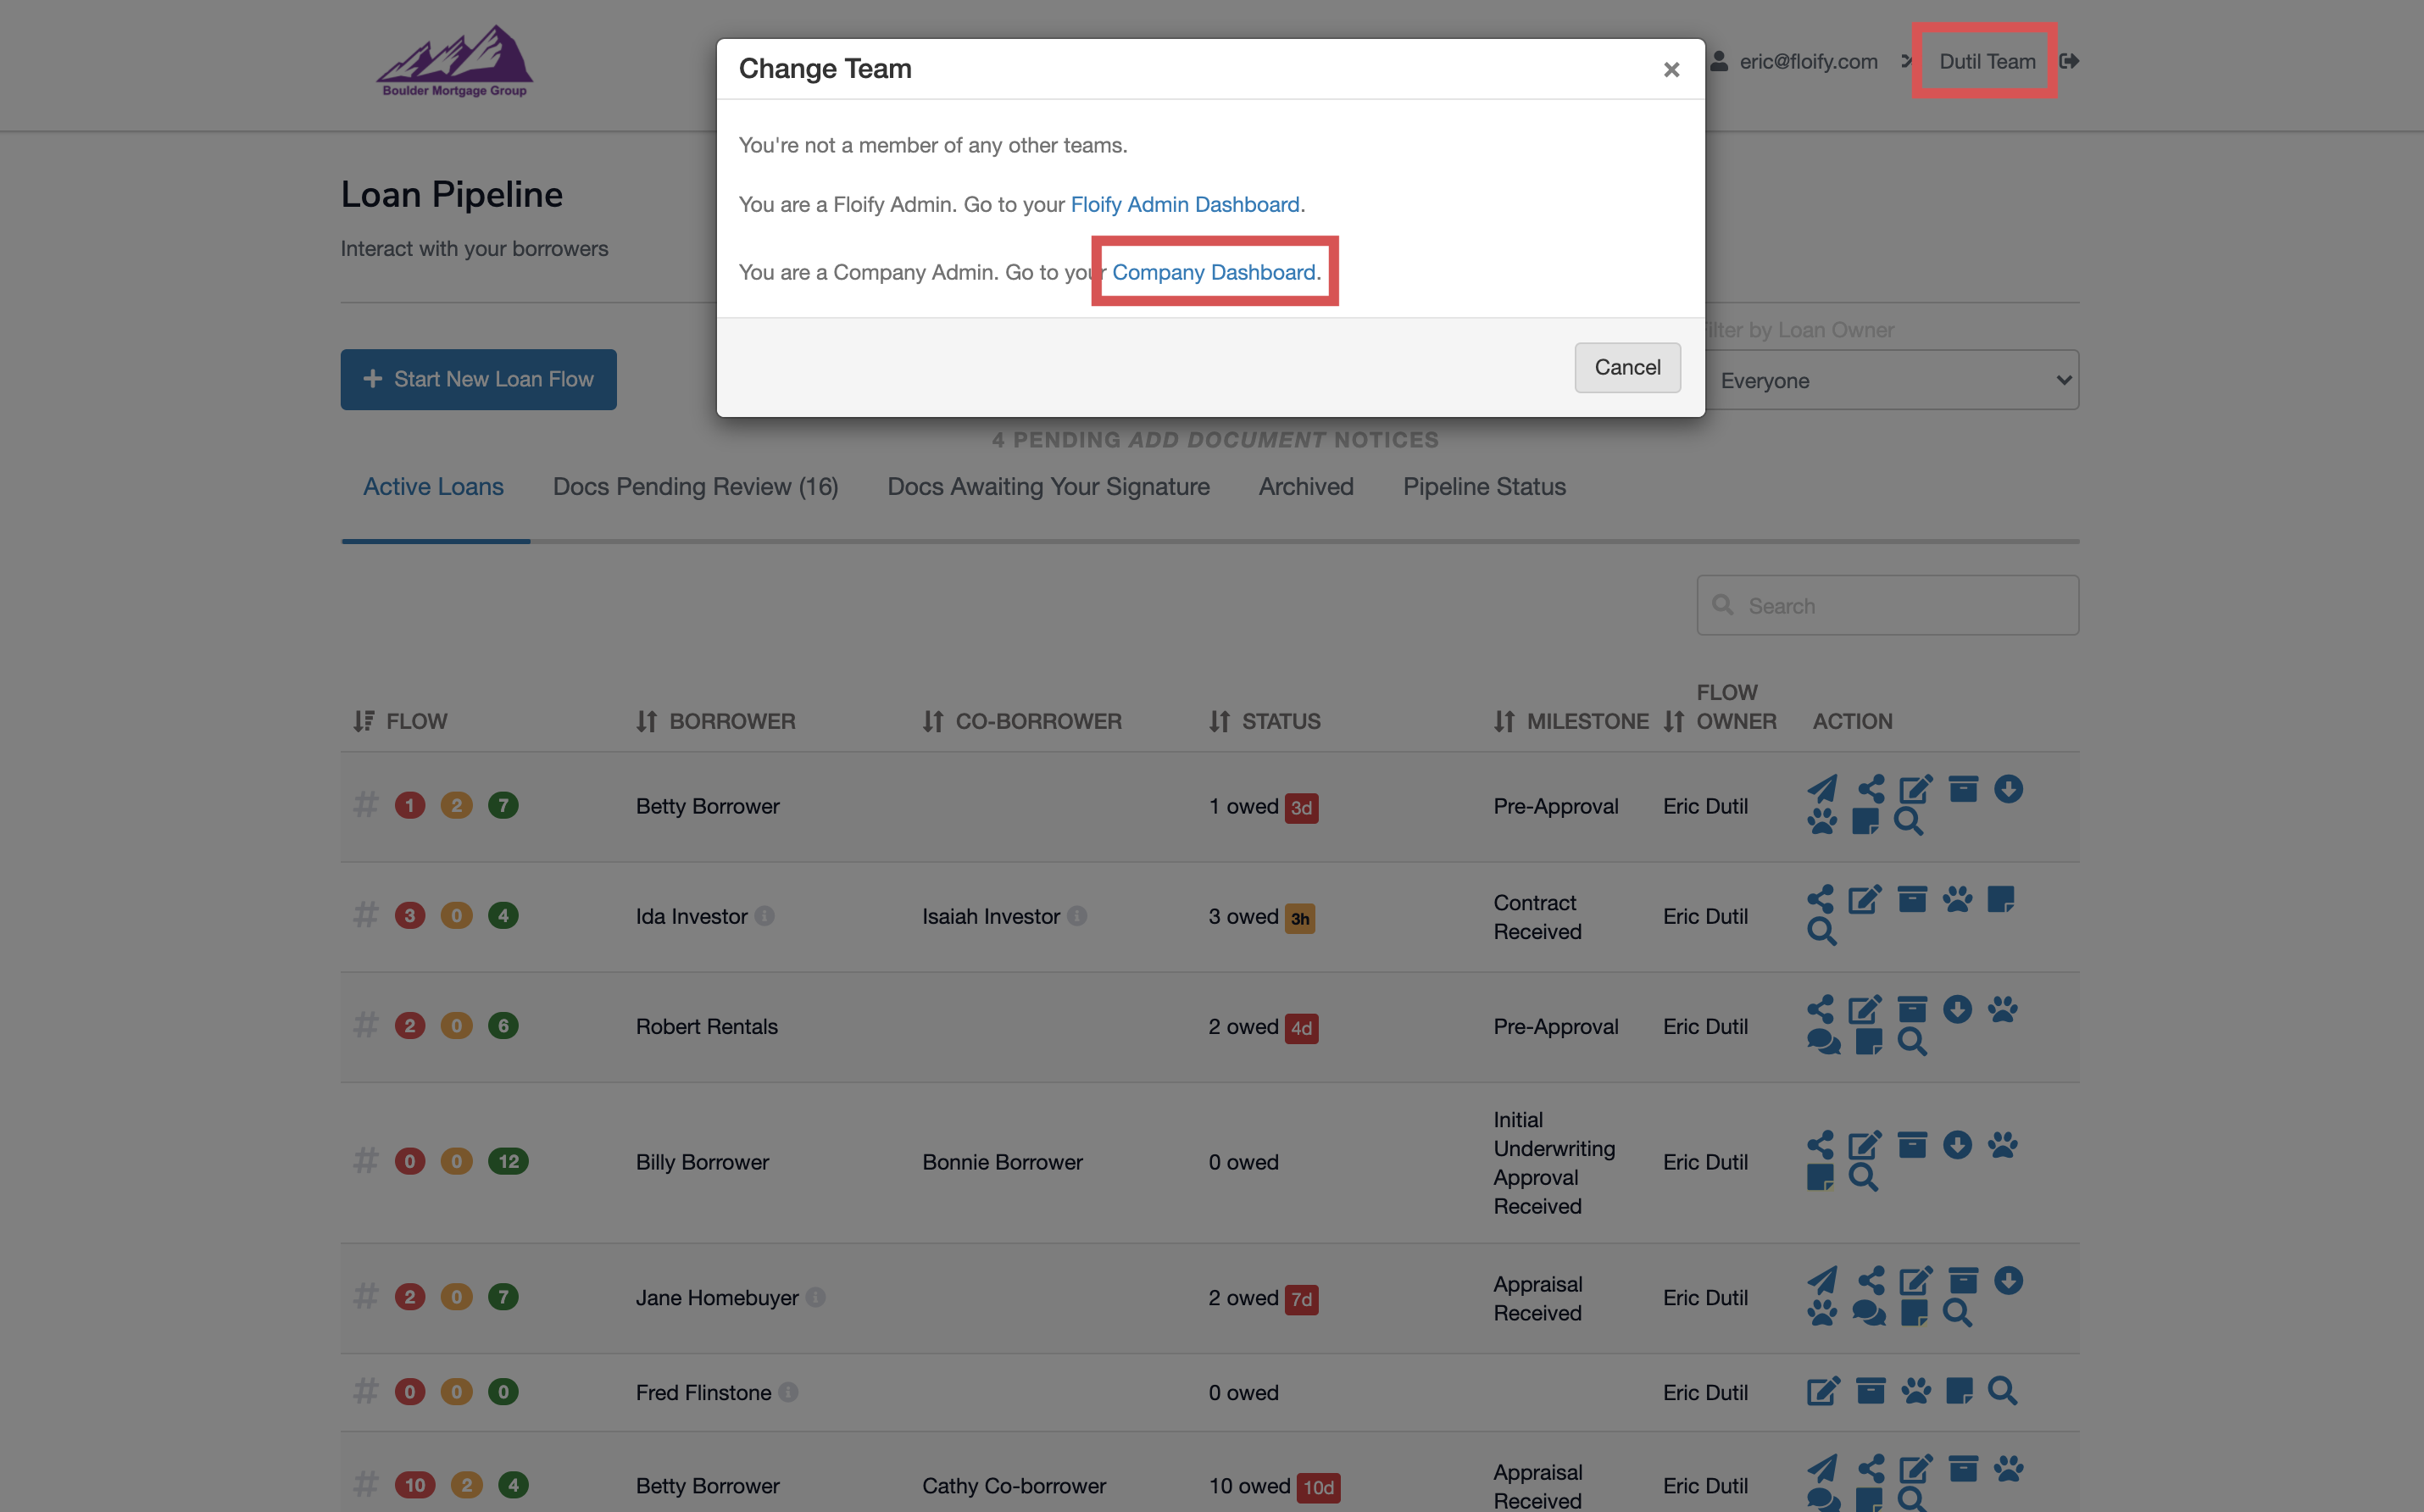
From the team pipeline, choose the team name in the upper right-hand corner and select the option to navigate to the Company Dashboard:
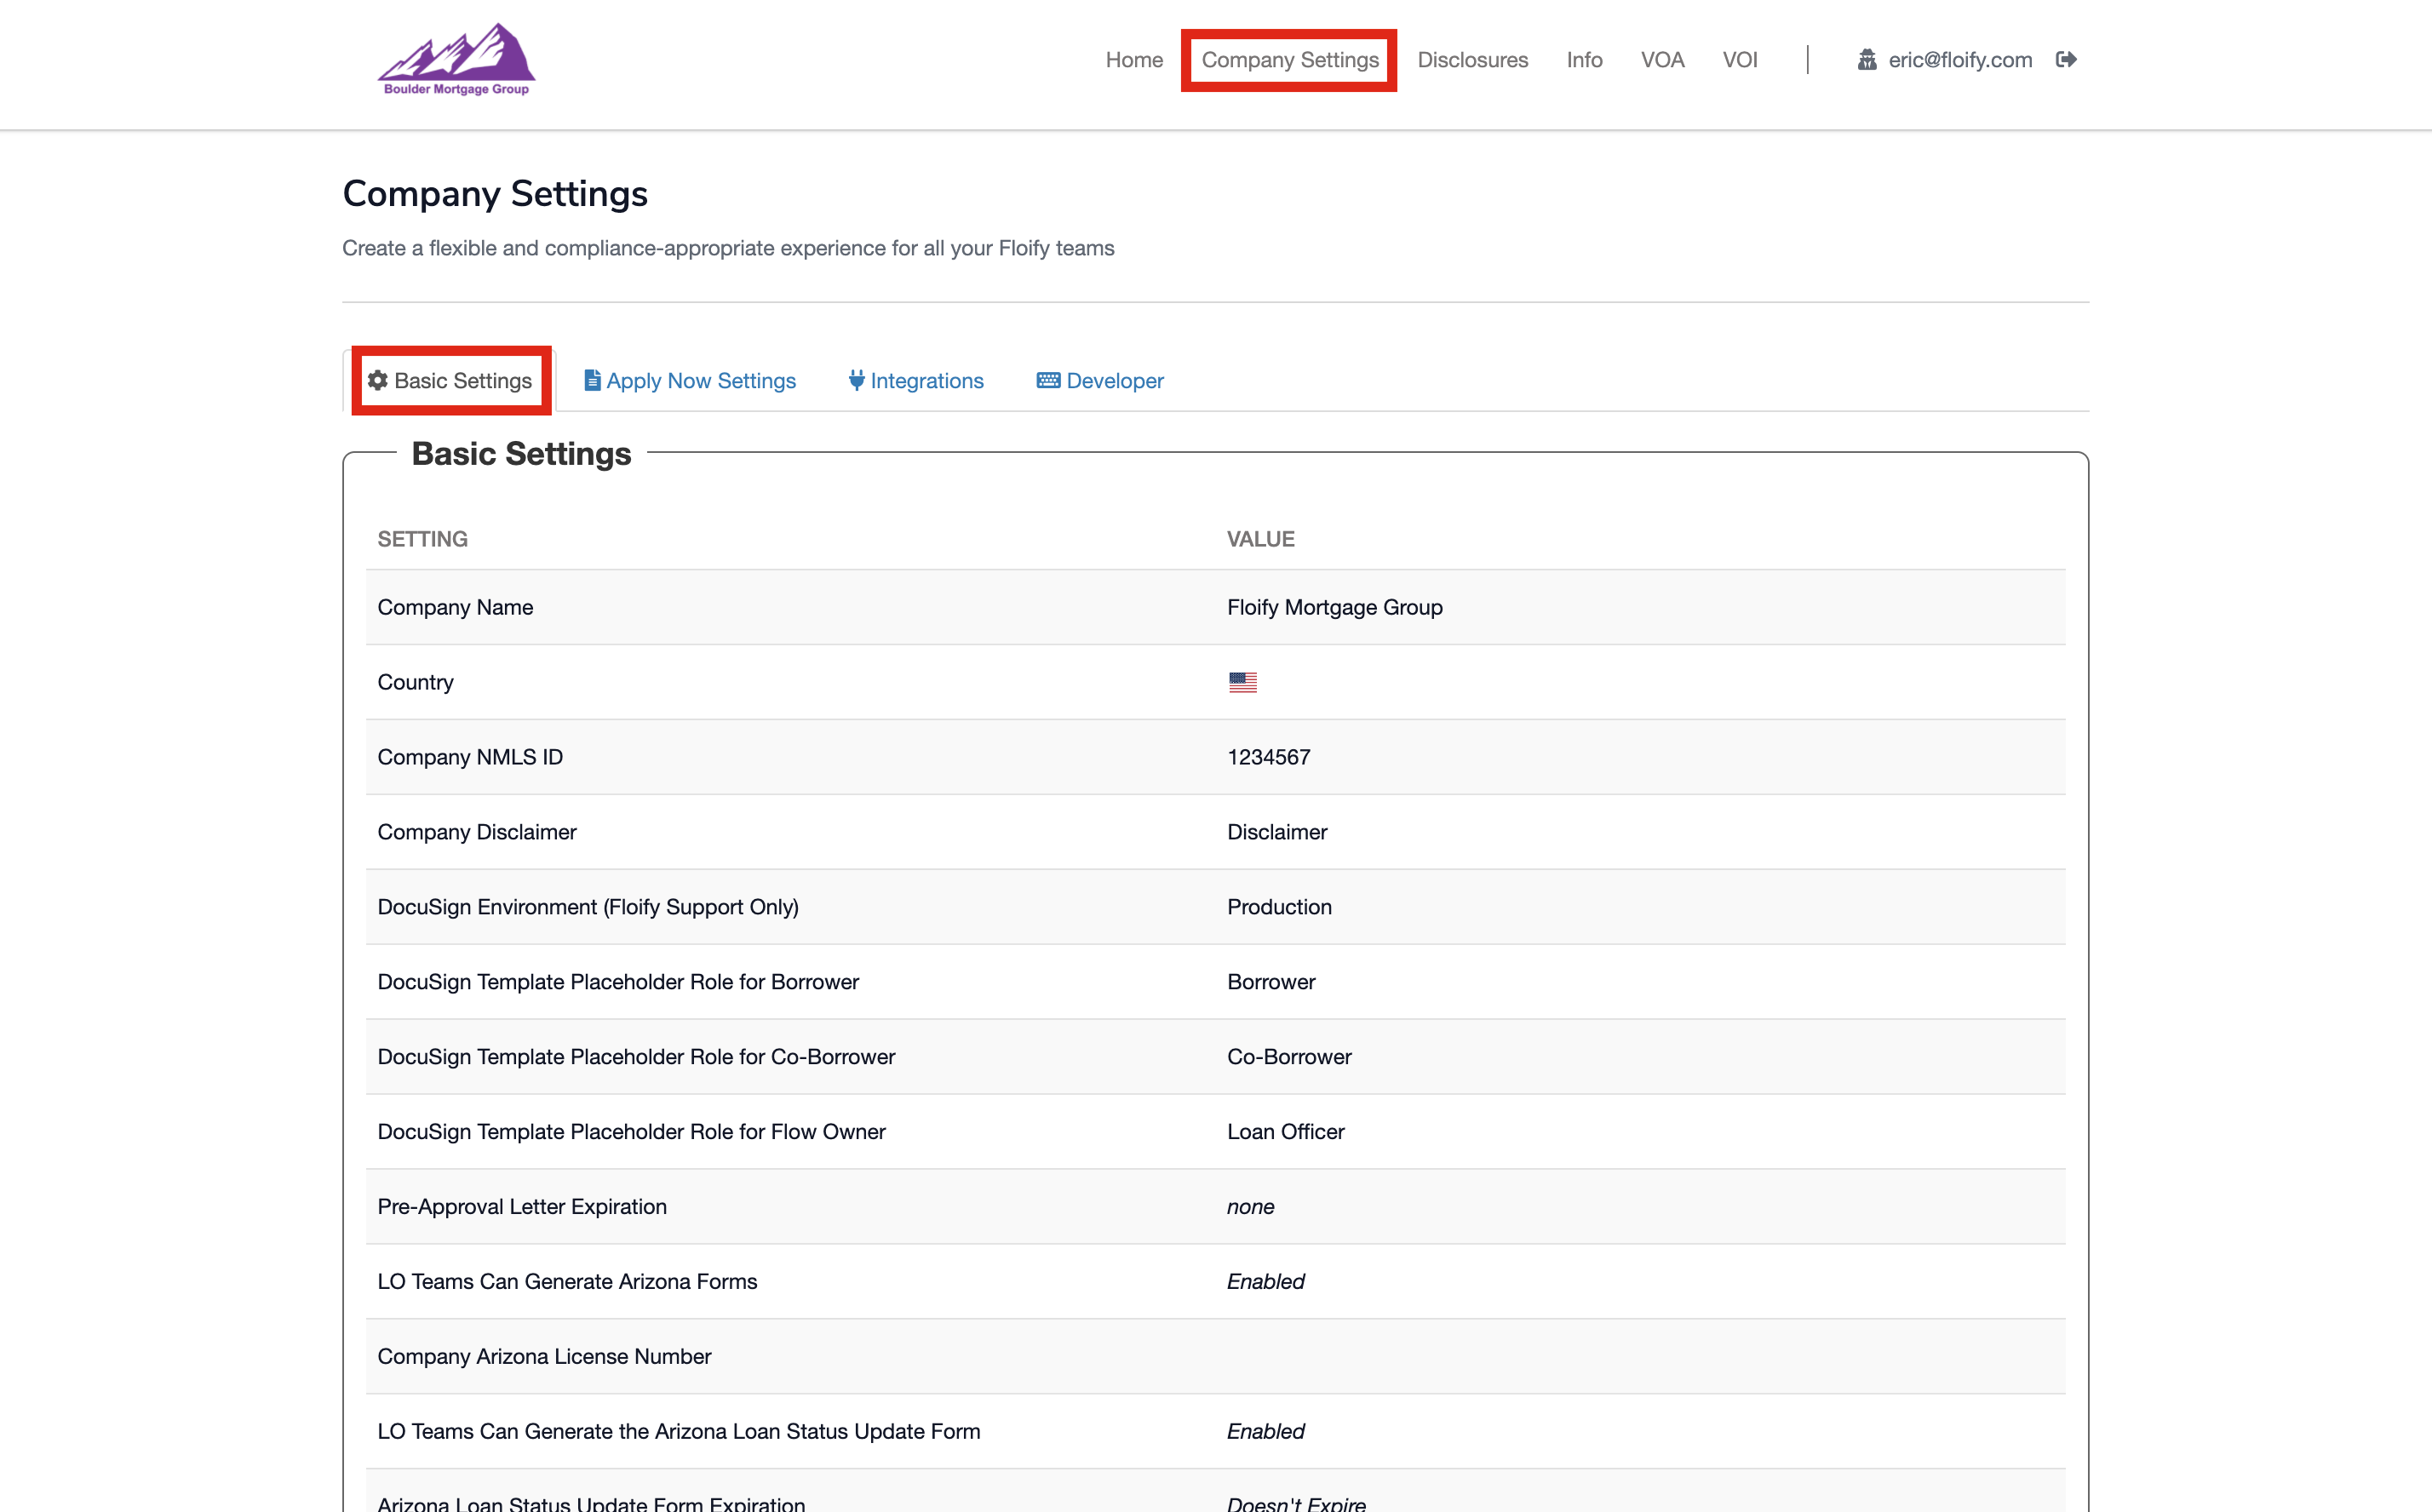
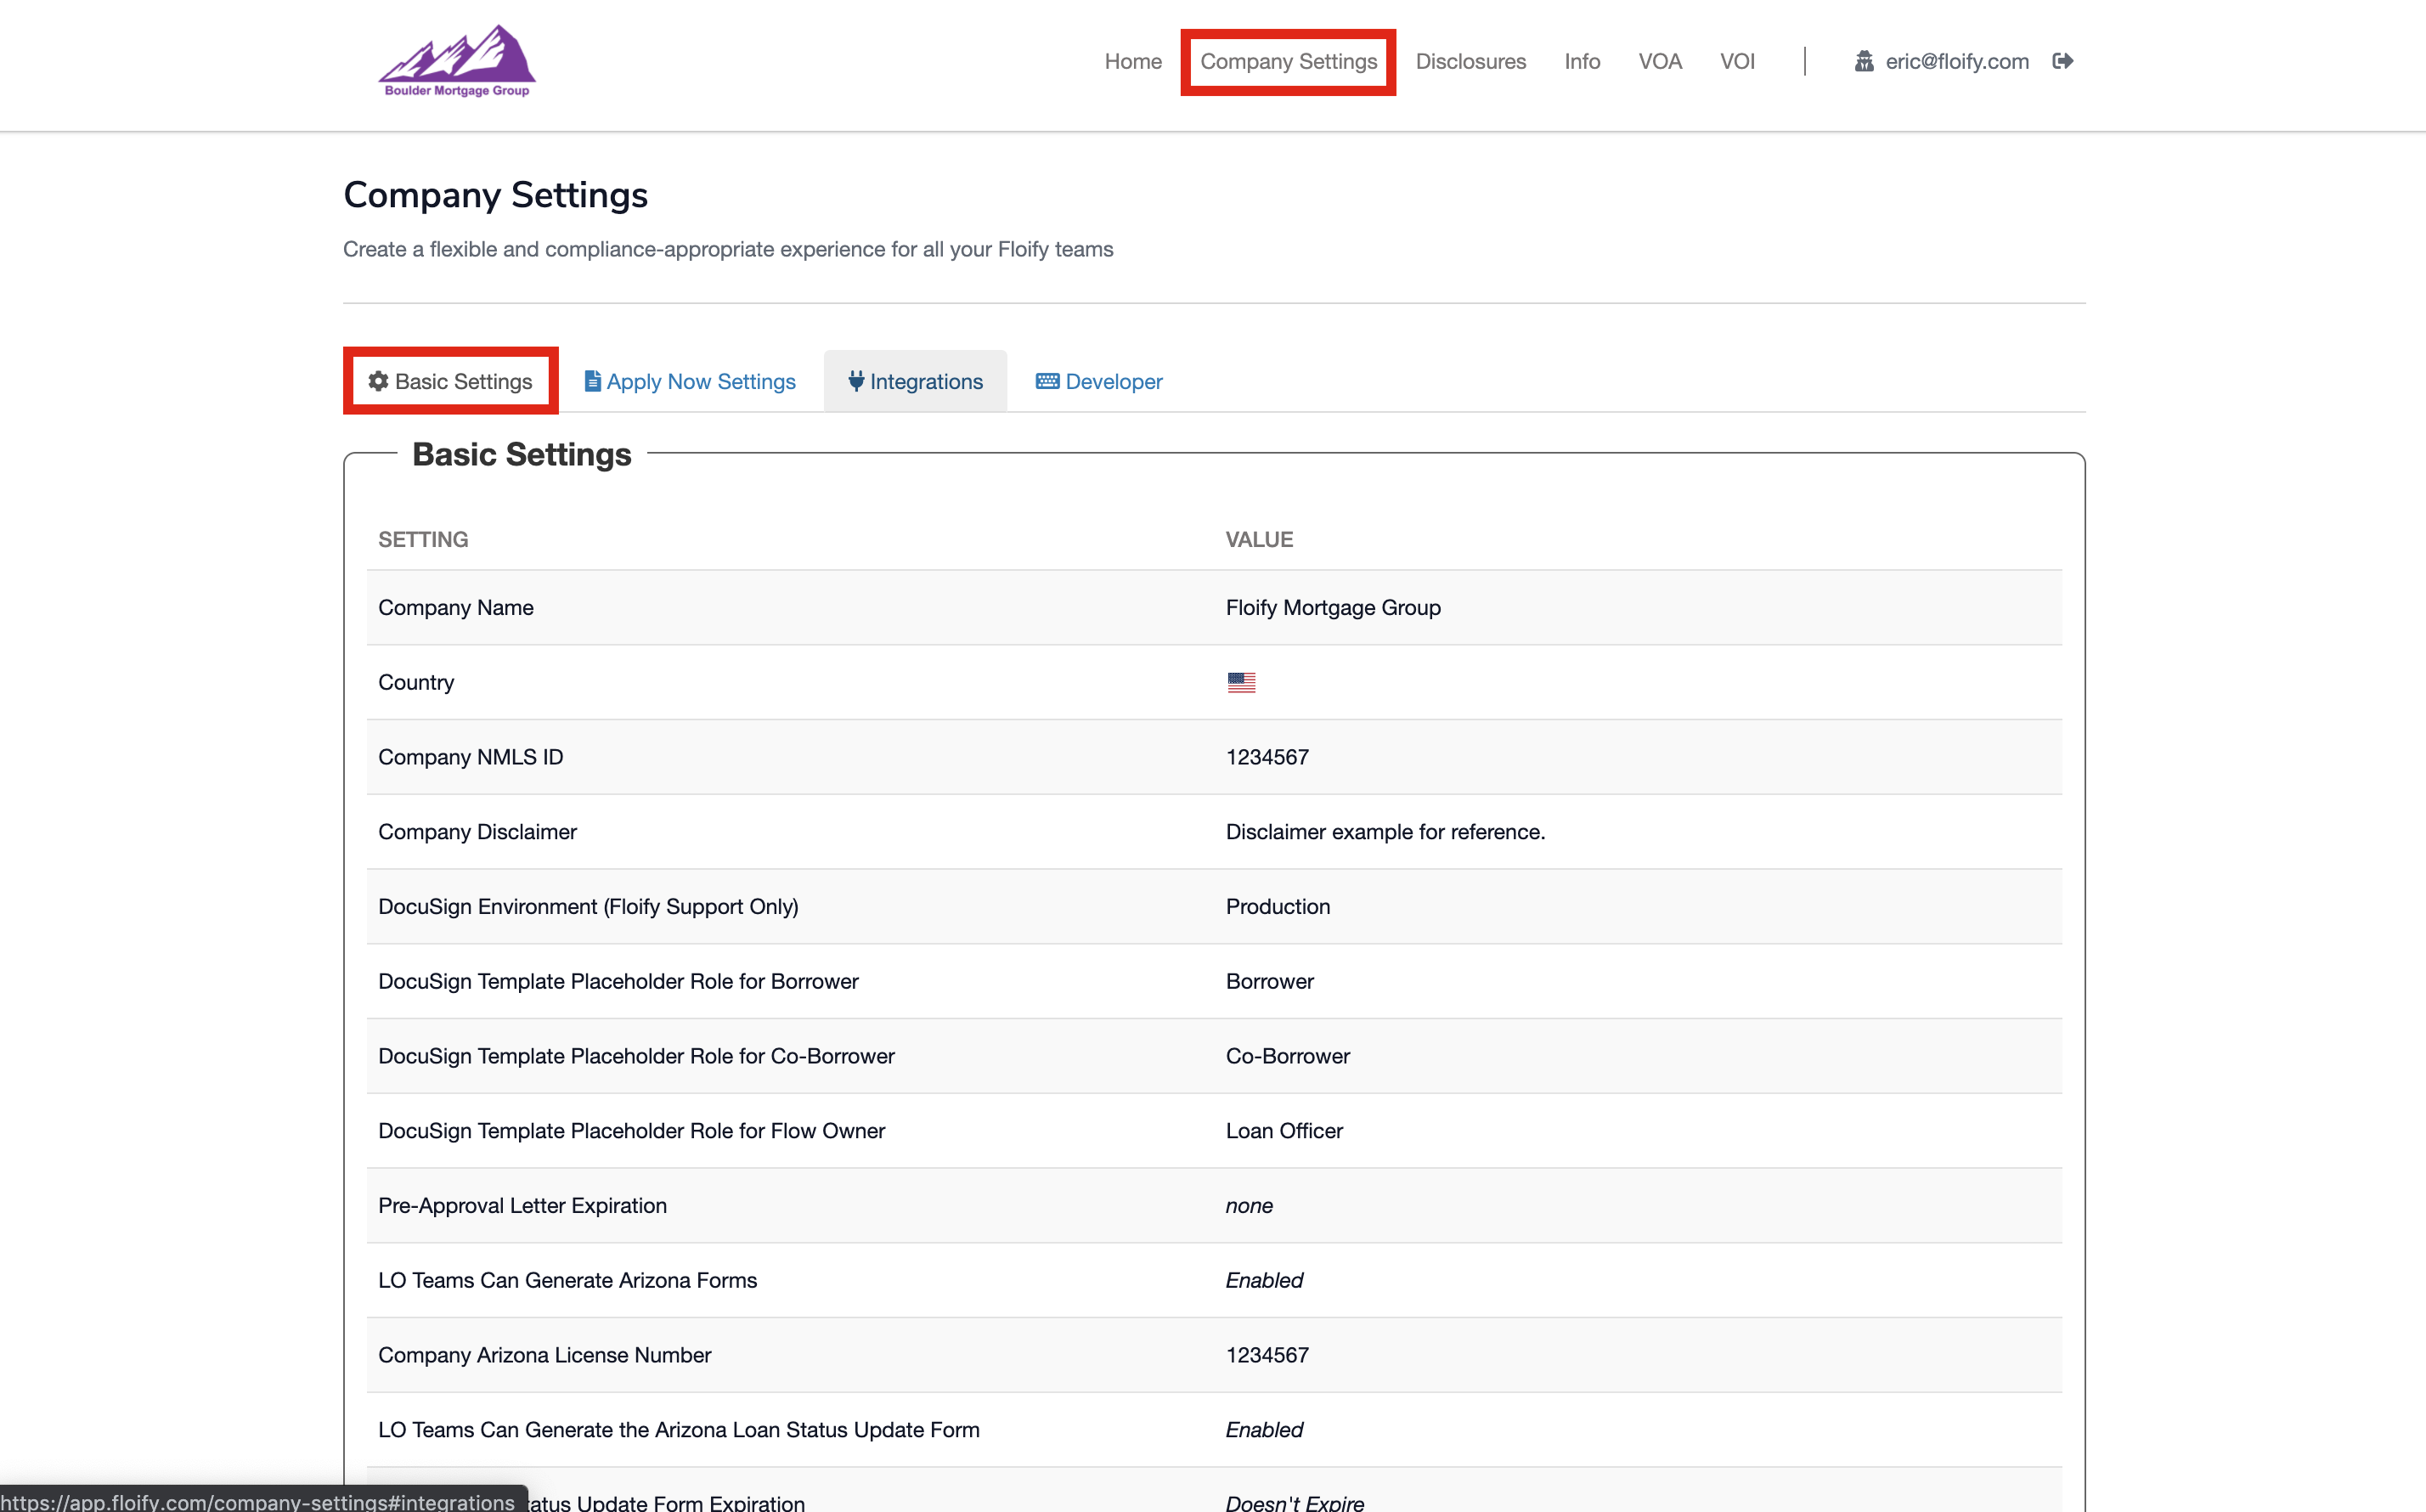
Navigate to Company Settings and then Basic Settings:
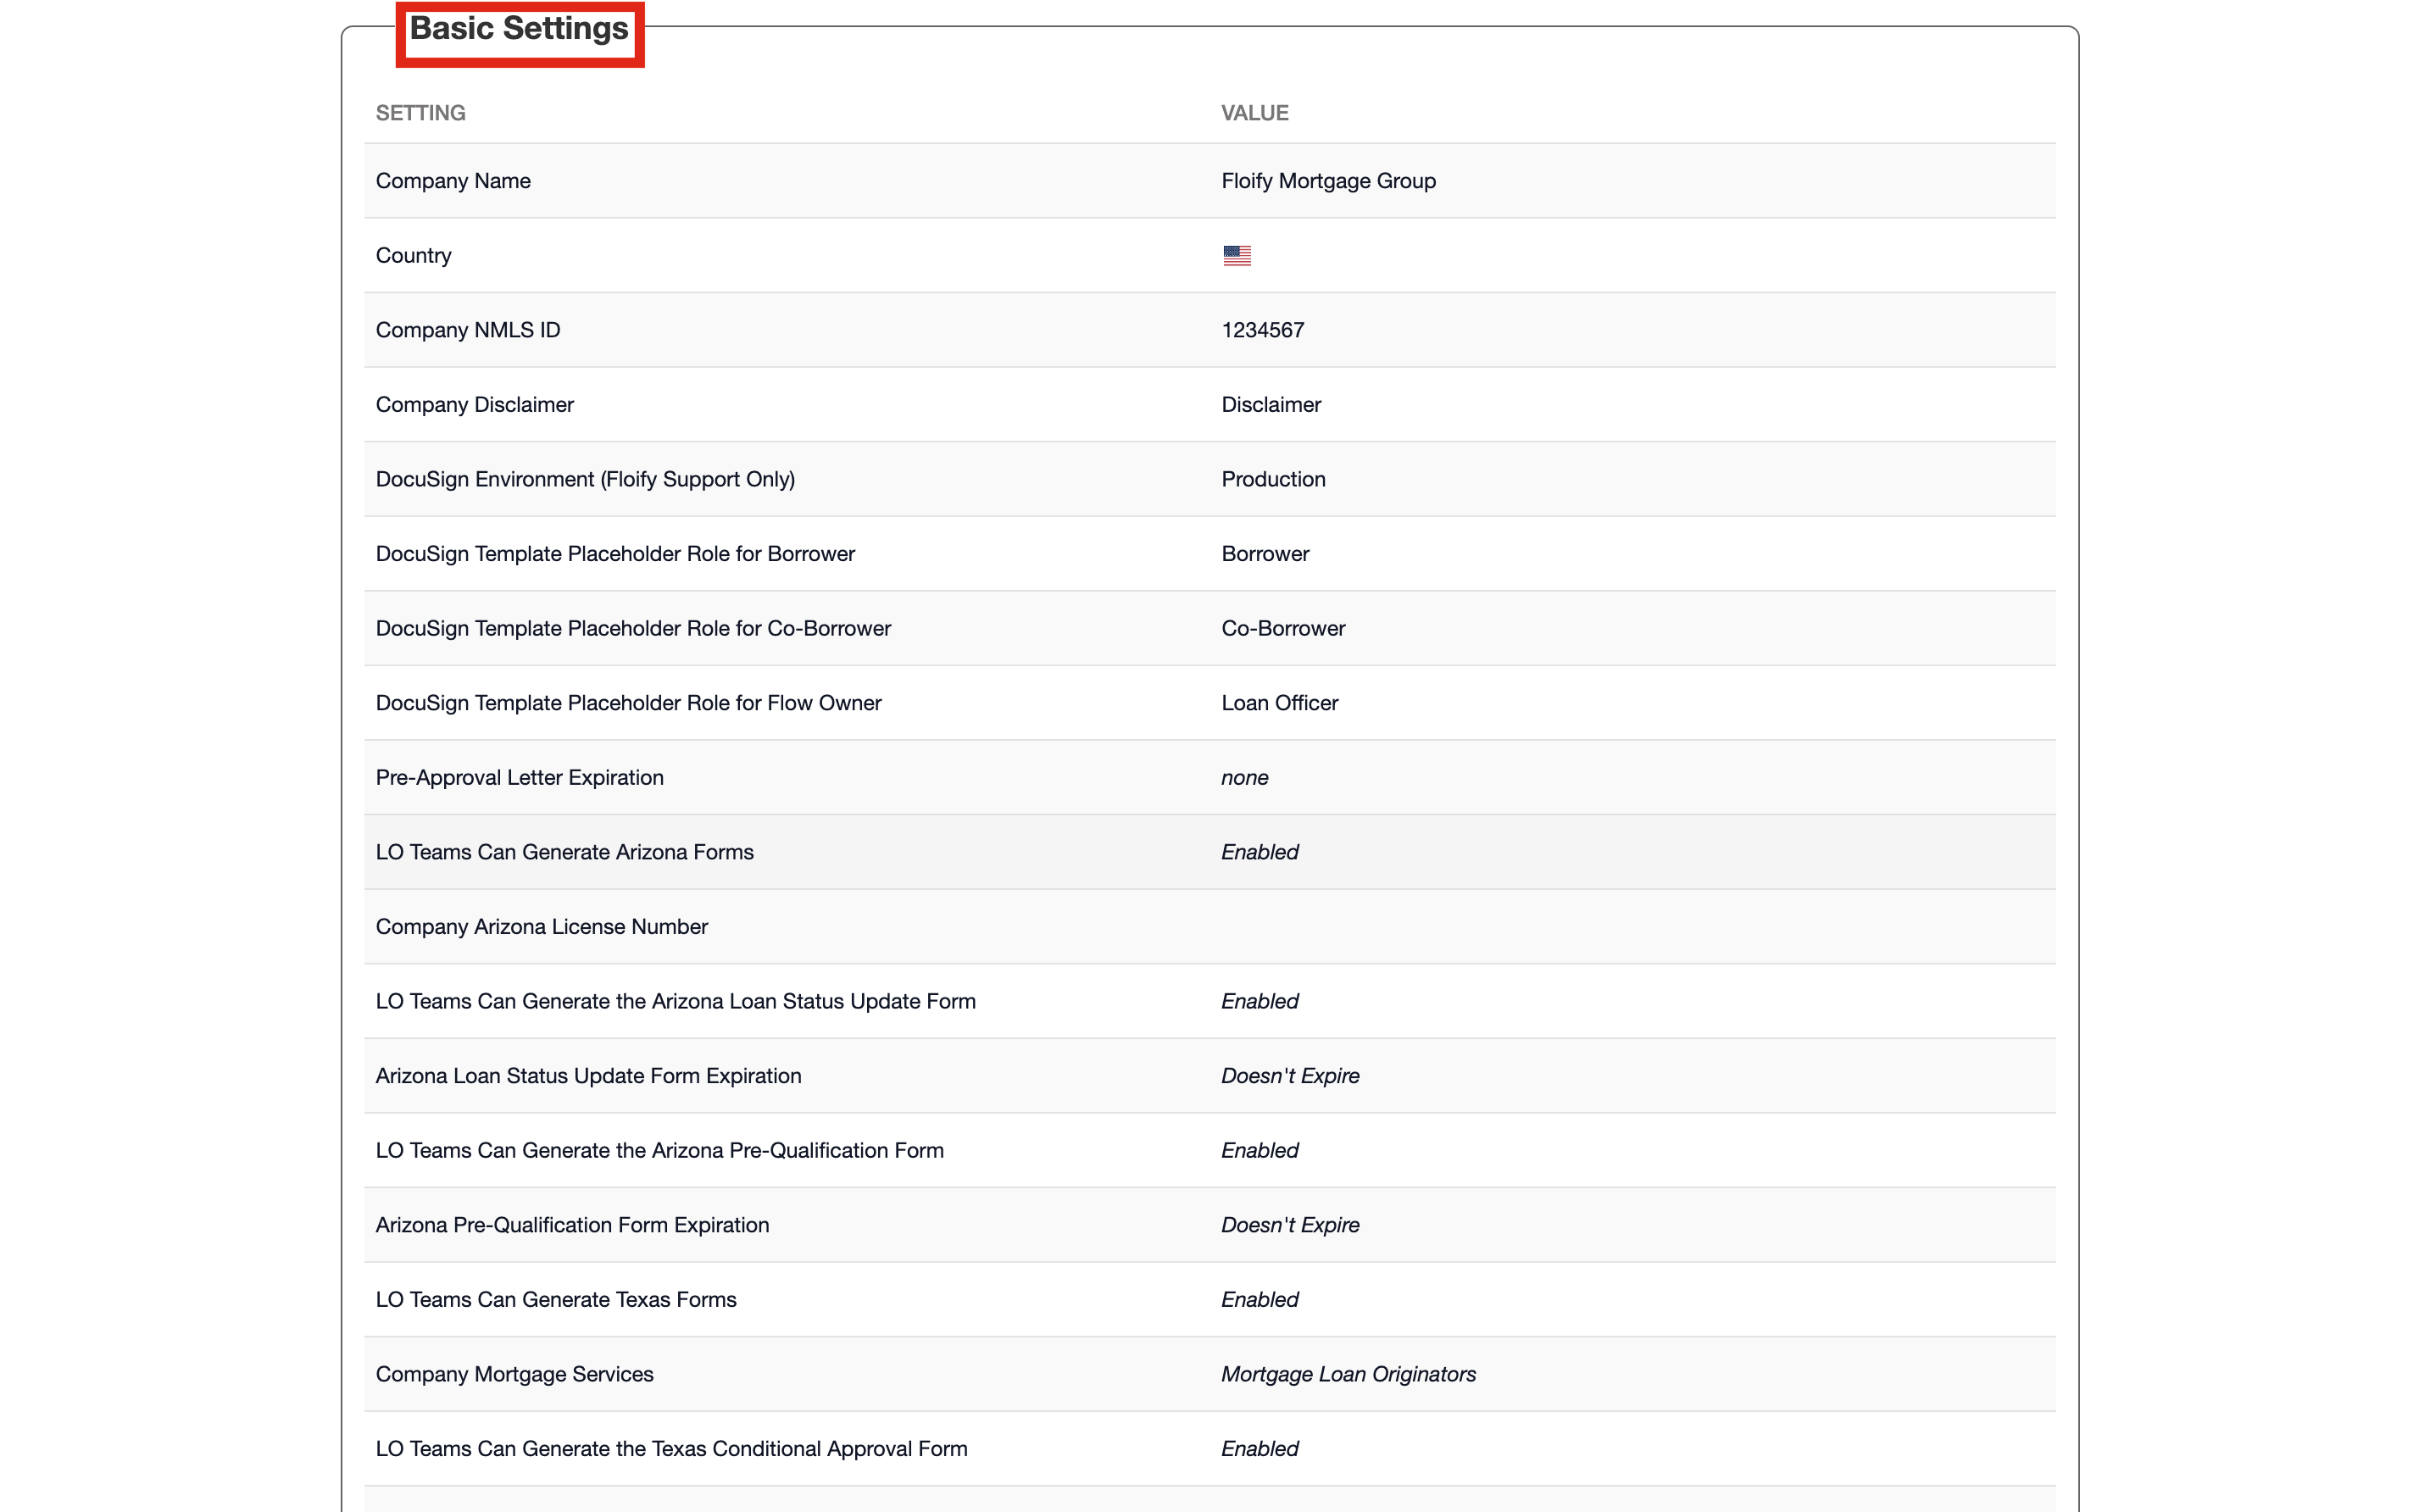
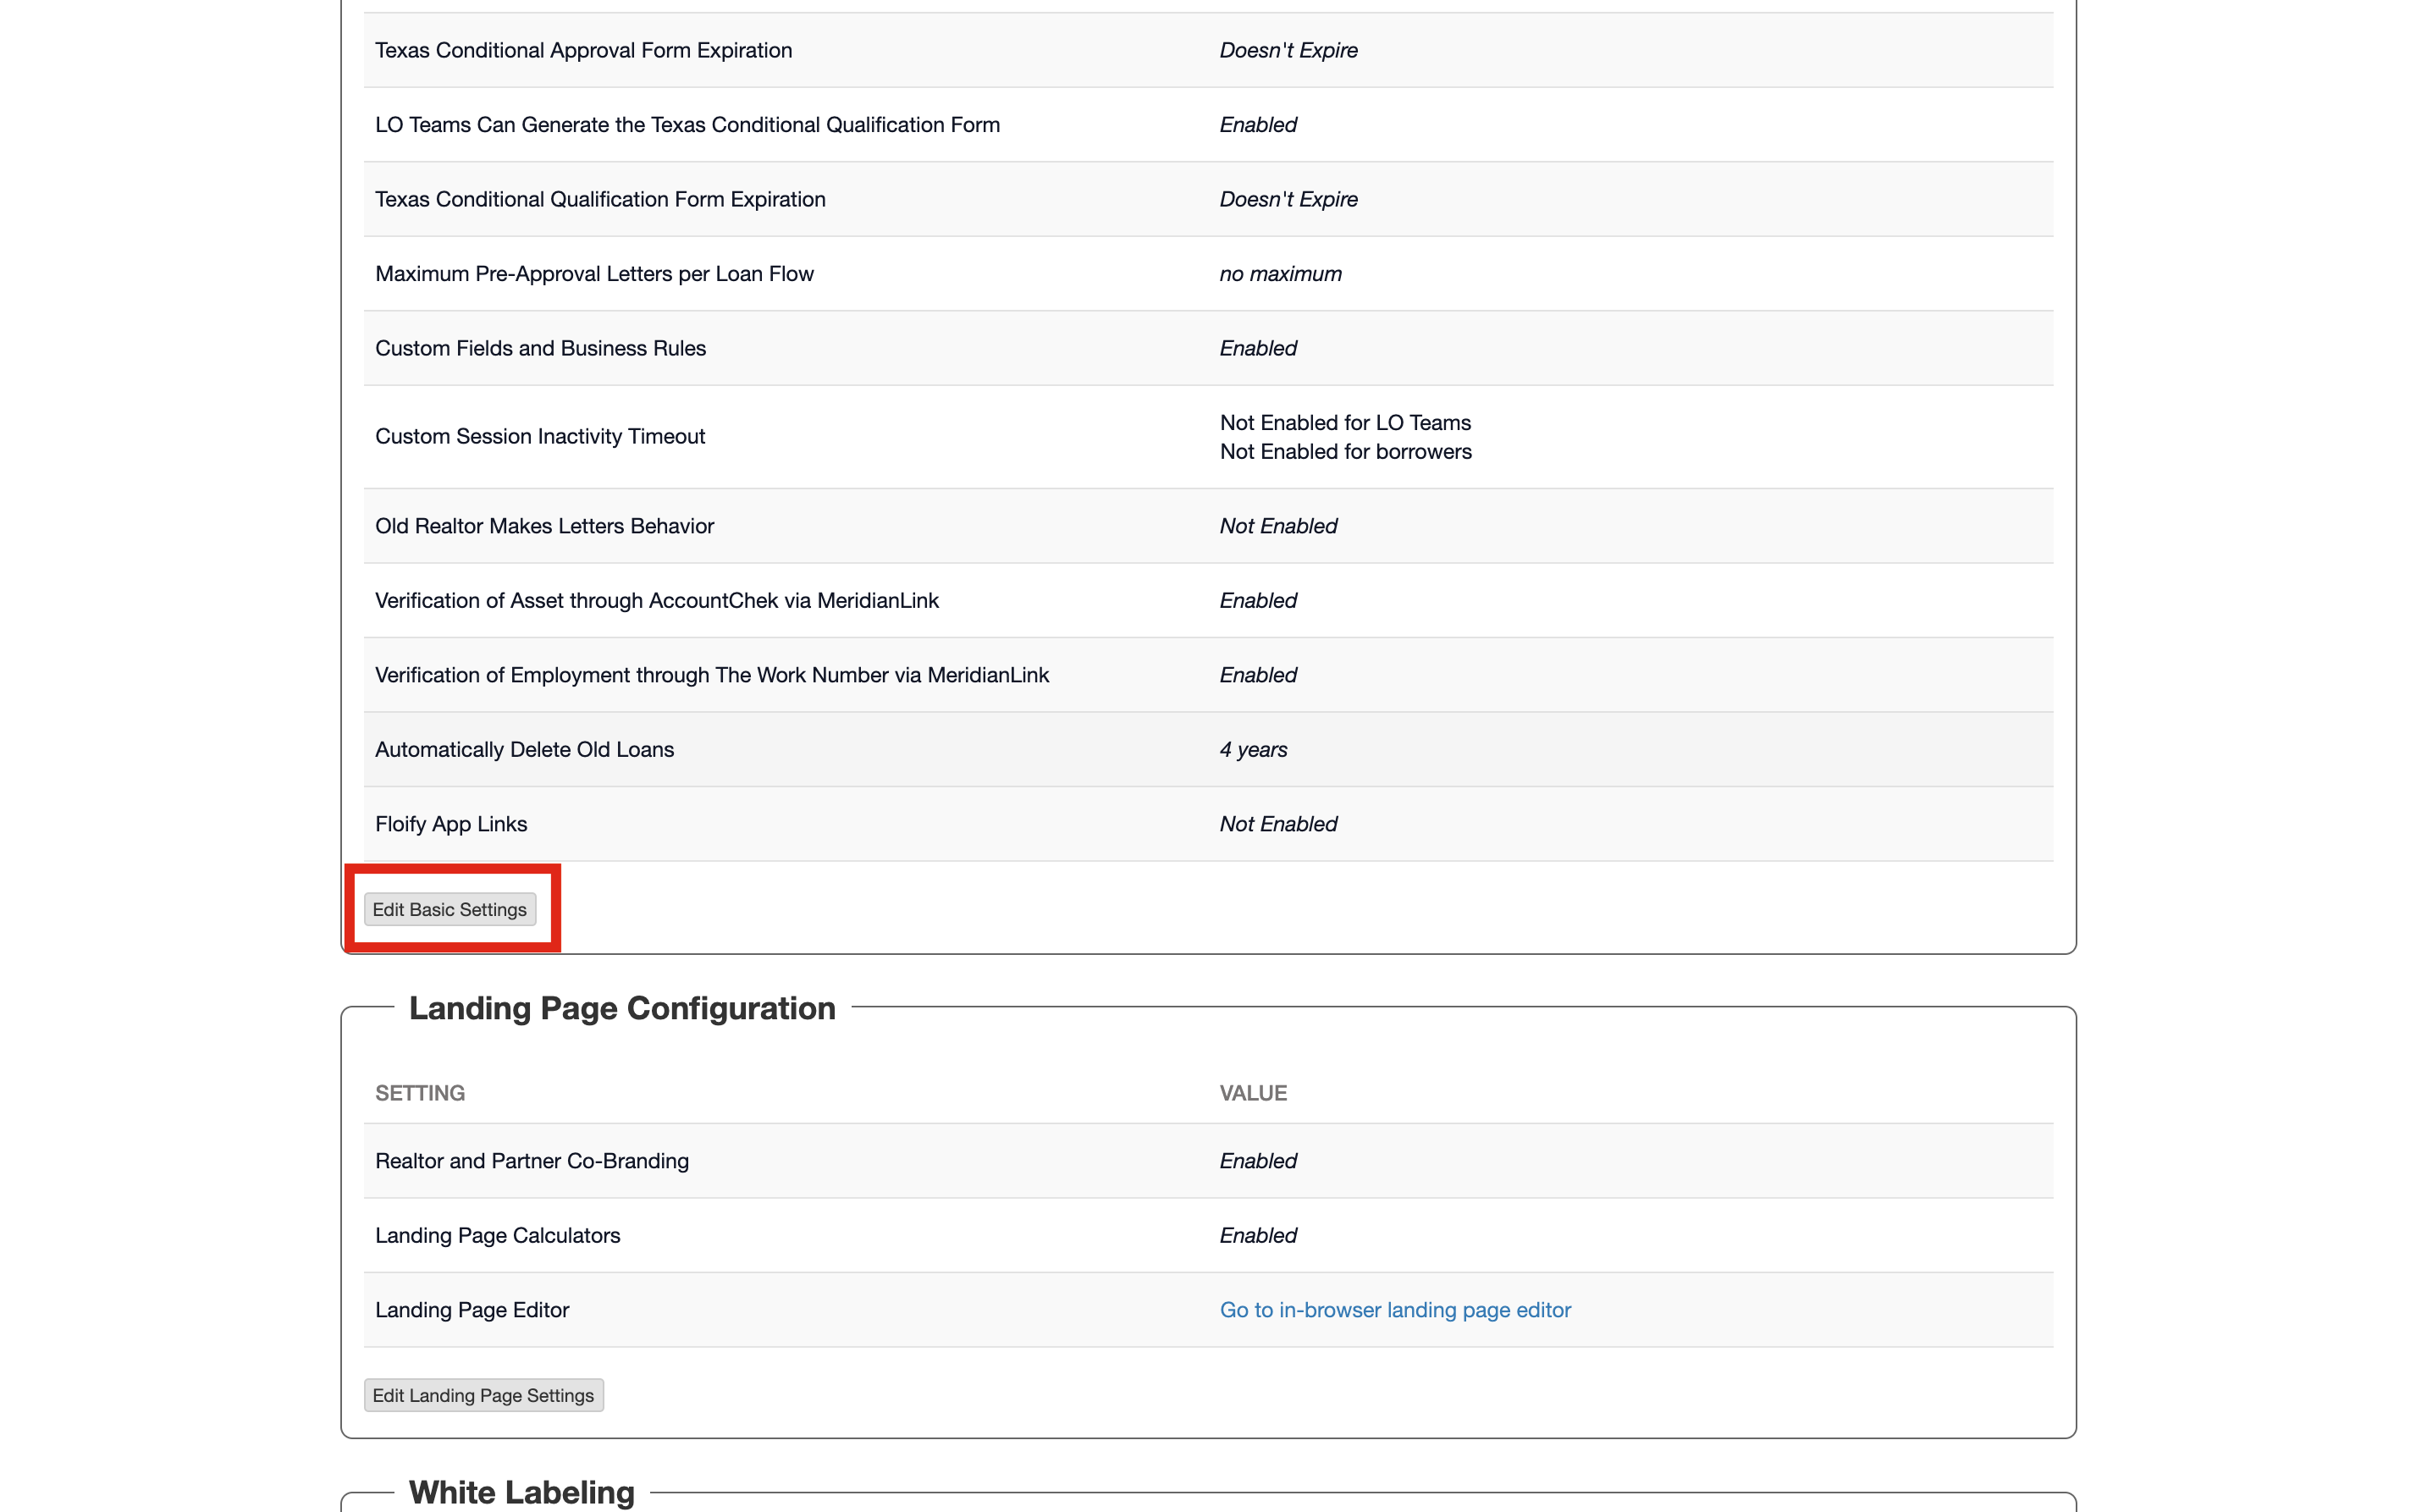
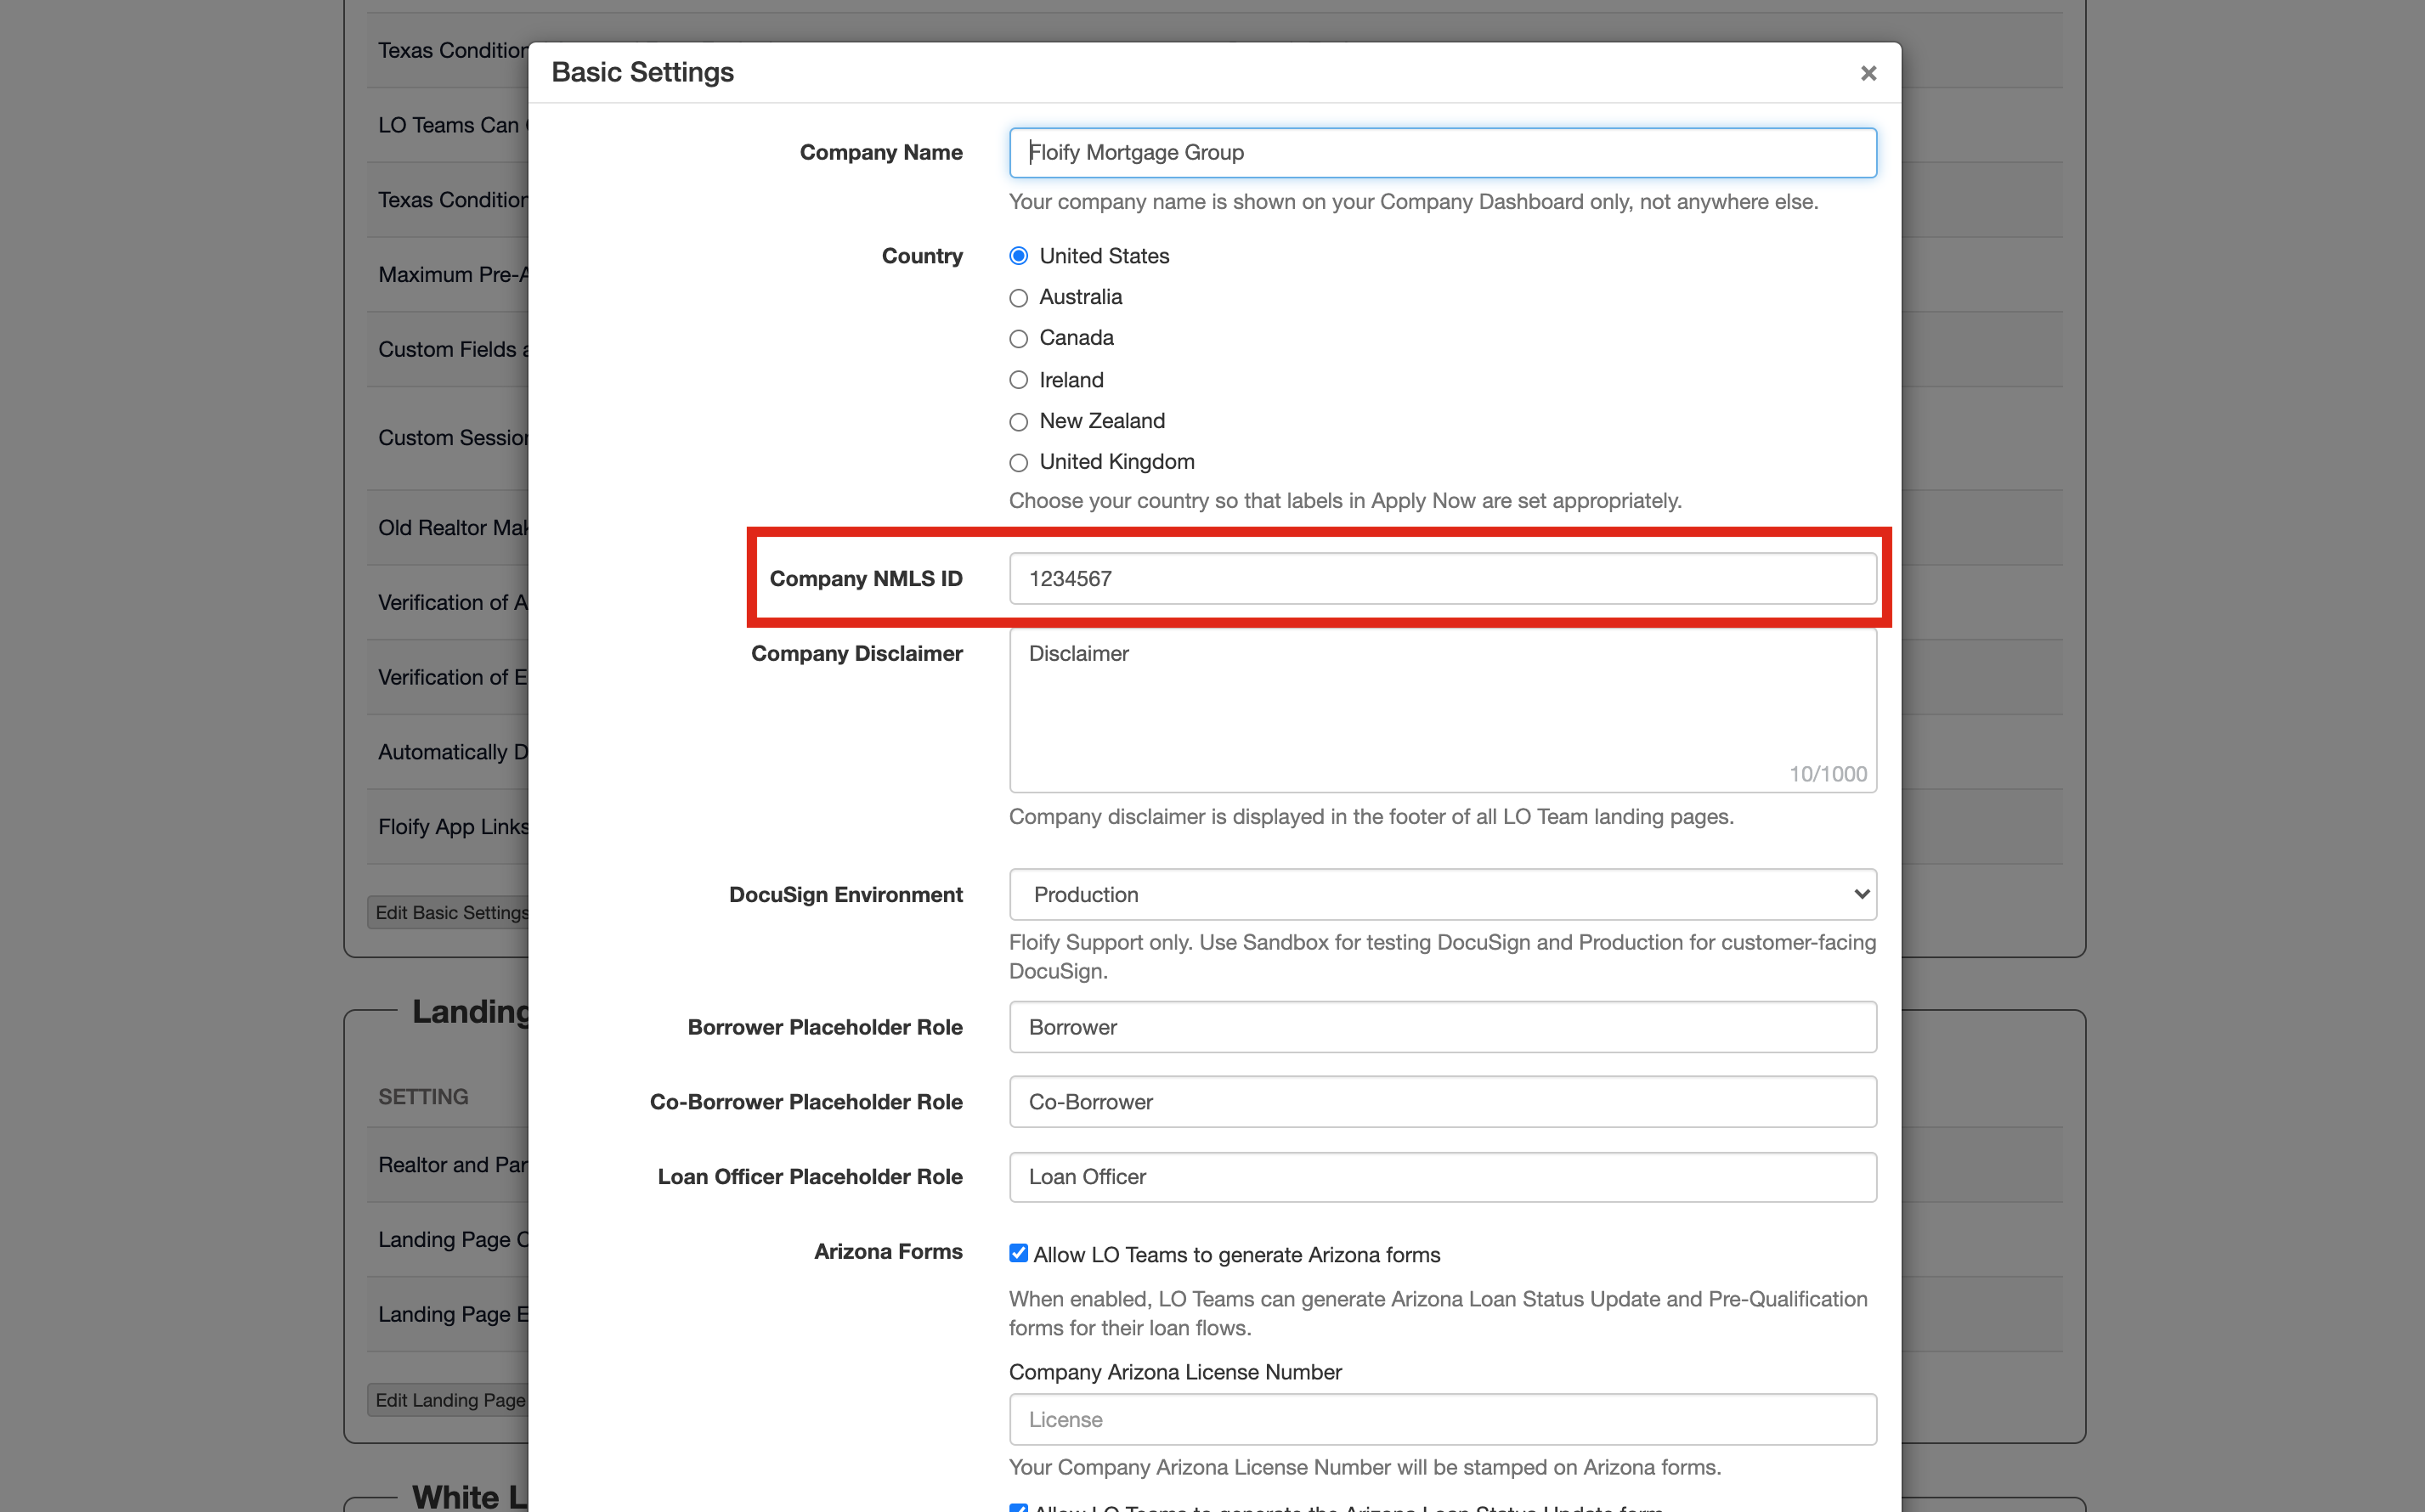
Scroll down to Basic Settings and select the option to Edit Basic Settings:
Update the company NMLS ID. Make sure you select Save once you have finished to complete the change:
Configure My Landing Page Text via the In-Browser Landing Page Editor
From the team pipeline, choose the team name in the upper right-hand corner and select the option to navigate to the Company Dashboard:
Navigate to the Company Settings and then Basic Settings:
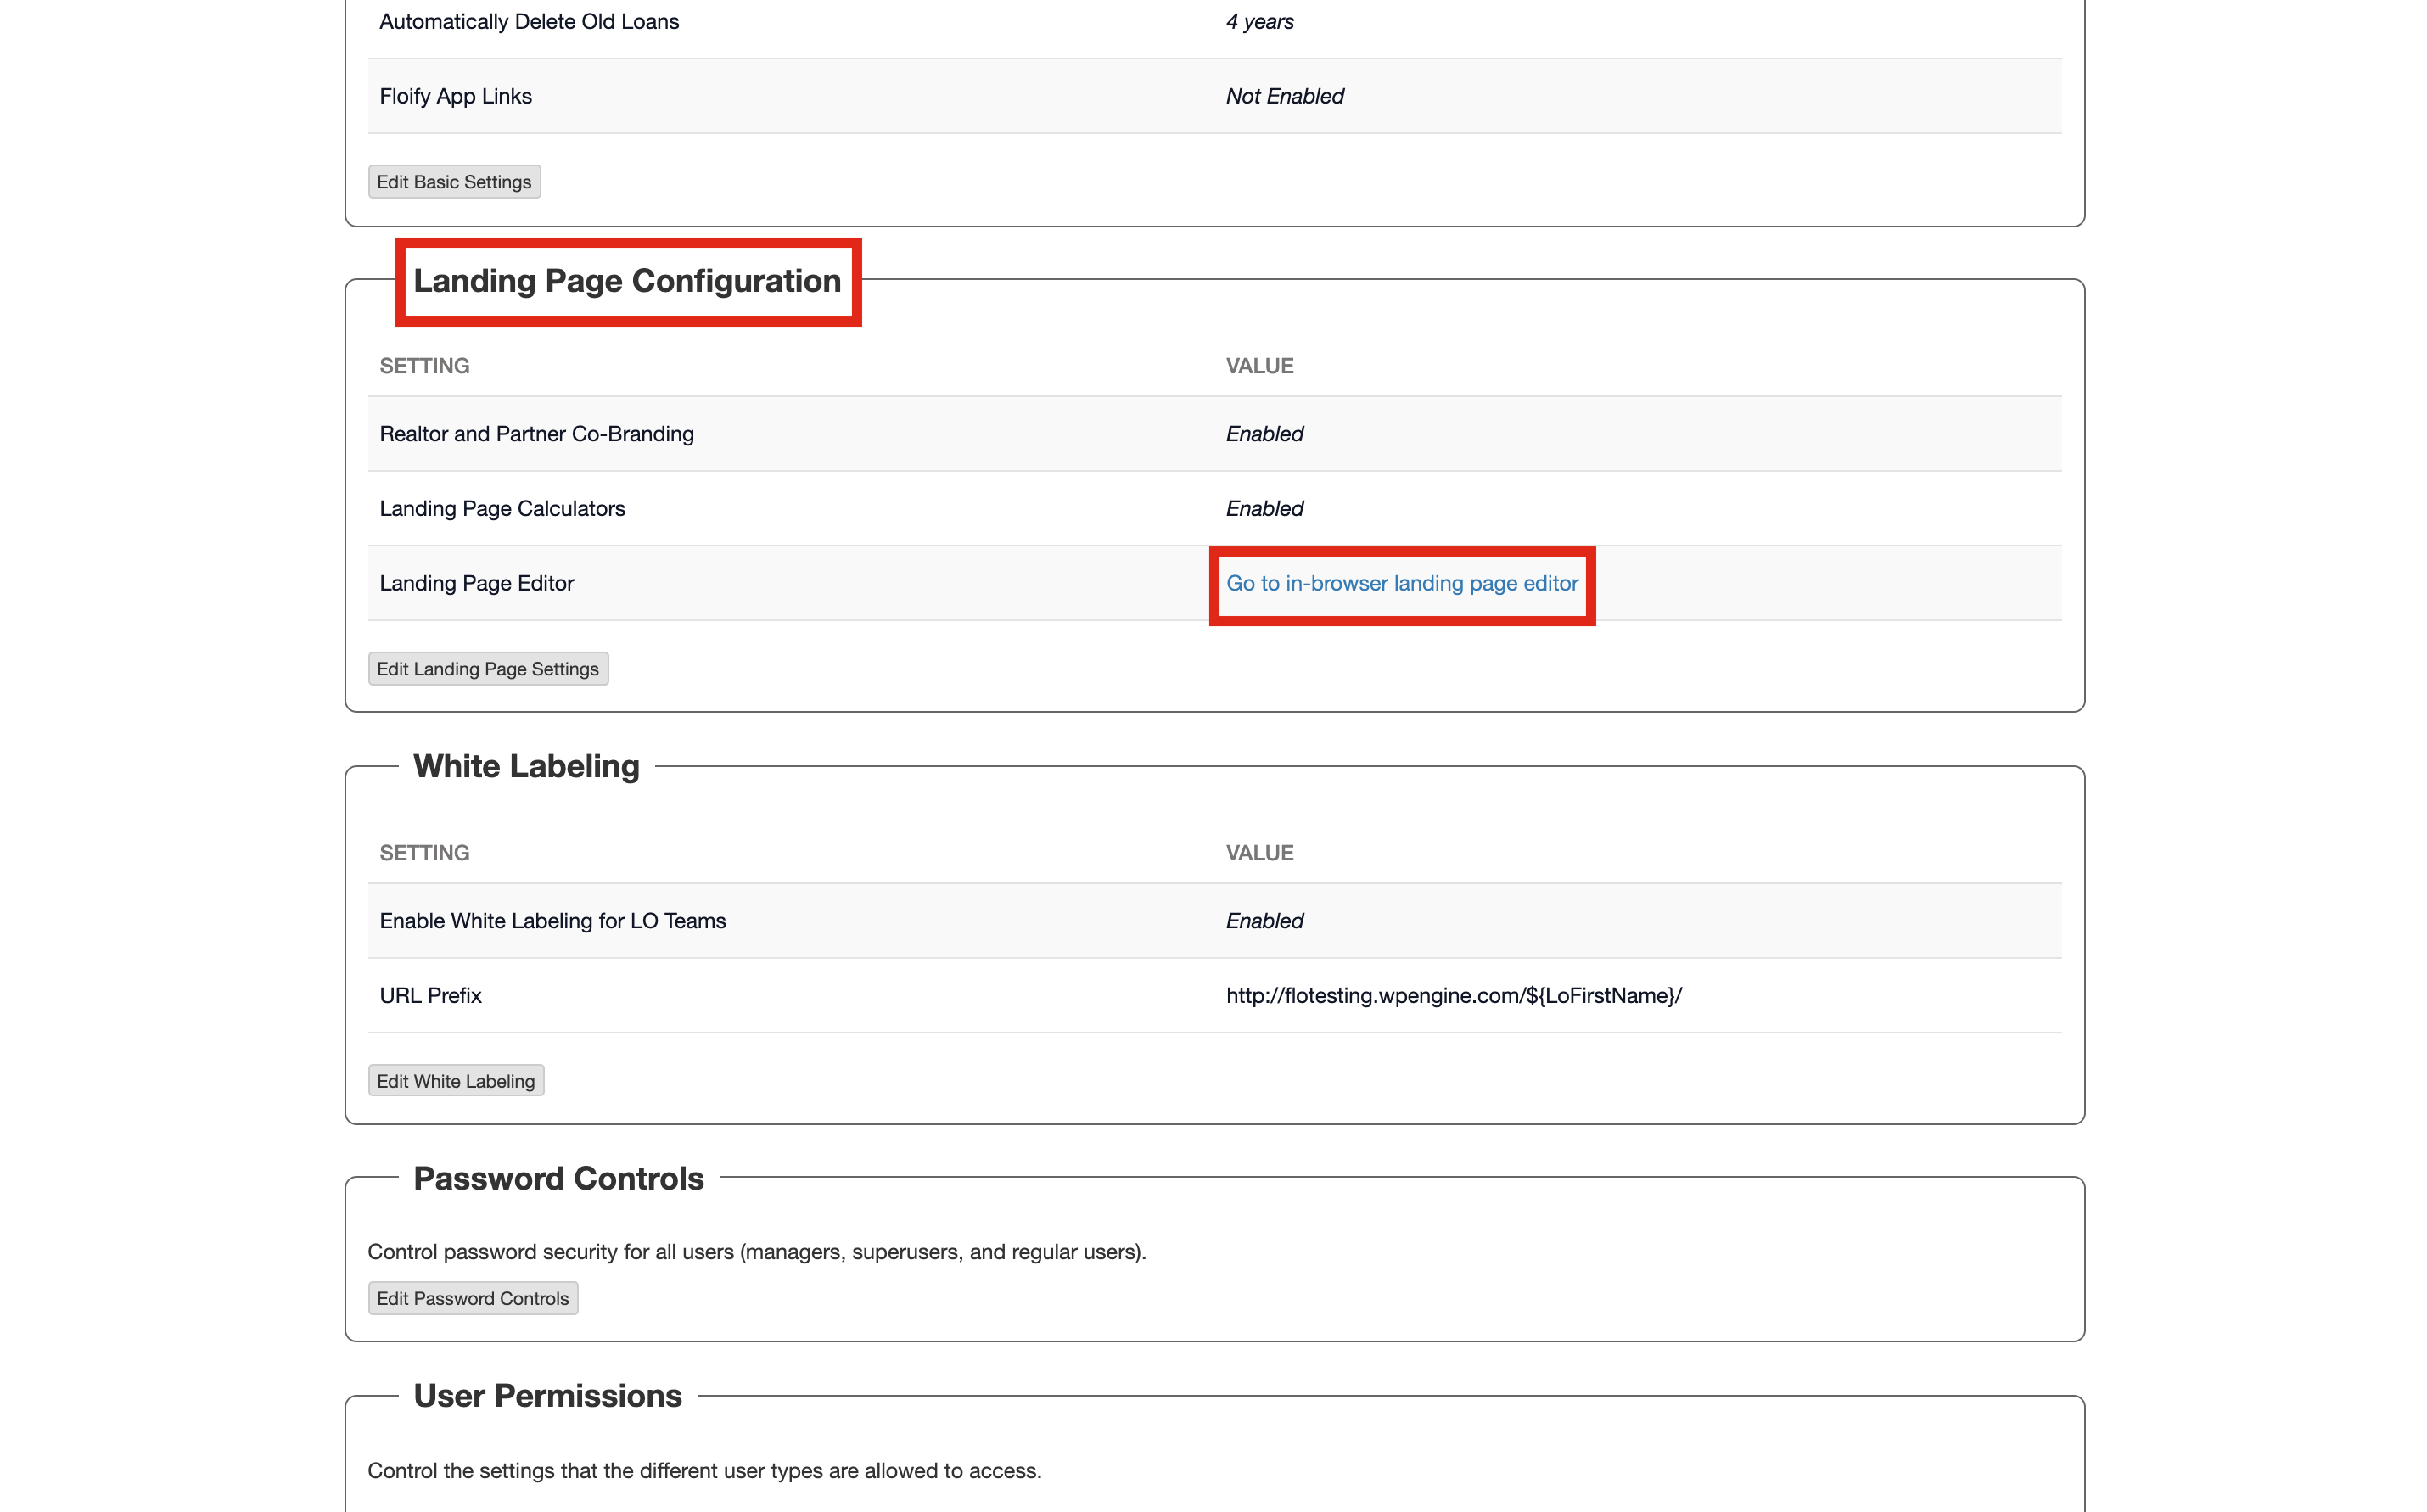
Scroll down to Landing Page Configuration and select the option to Go to in-browser landing page editor:
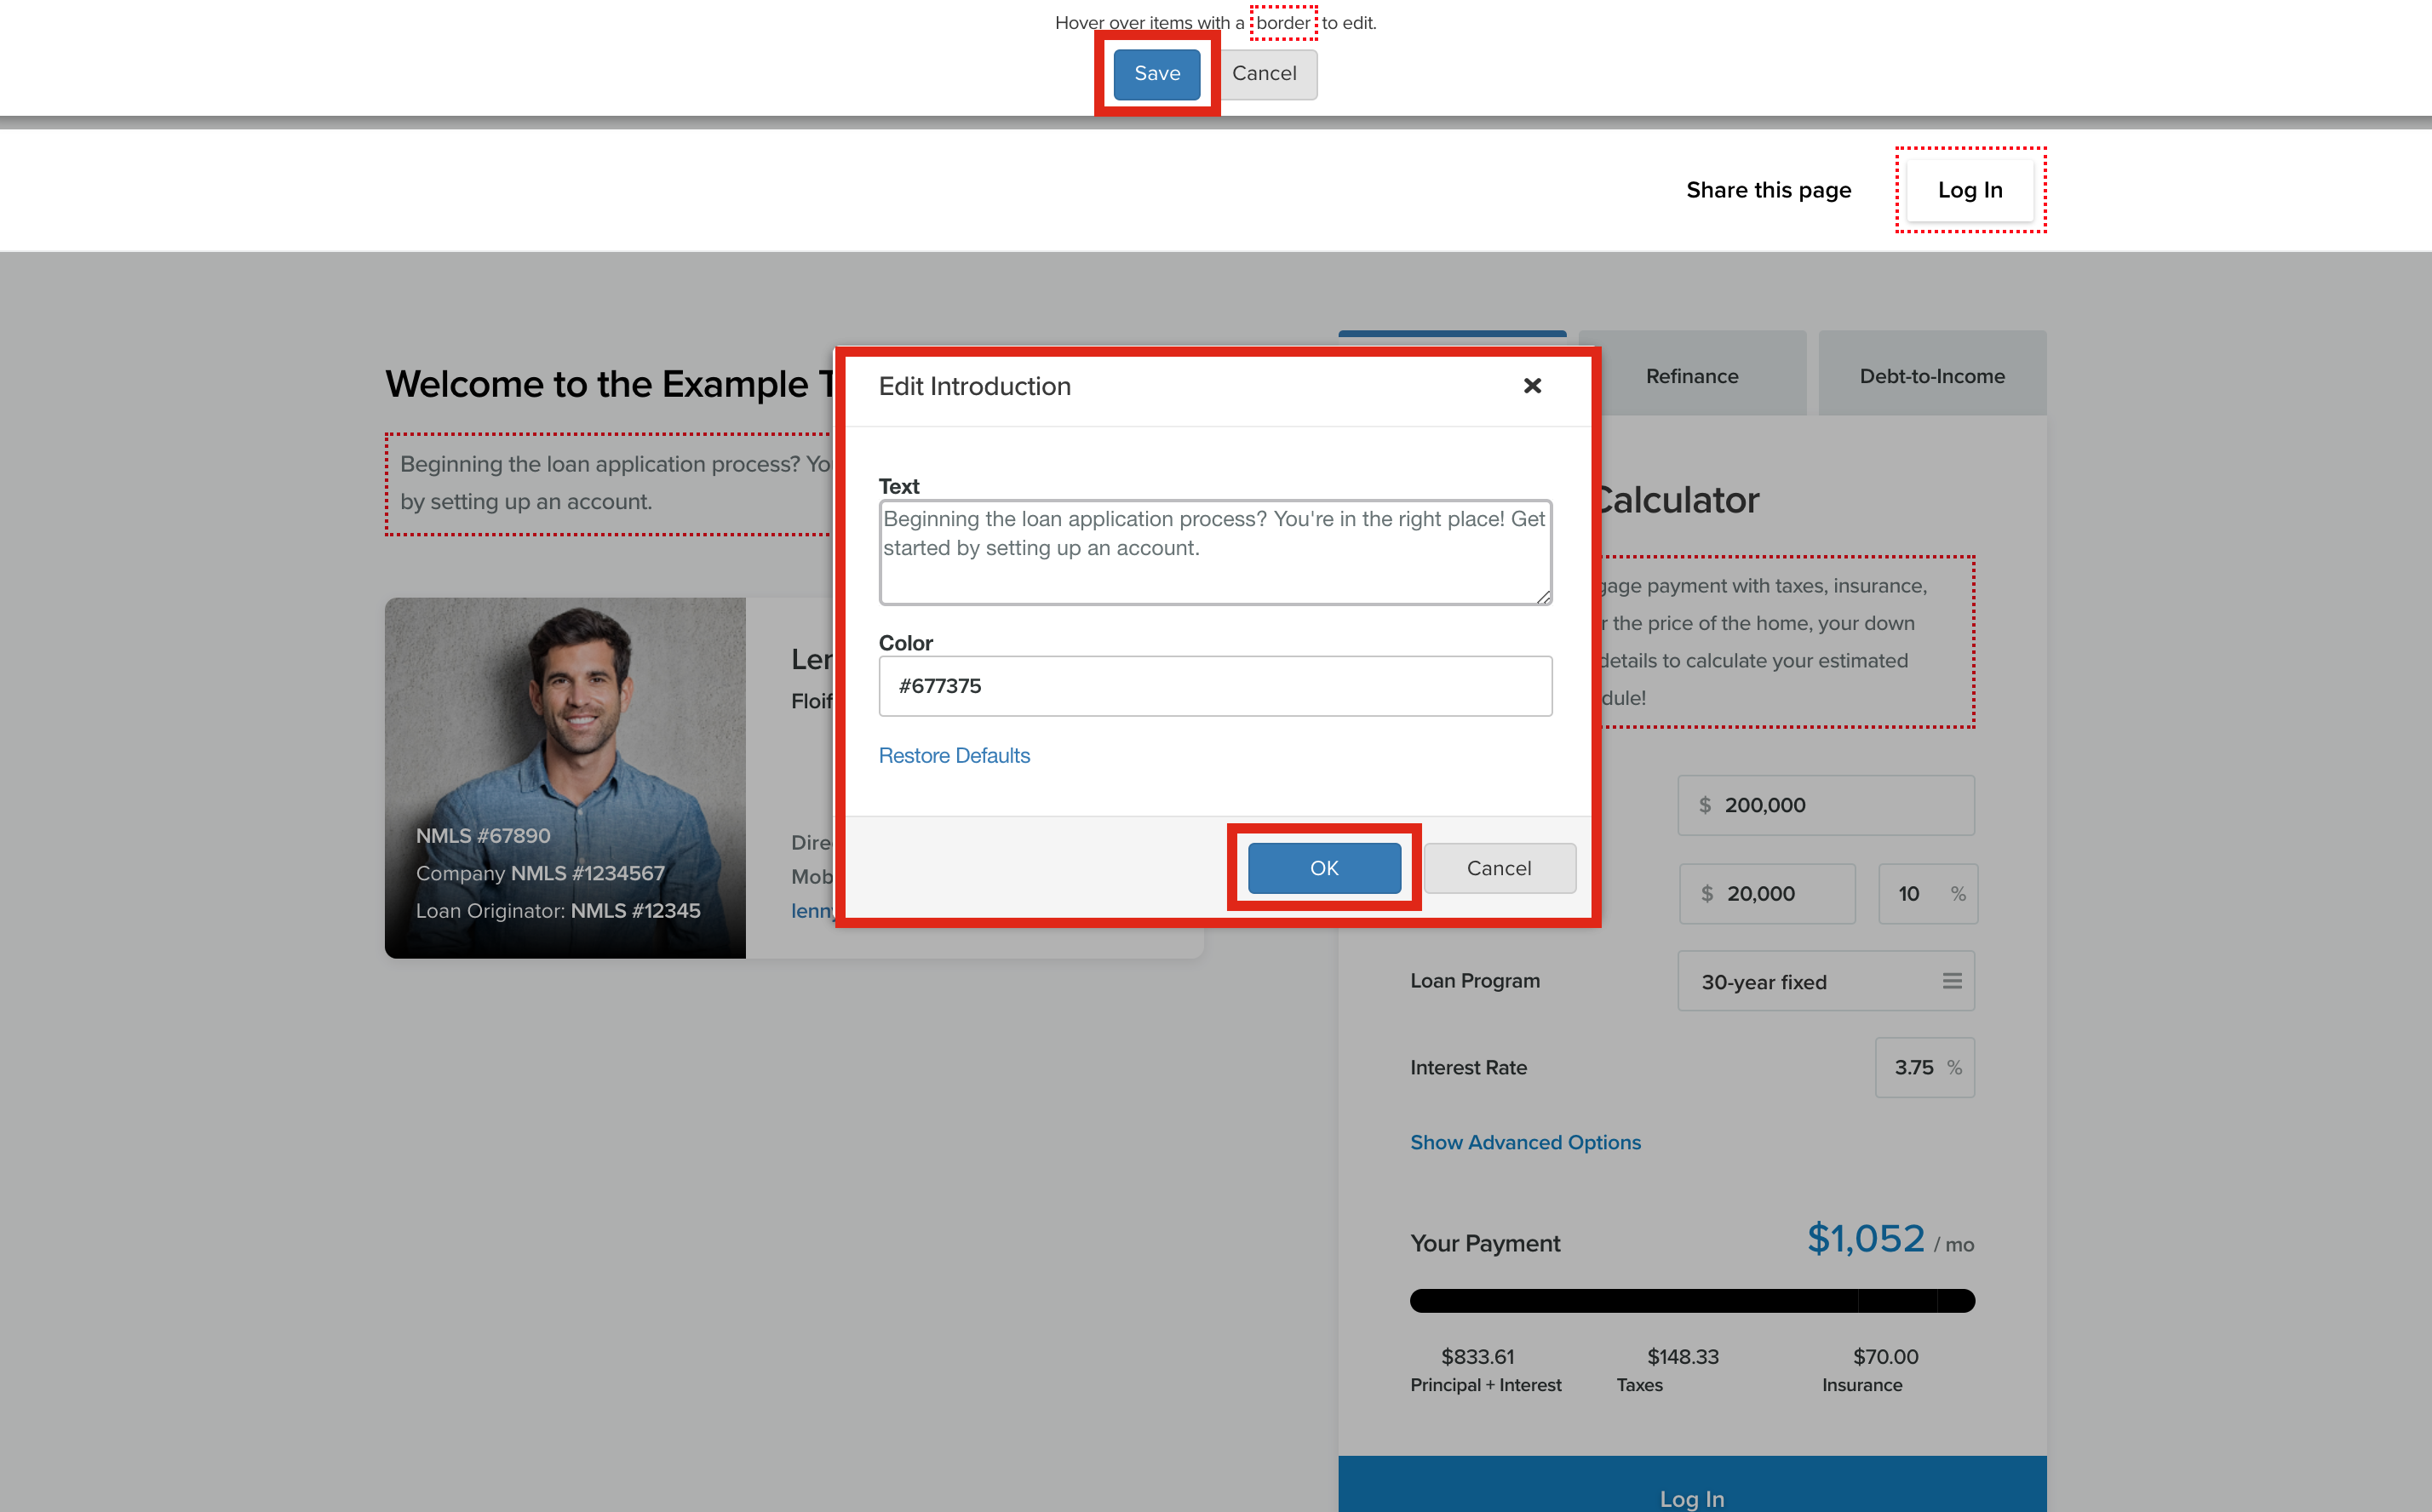
In the landing page editor, you'll see the editable fields circled in a red border. Click on the Edit button to make changes:
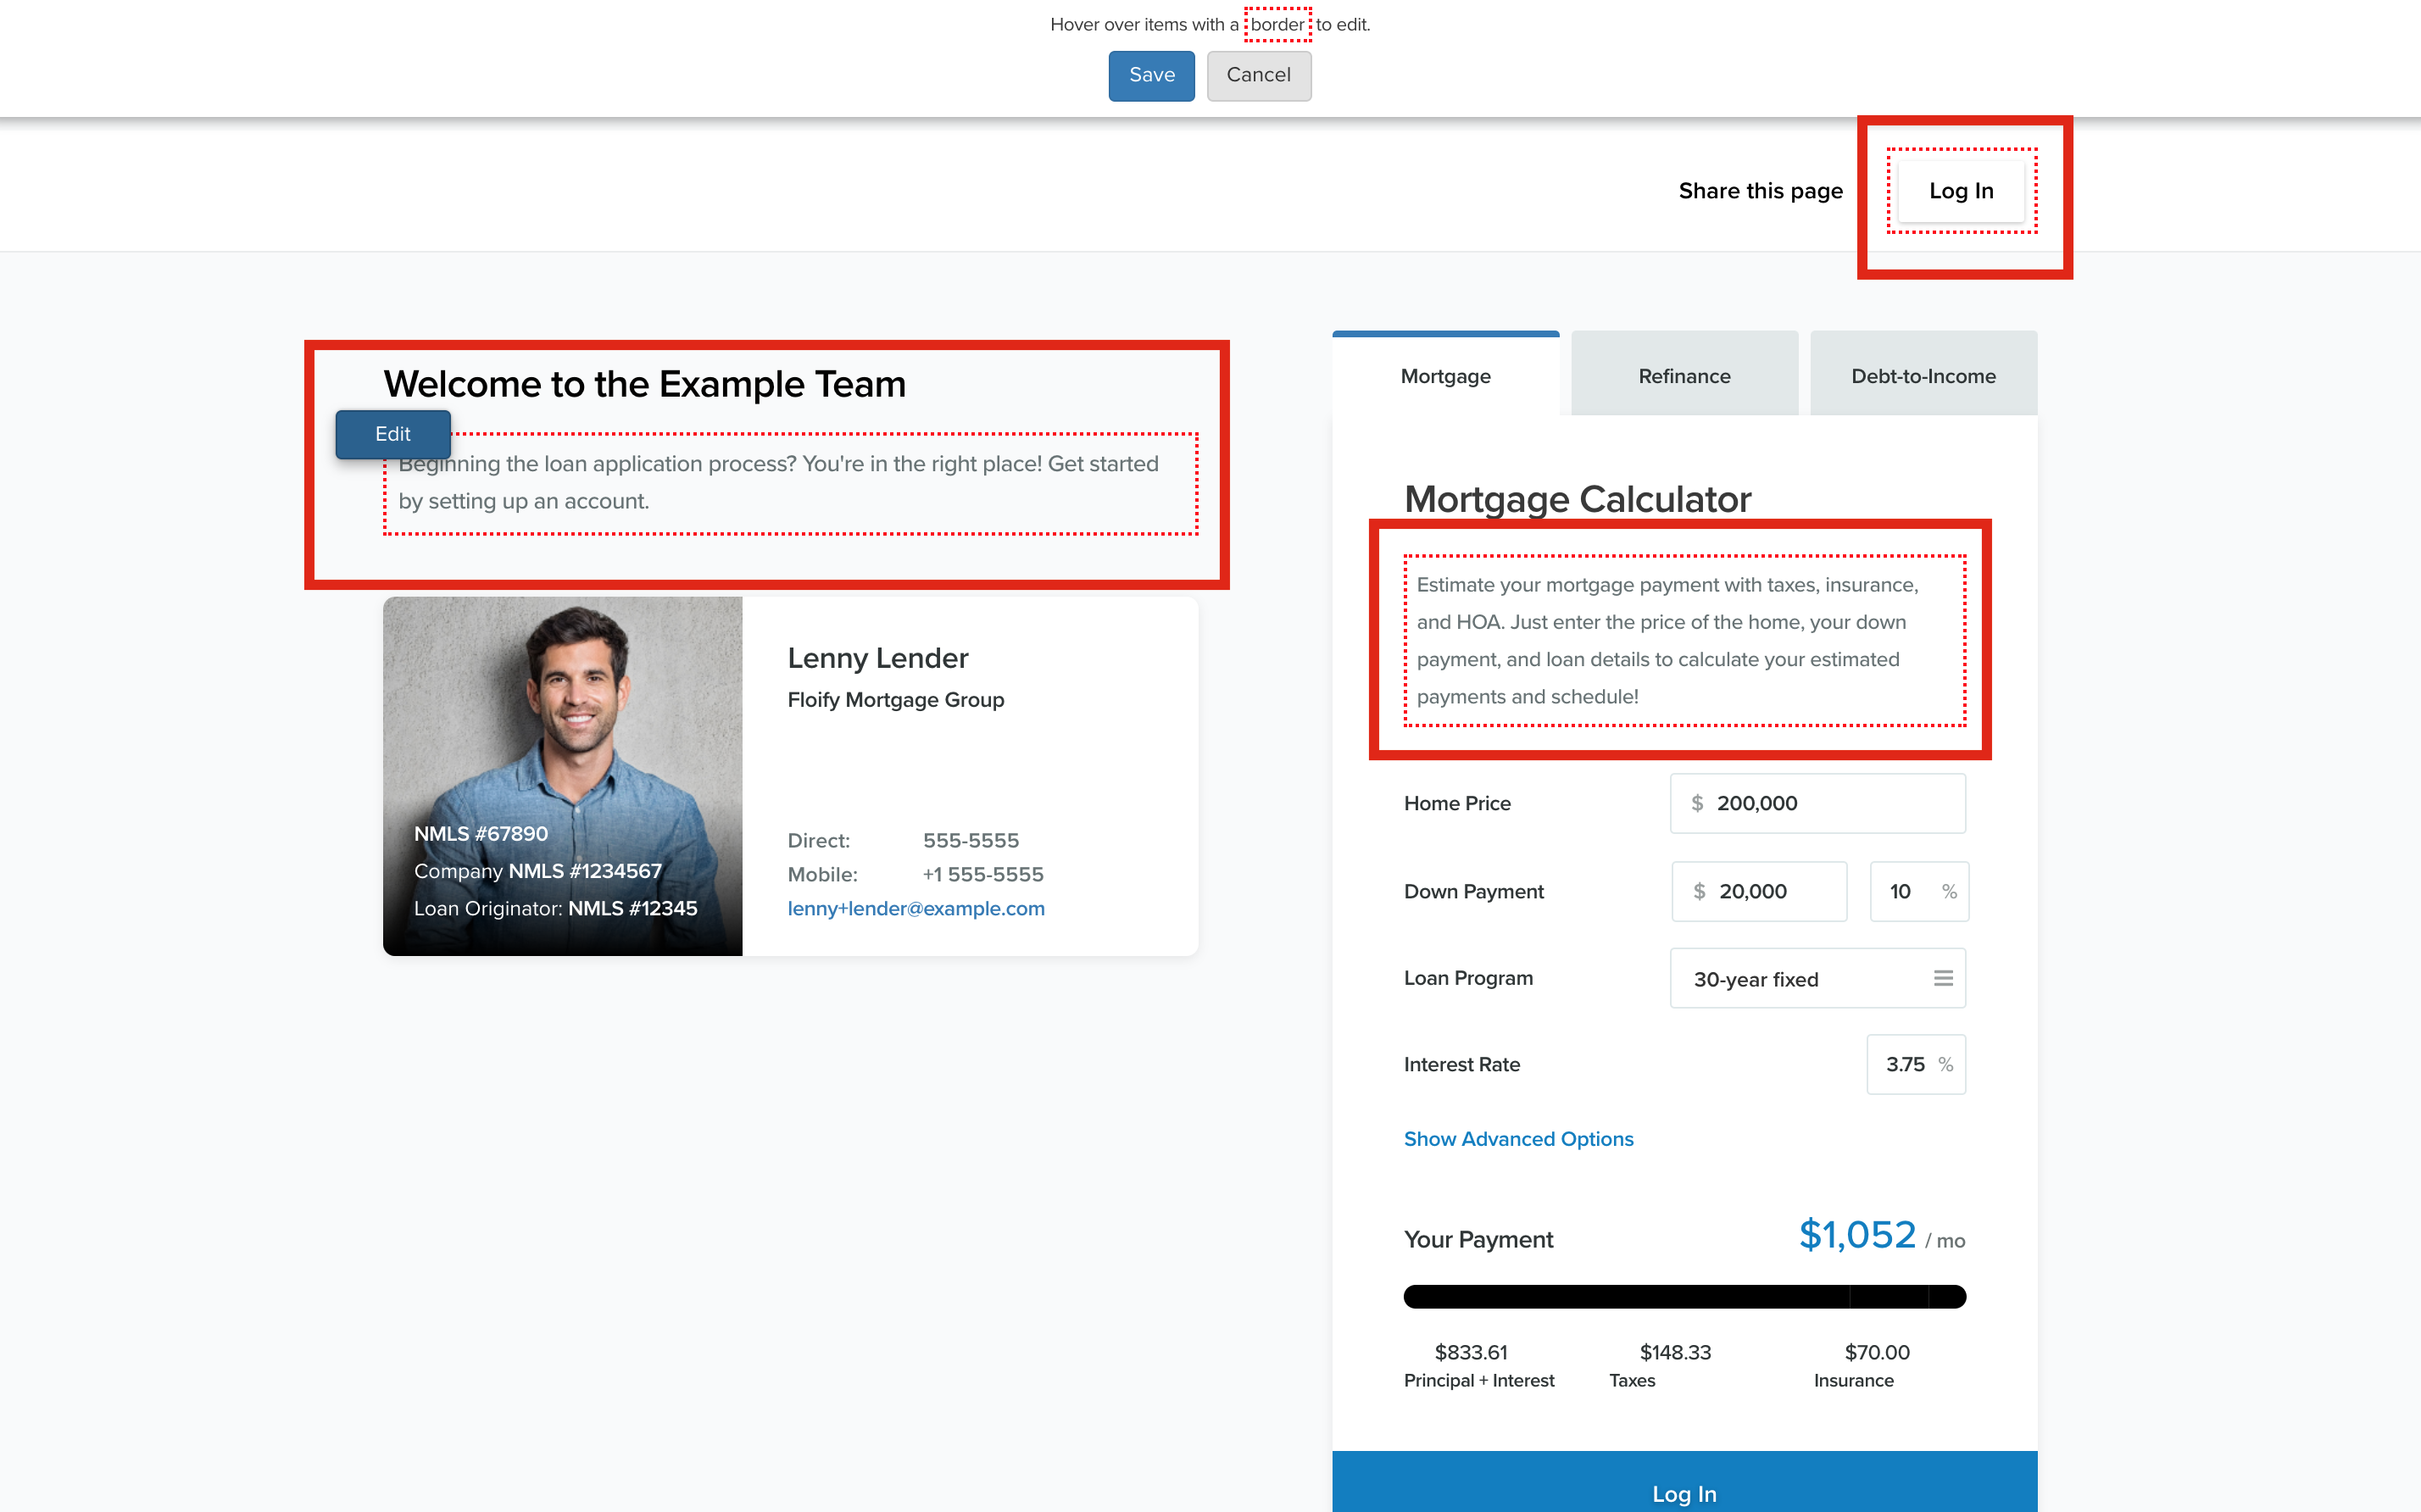
You will then see the option to edit the text as well as the color. Select OK once you are done making changes to confirm and then Save at the top once you are done making edits:
Team Level Configuration
Change My Landing Page Link
From your team pipeline, navigate to Settings and select the Team Info tab:
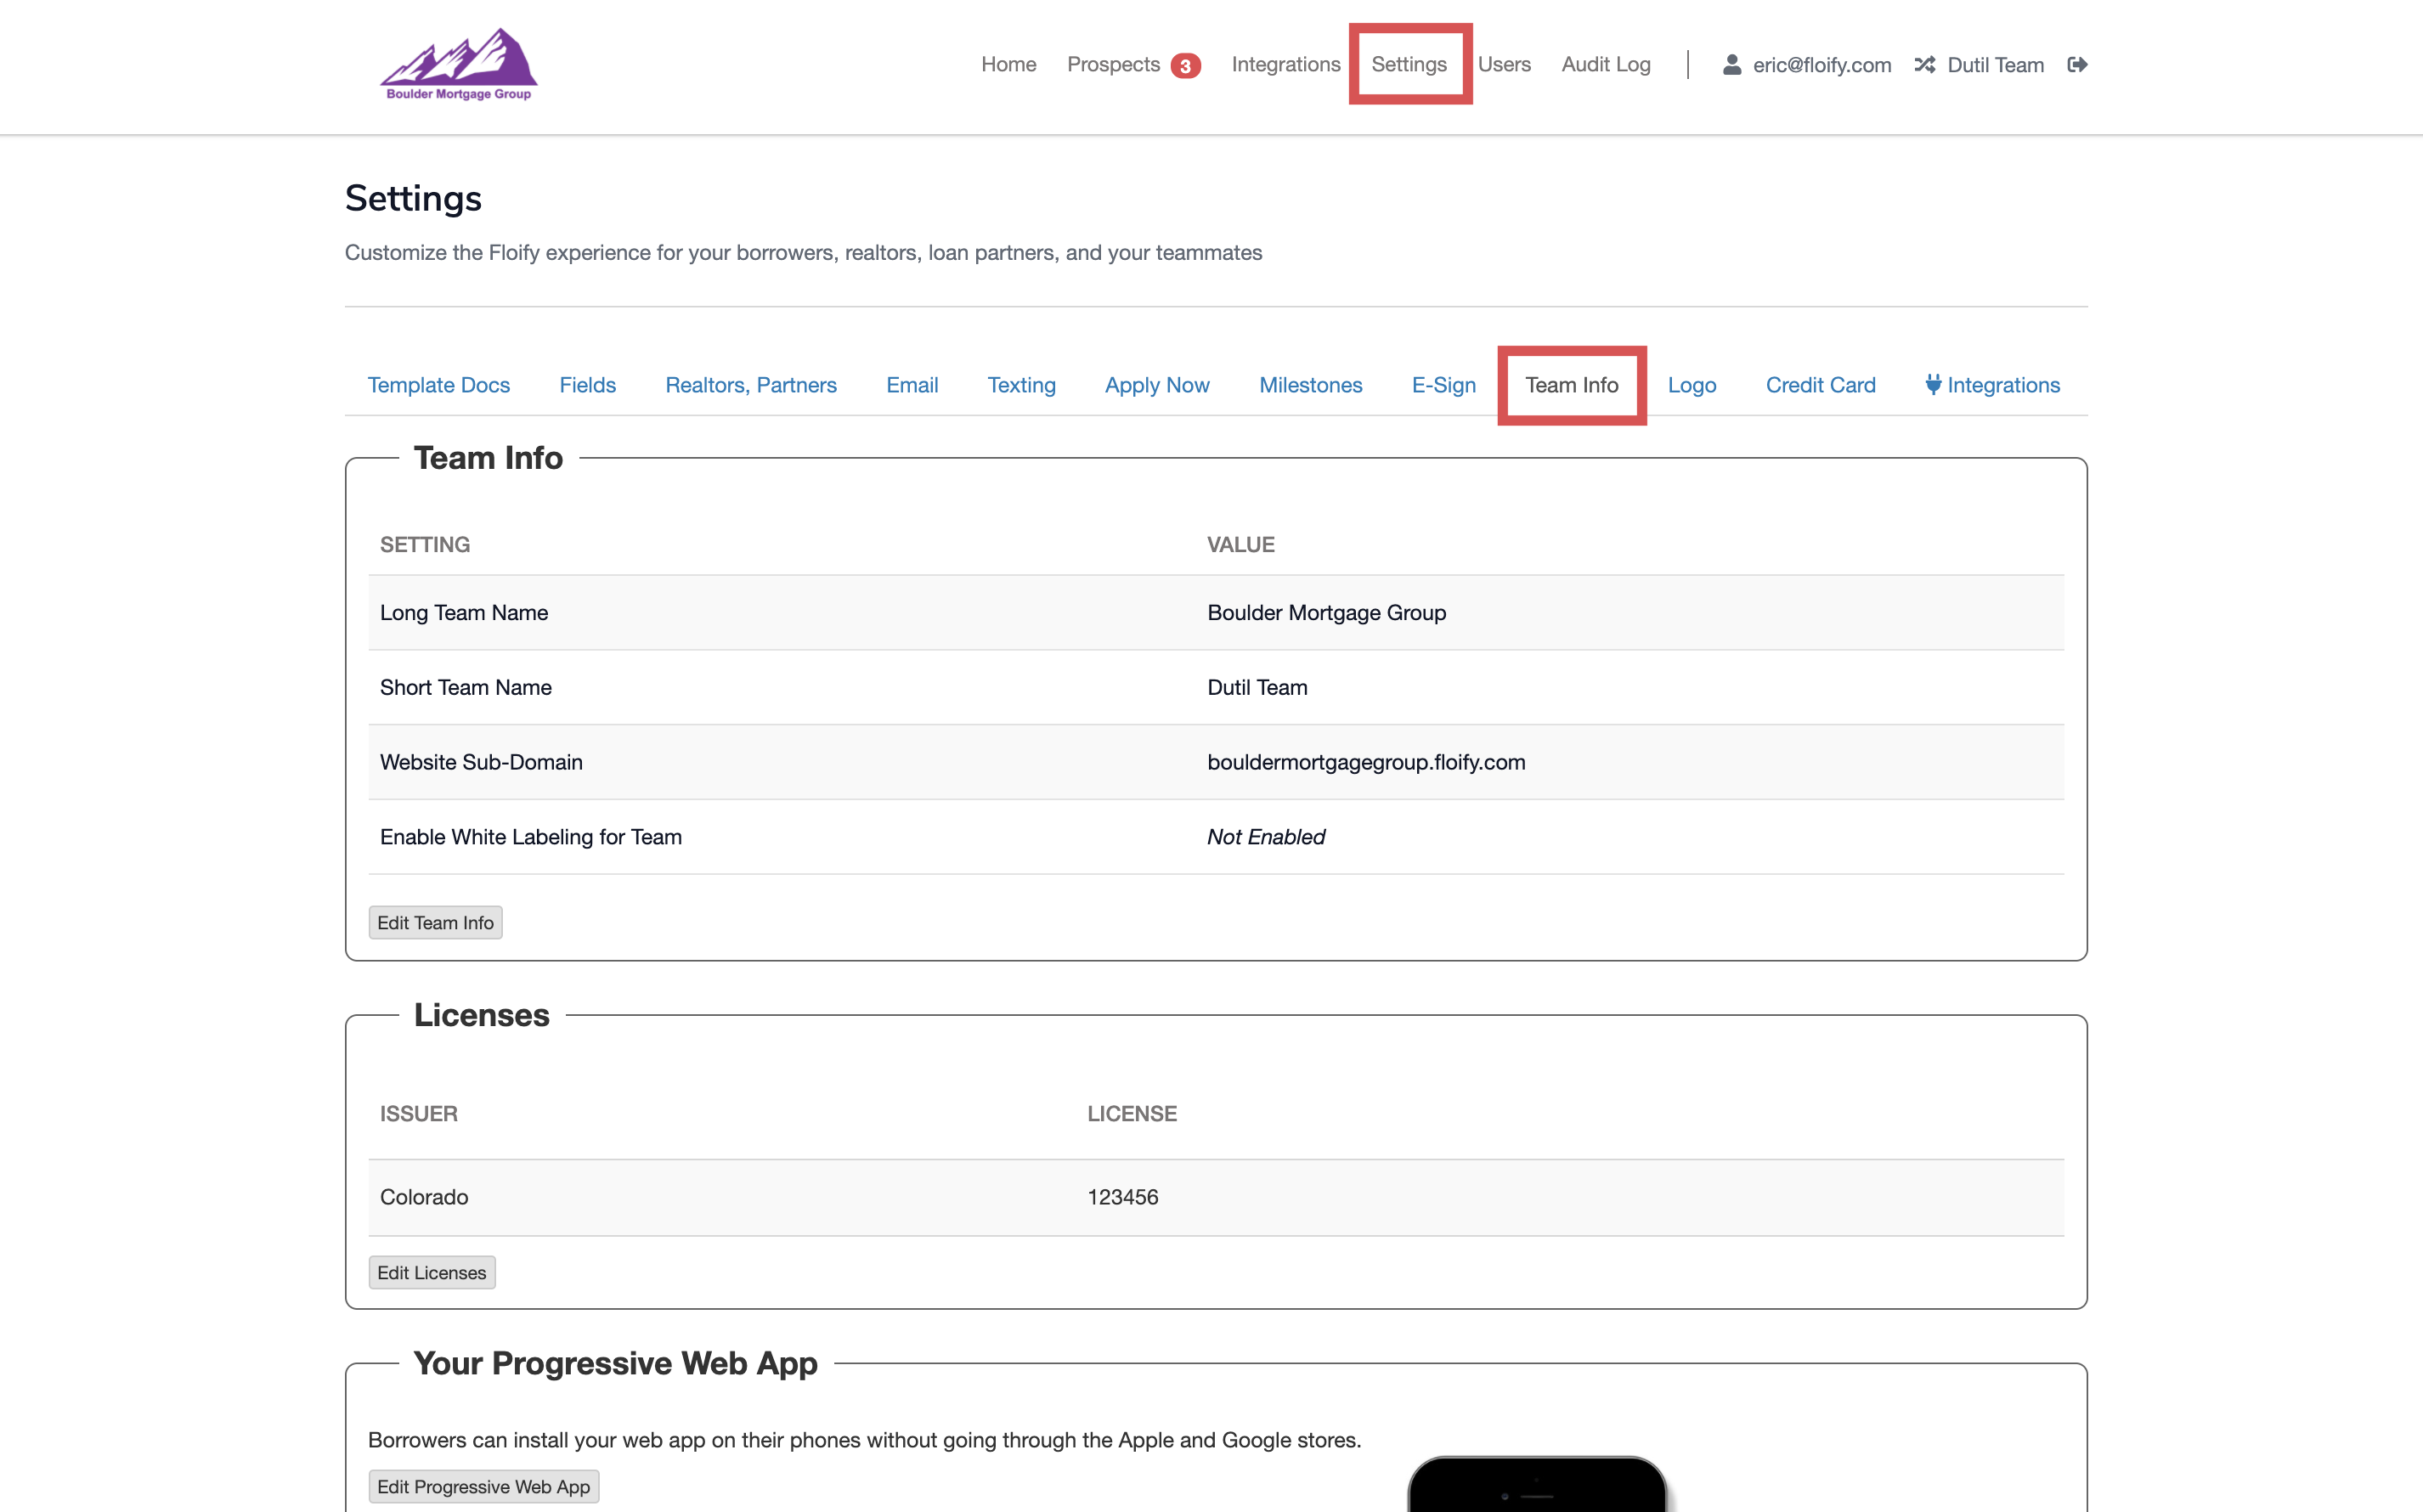
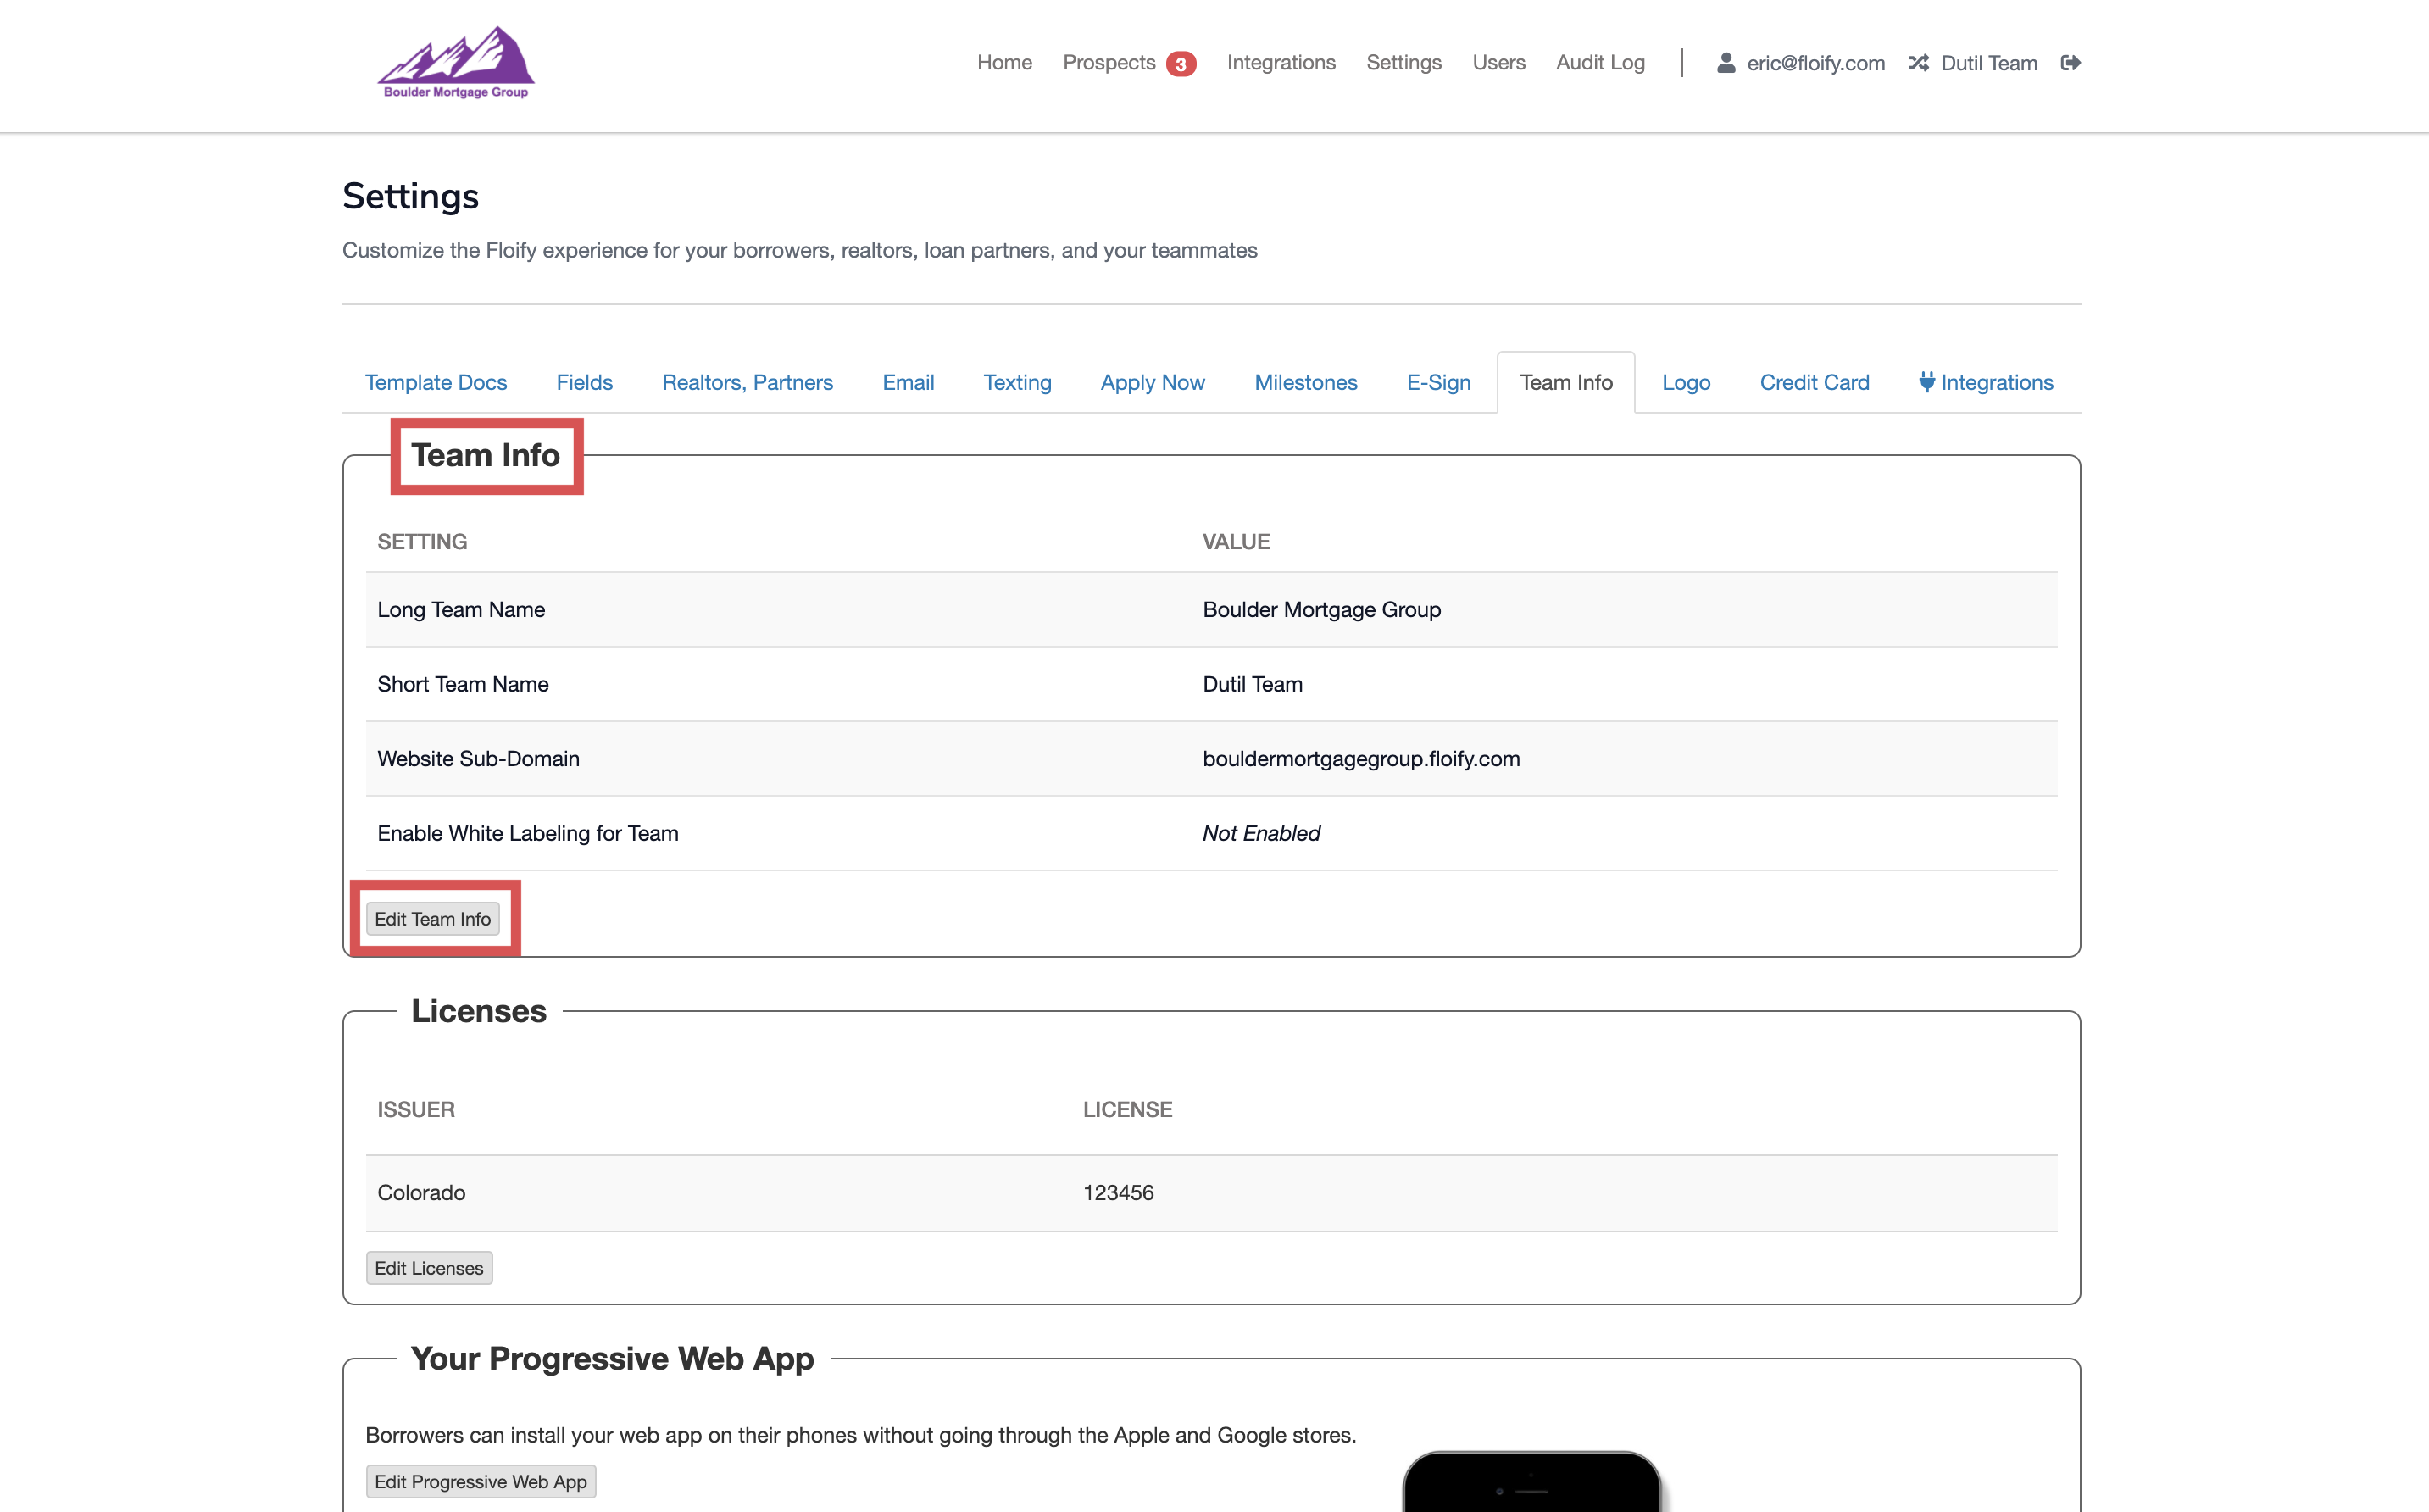
Scroll down to Team Info and select the option to Edit Team Info:
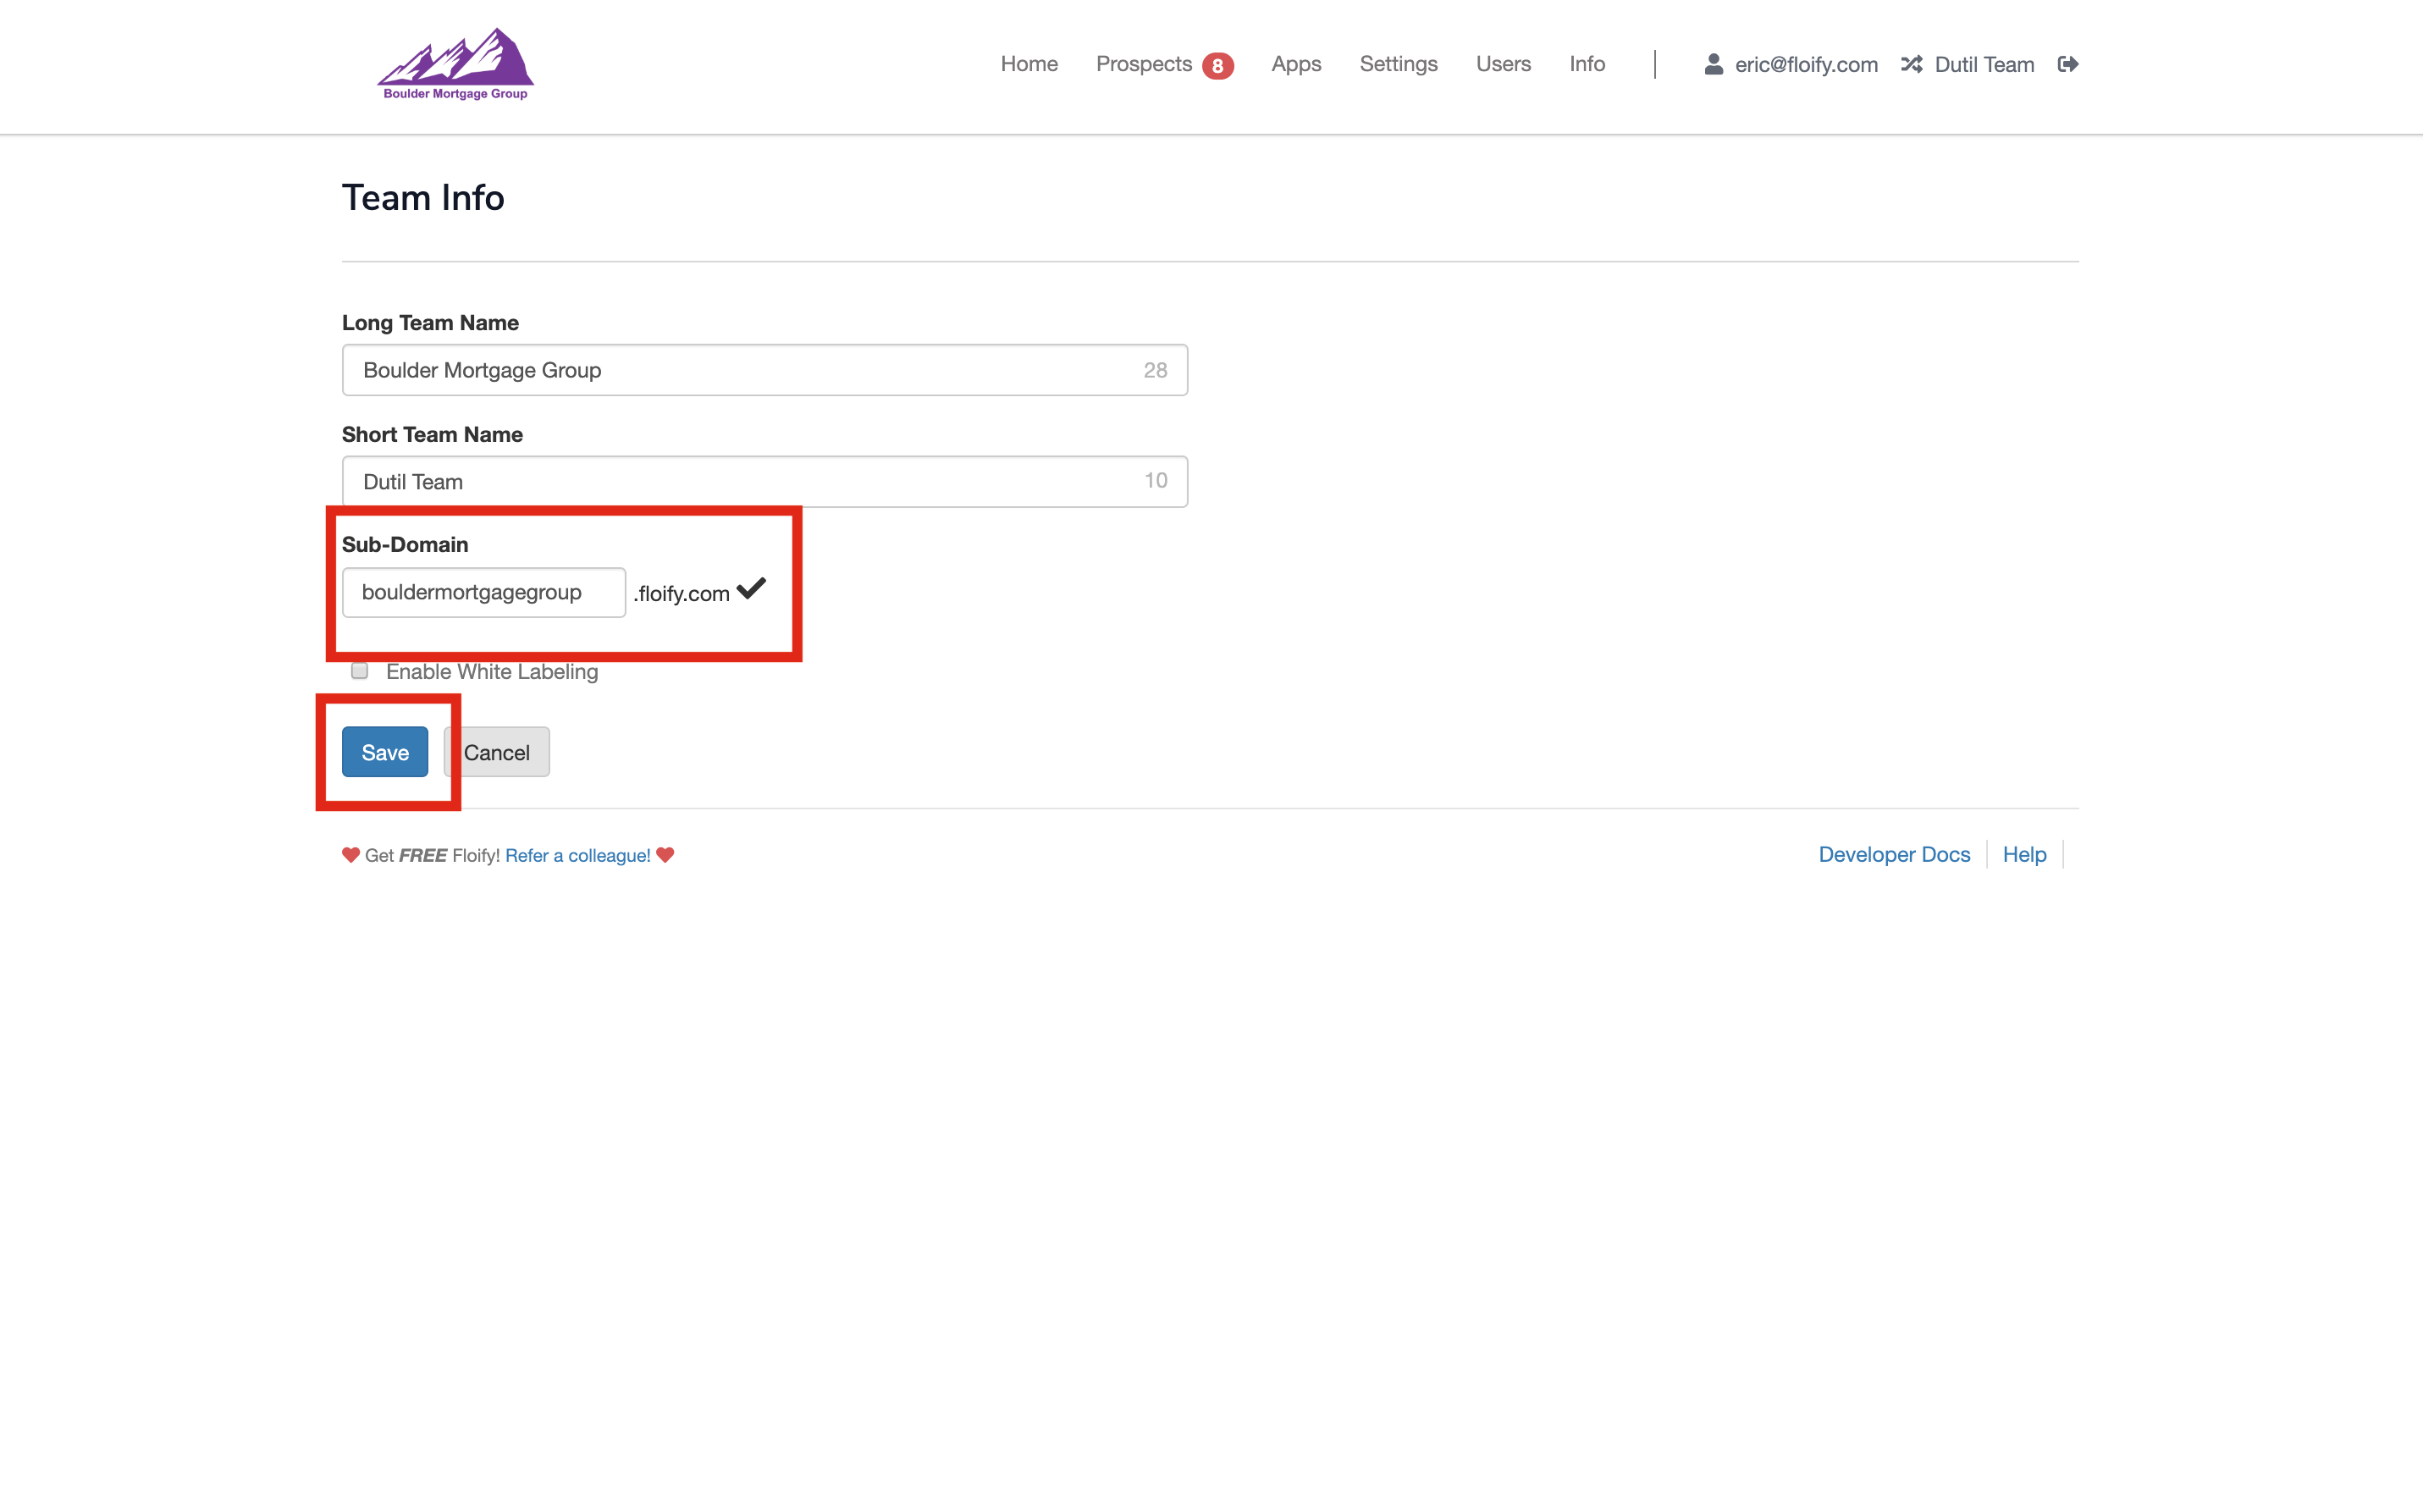
Edit the first portion of the sub-domain as you'd like. Make sure you select Save to confirm the change:
Note: If the sub-domain is not available, you will see a red X to the right; otherwise you will see a checkmark to let you know this sub-domain is available to choose.
Update My Landing Page Headline
From your team pipeline, navigate to Settings and select the Team Info tab:
Scroll down to Landing Page Configuration and select the option to Edit Landing Page Configuration:
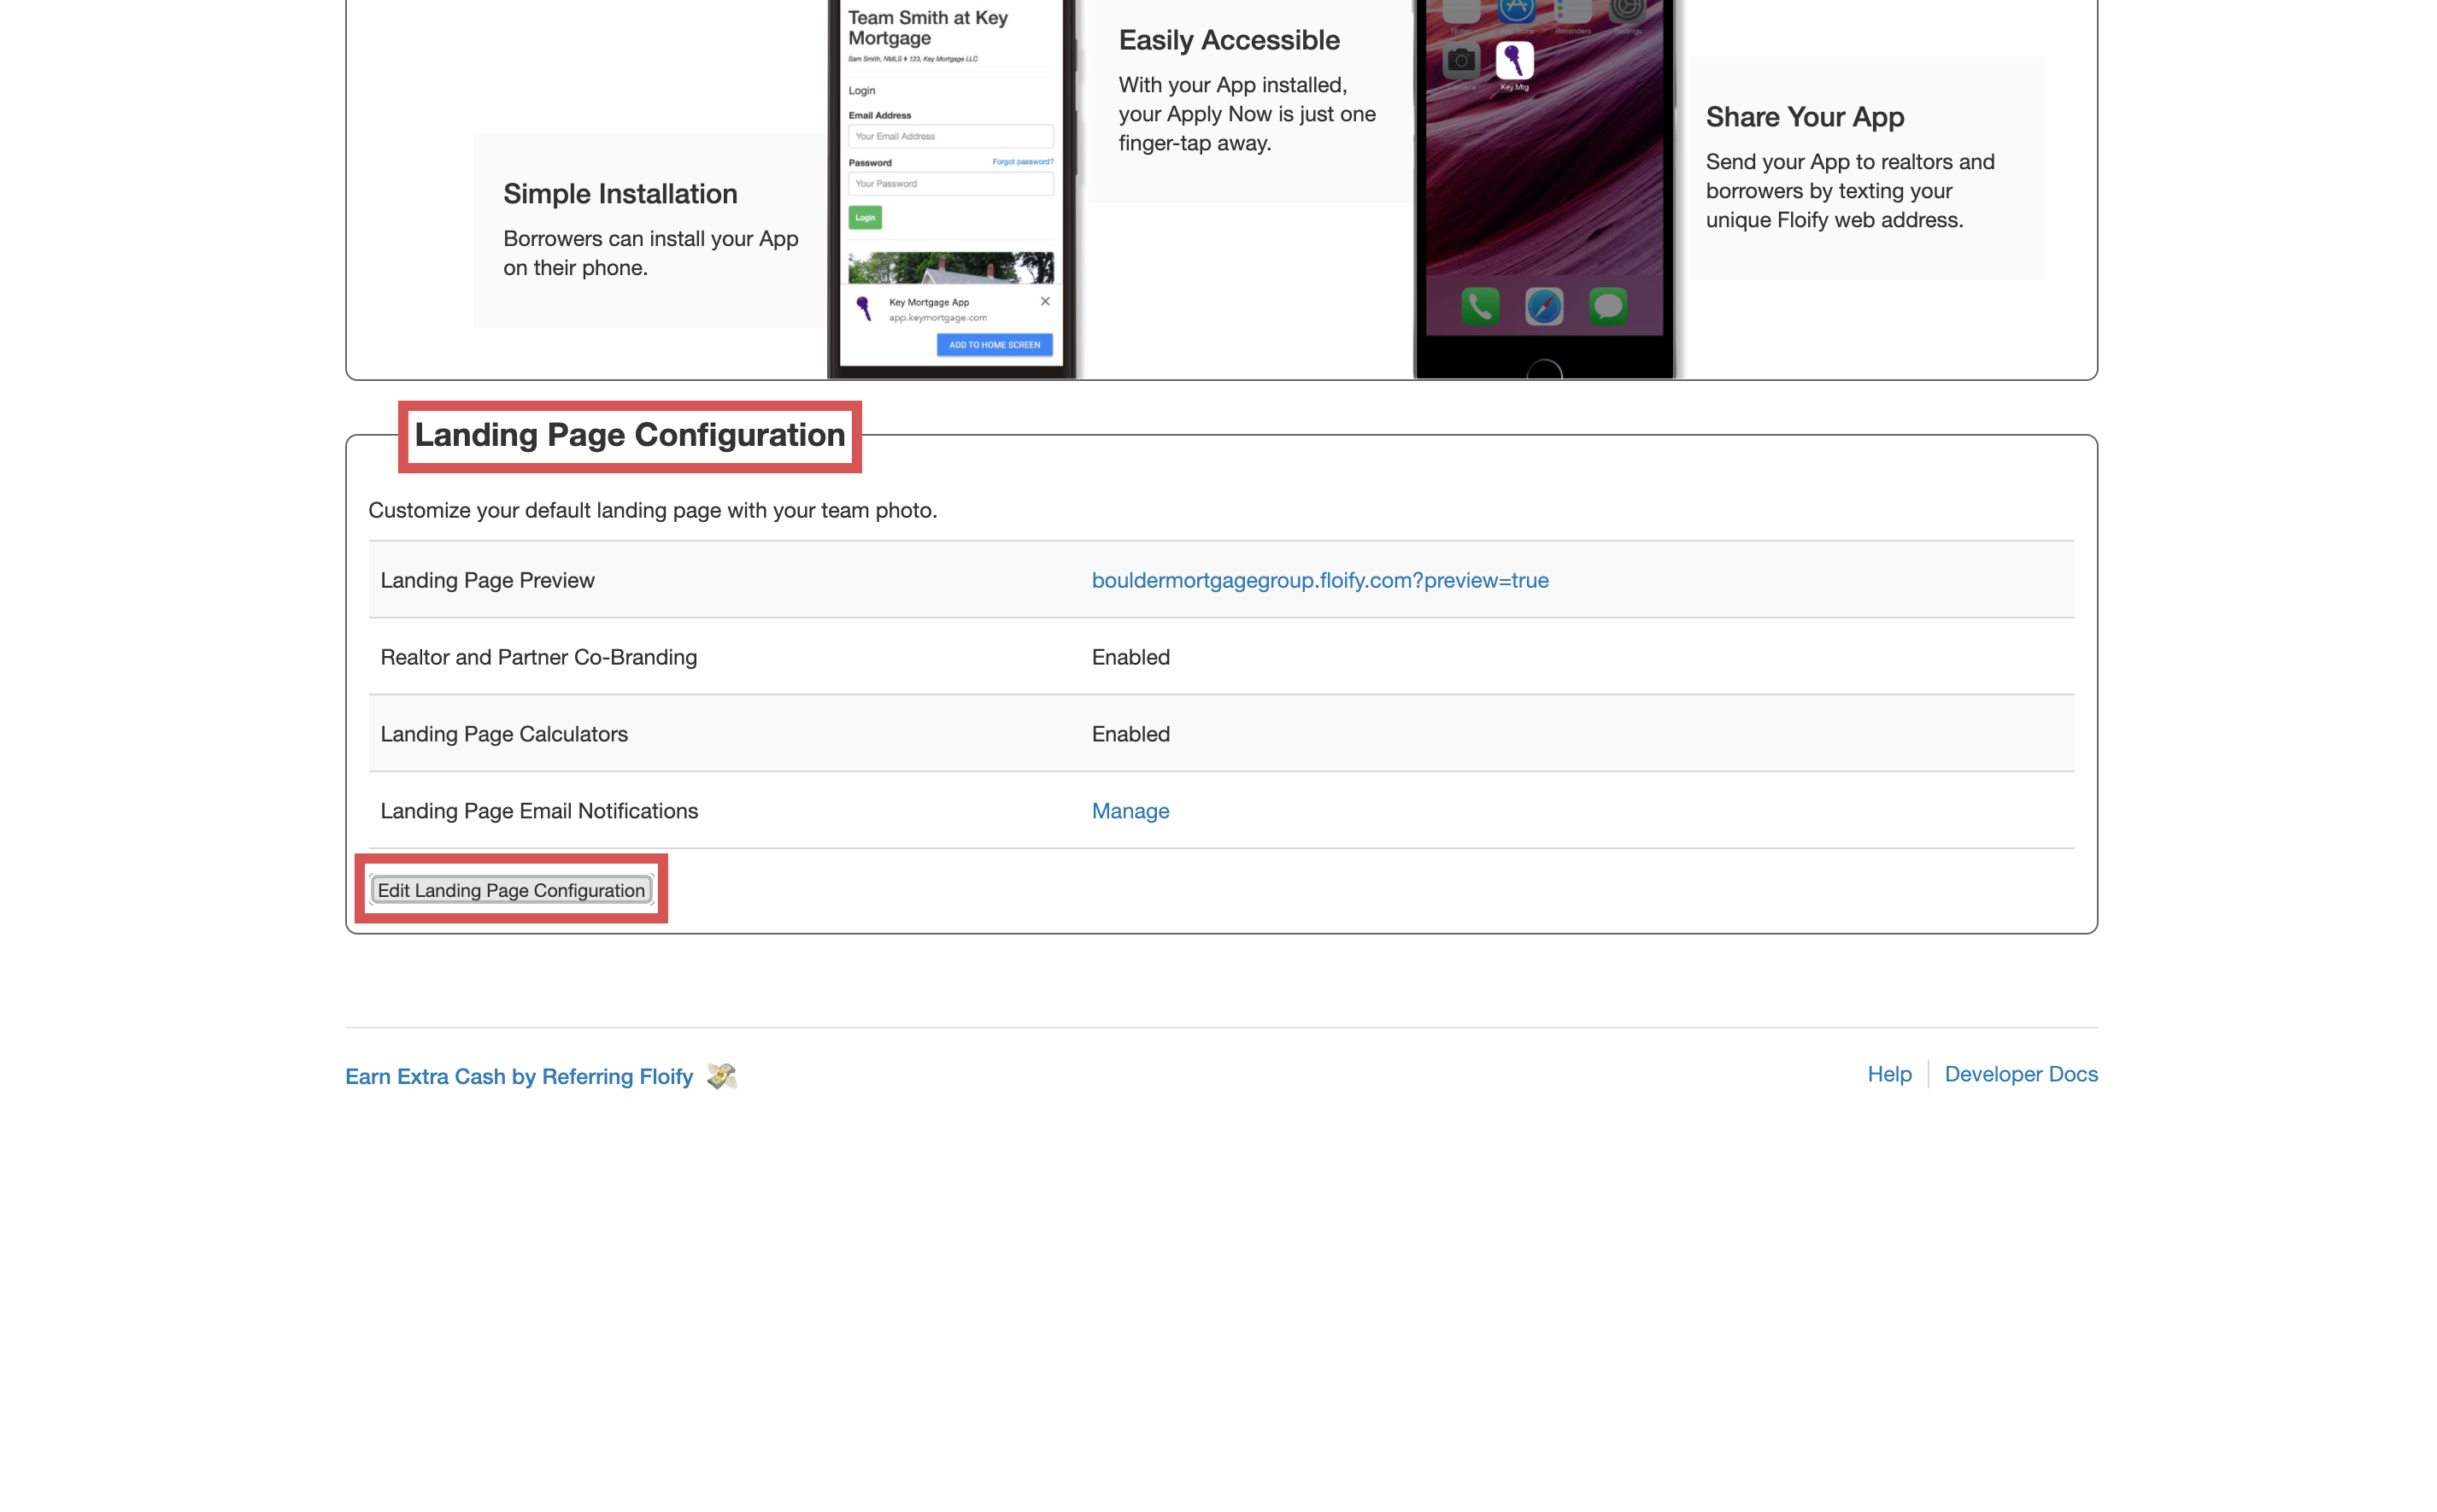
Update your headline as needed. Make sure you select Save to confirm the changes:
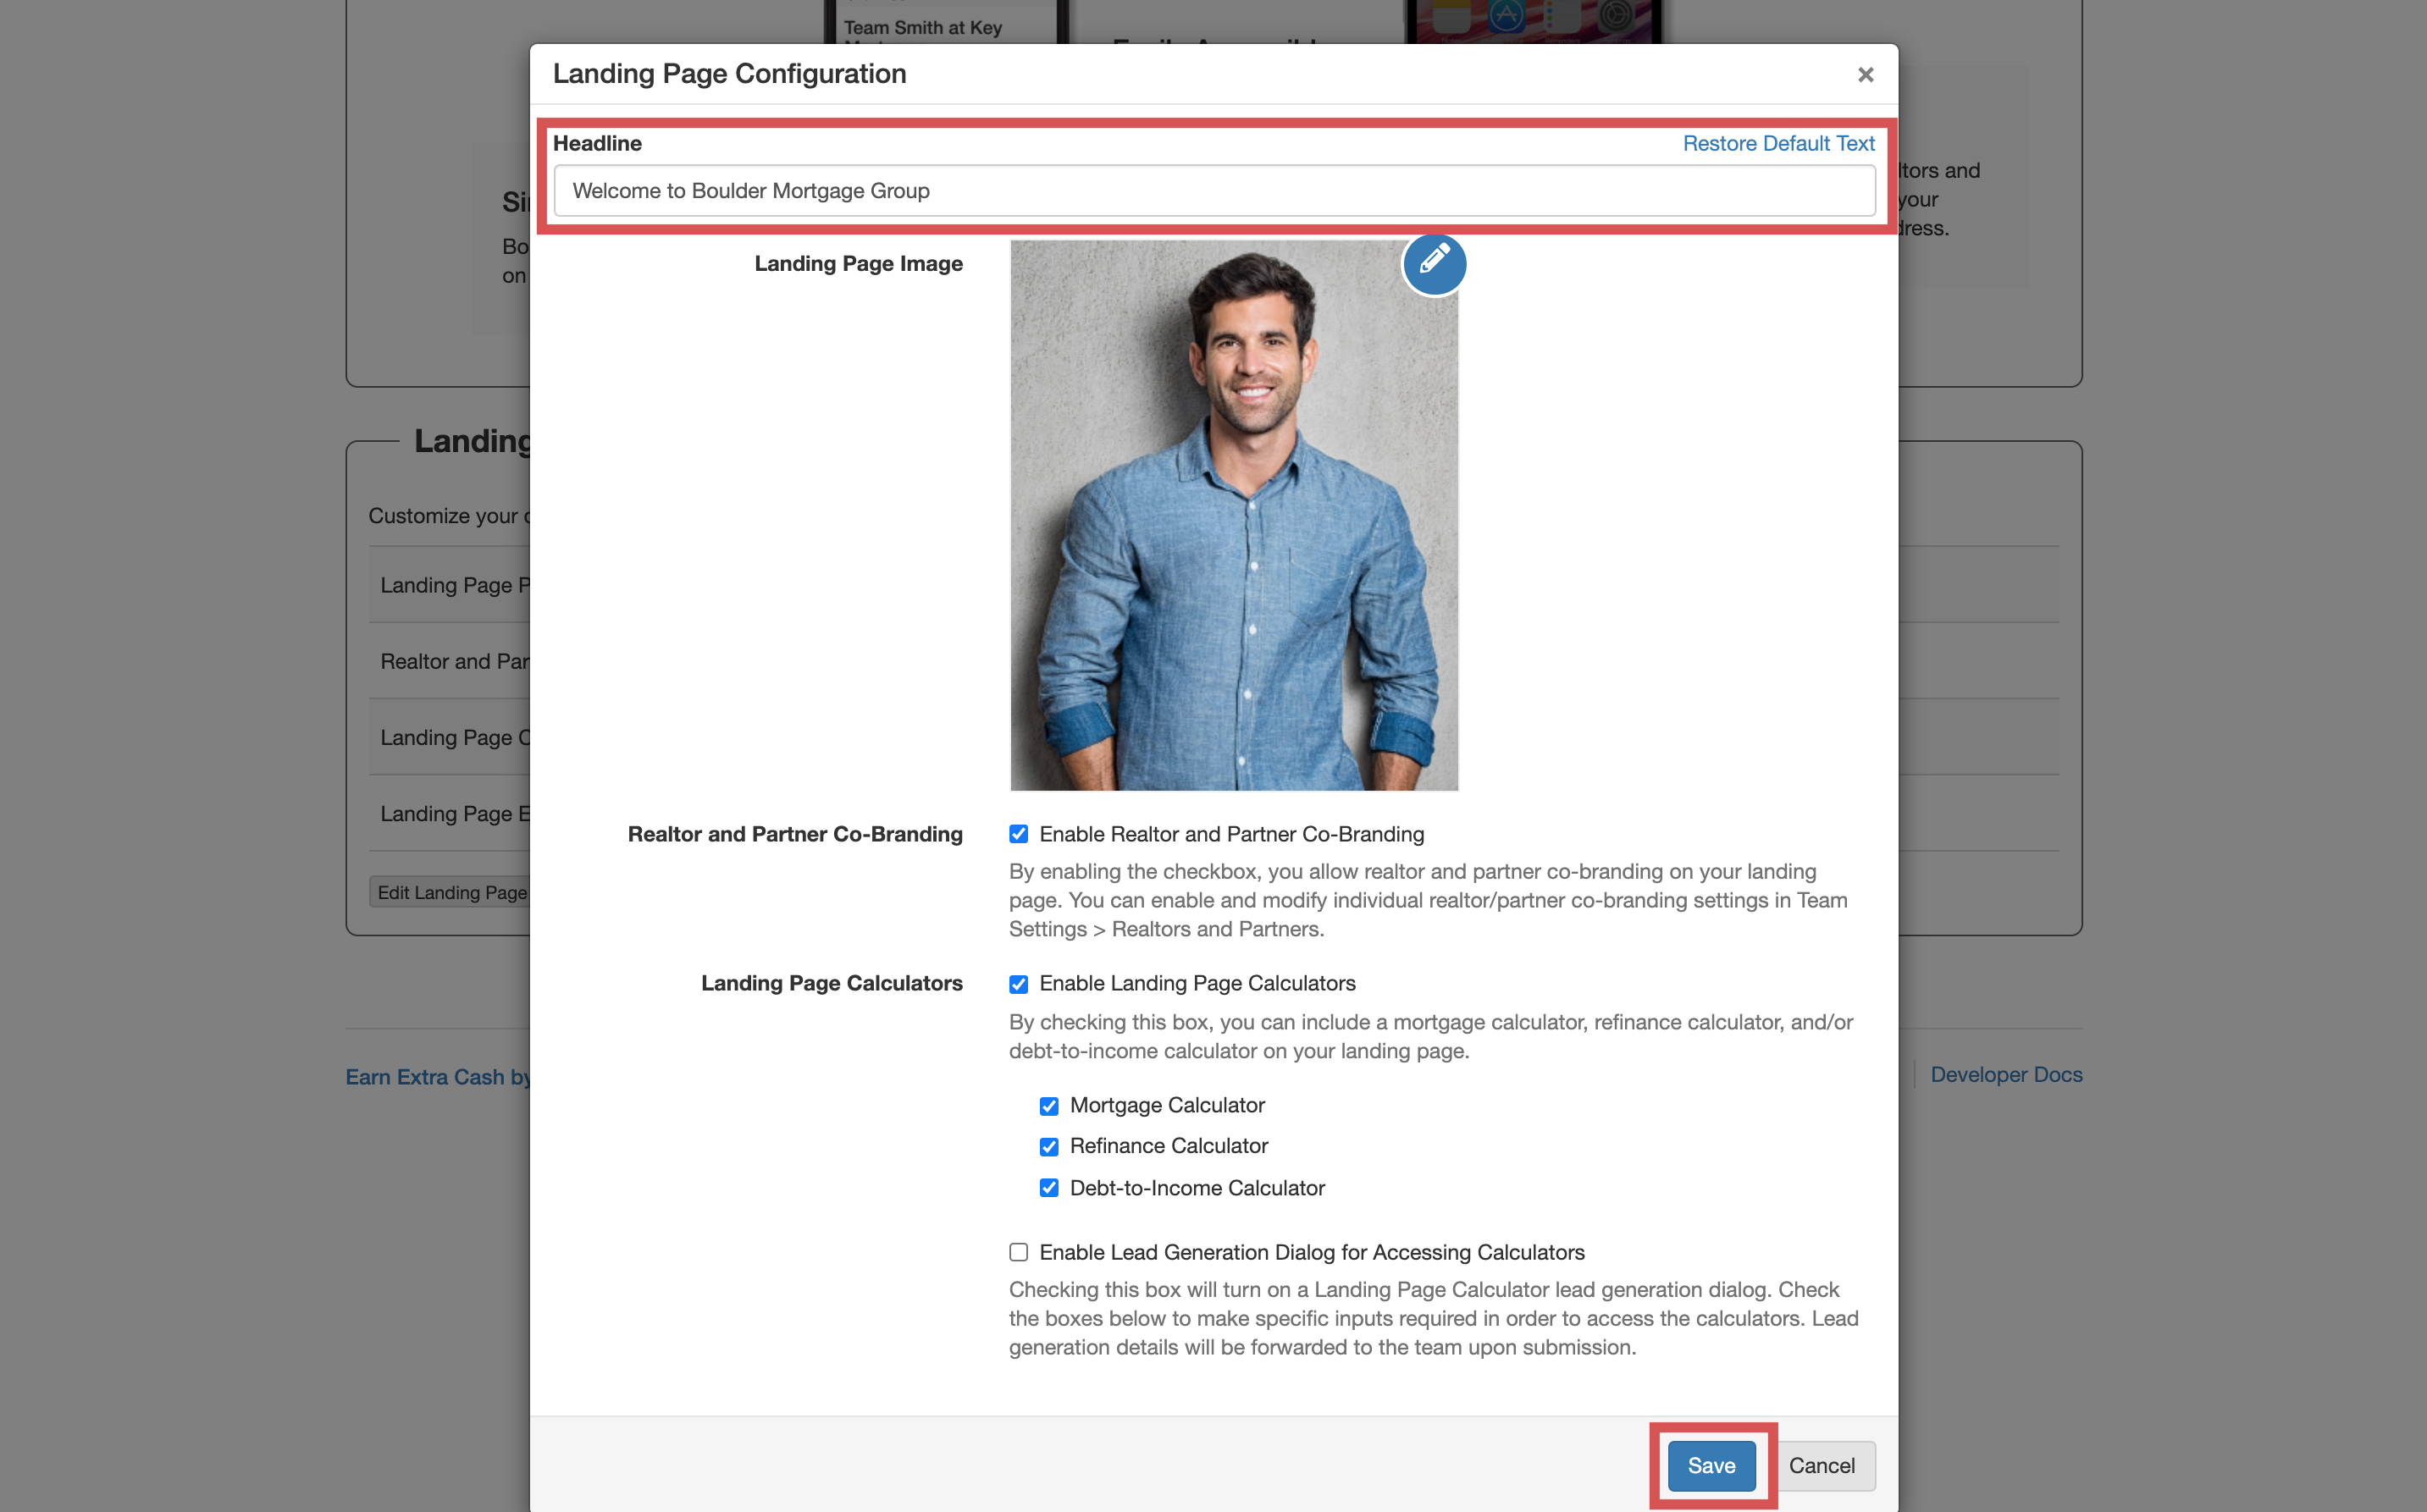
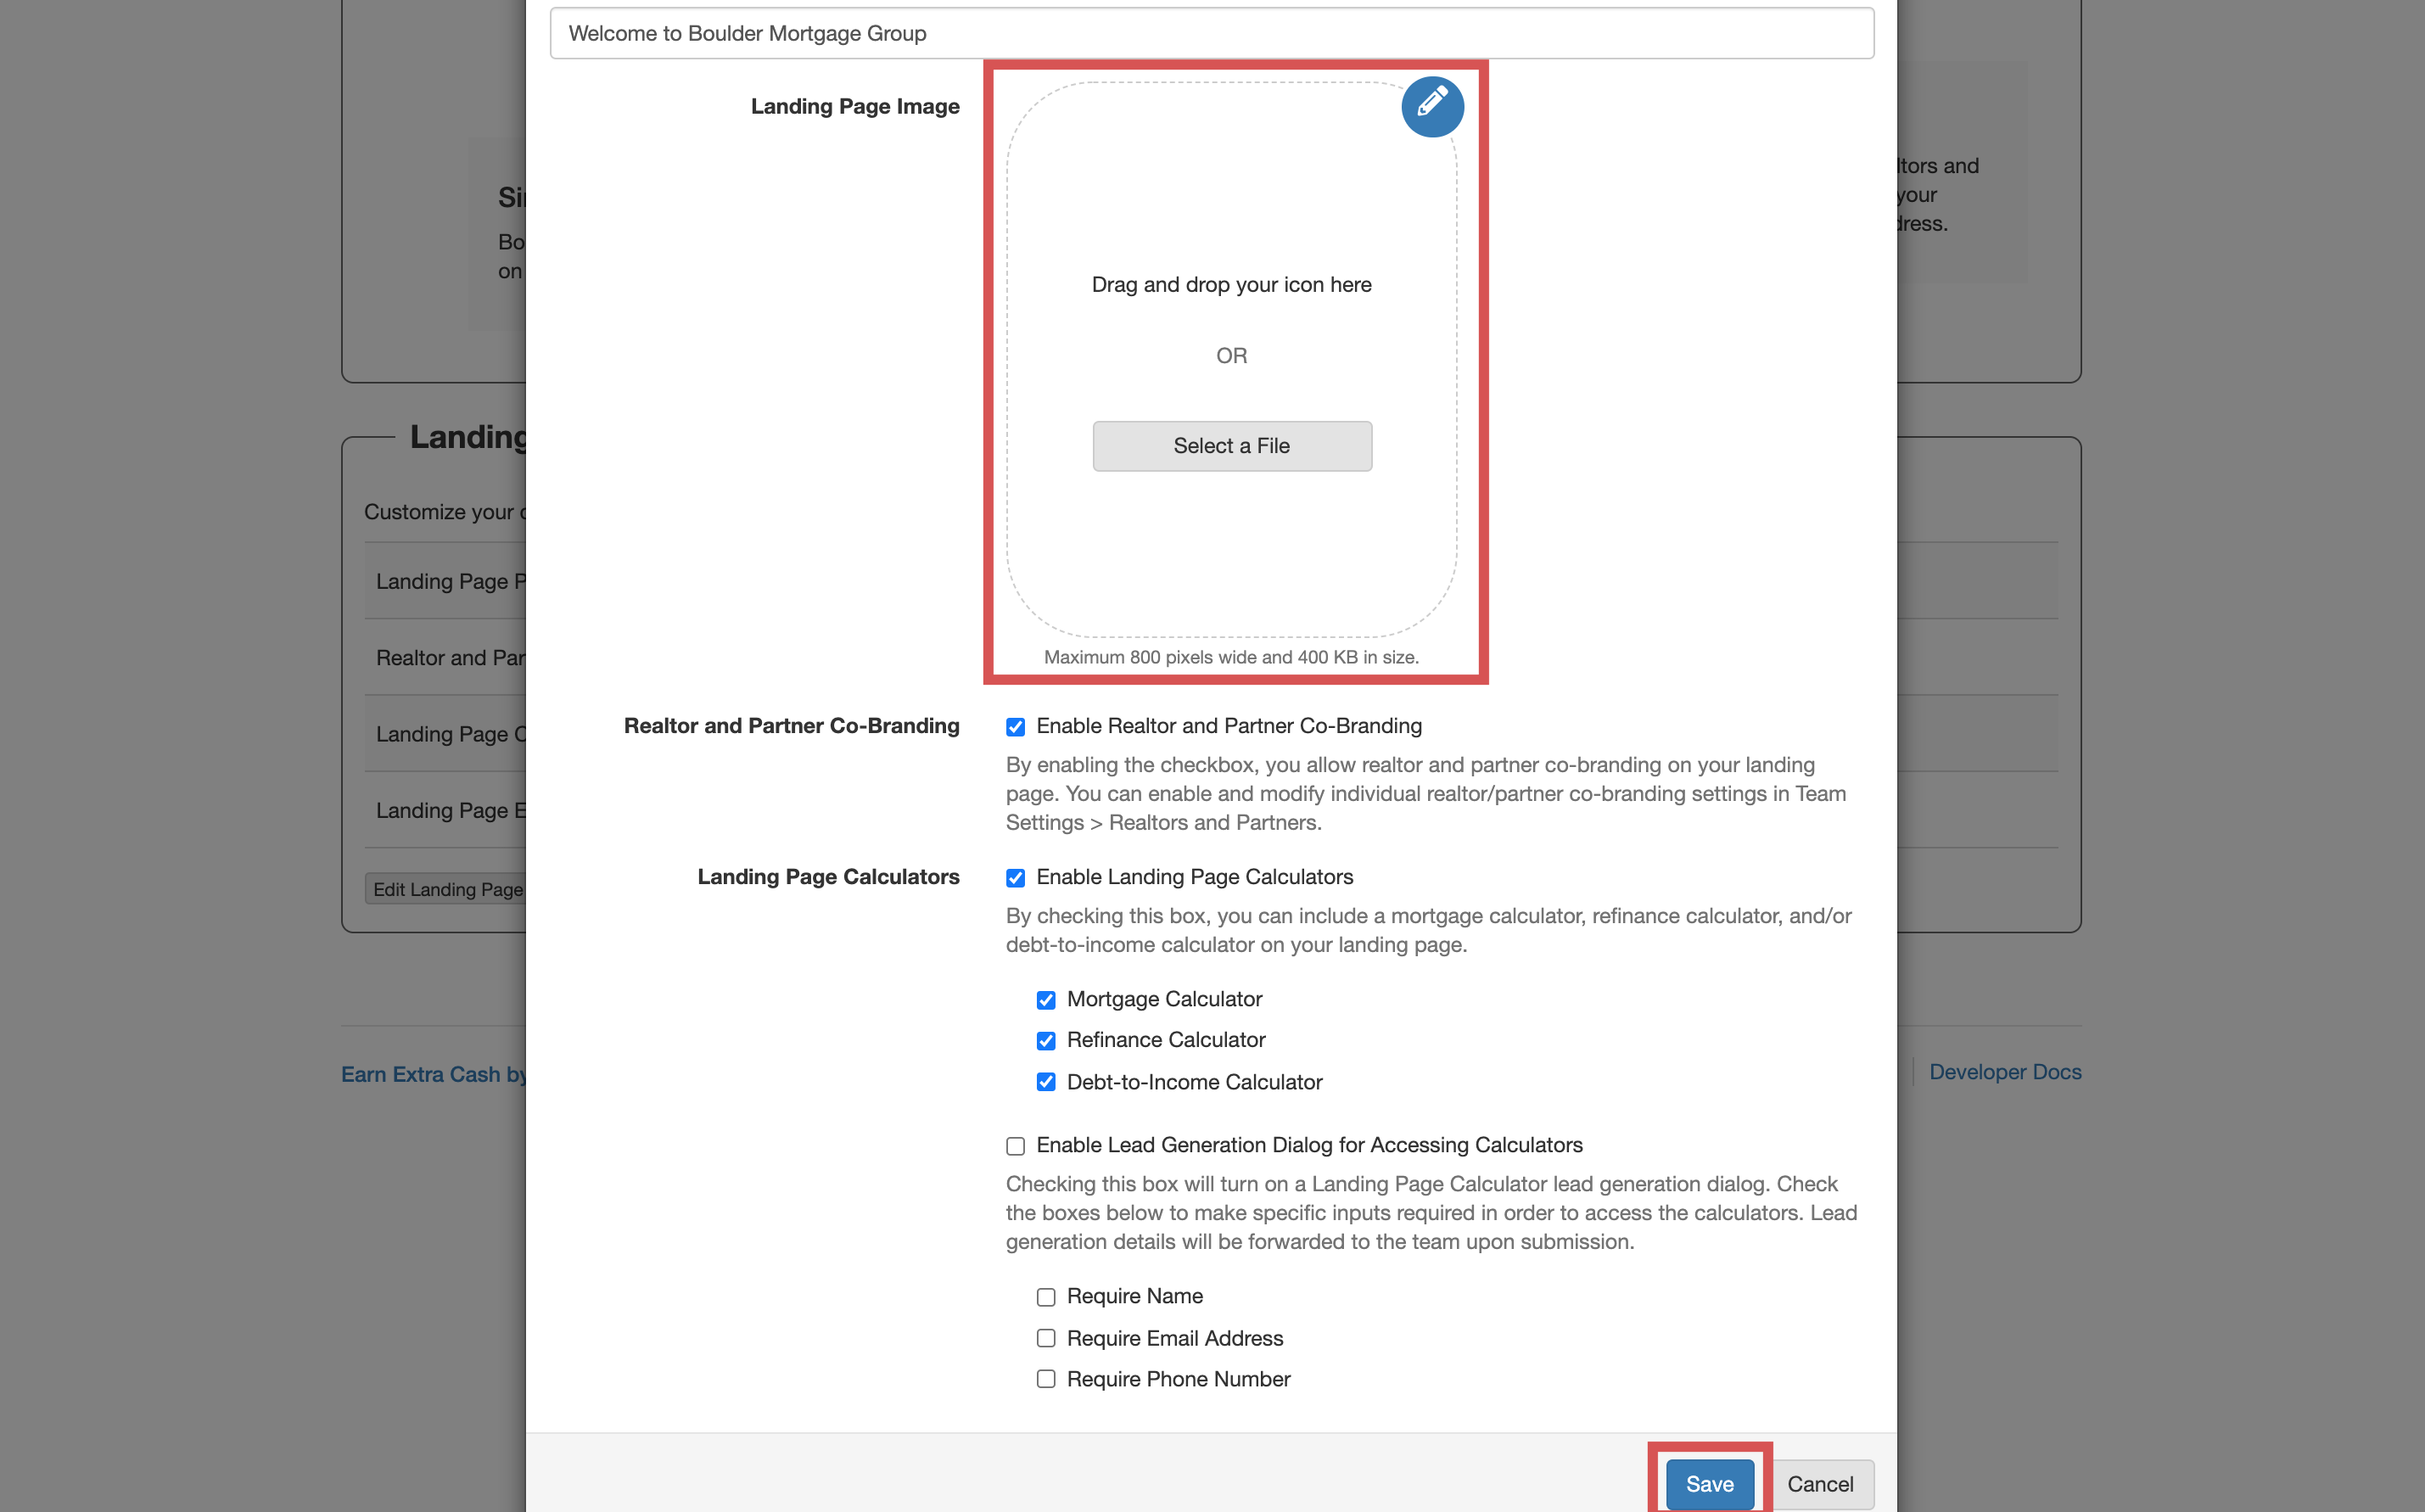
Update My Landing Page Image
From your team pipeline, navigate to Settings and select the Team Info tab:
Scroll down to Landing Page Configuration and select the option to Edit Landing Page Configuration:
Select the pencil icon in the right corner of the image, and then Change Photo:

This will allow you to drag and drop an image into the field or select a file from your computer. Make sure you select Save to confirm the changes:
Note: The maximum file size is 800 pixels wide and 400 KB in size.
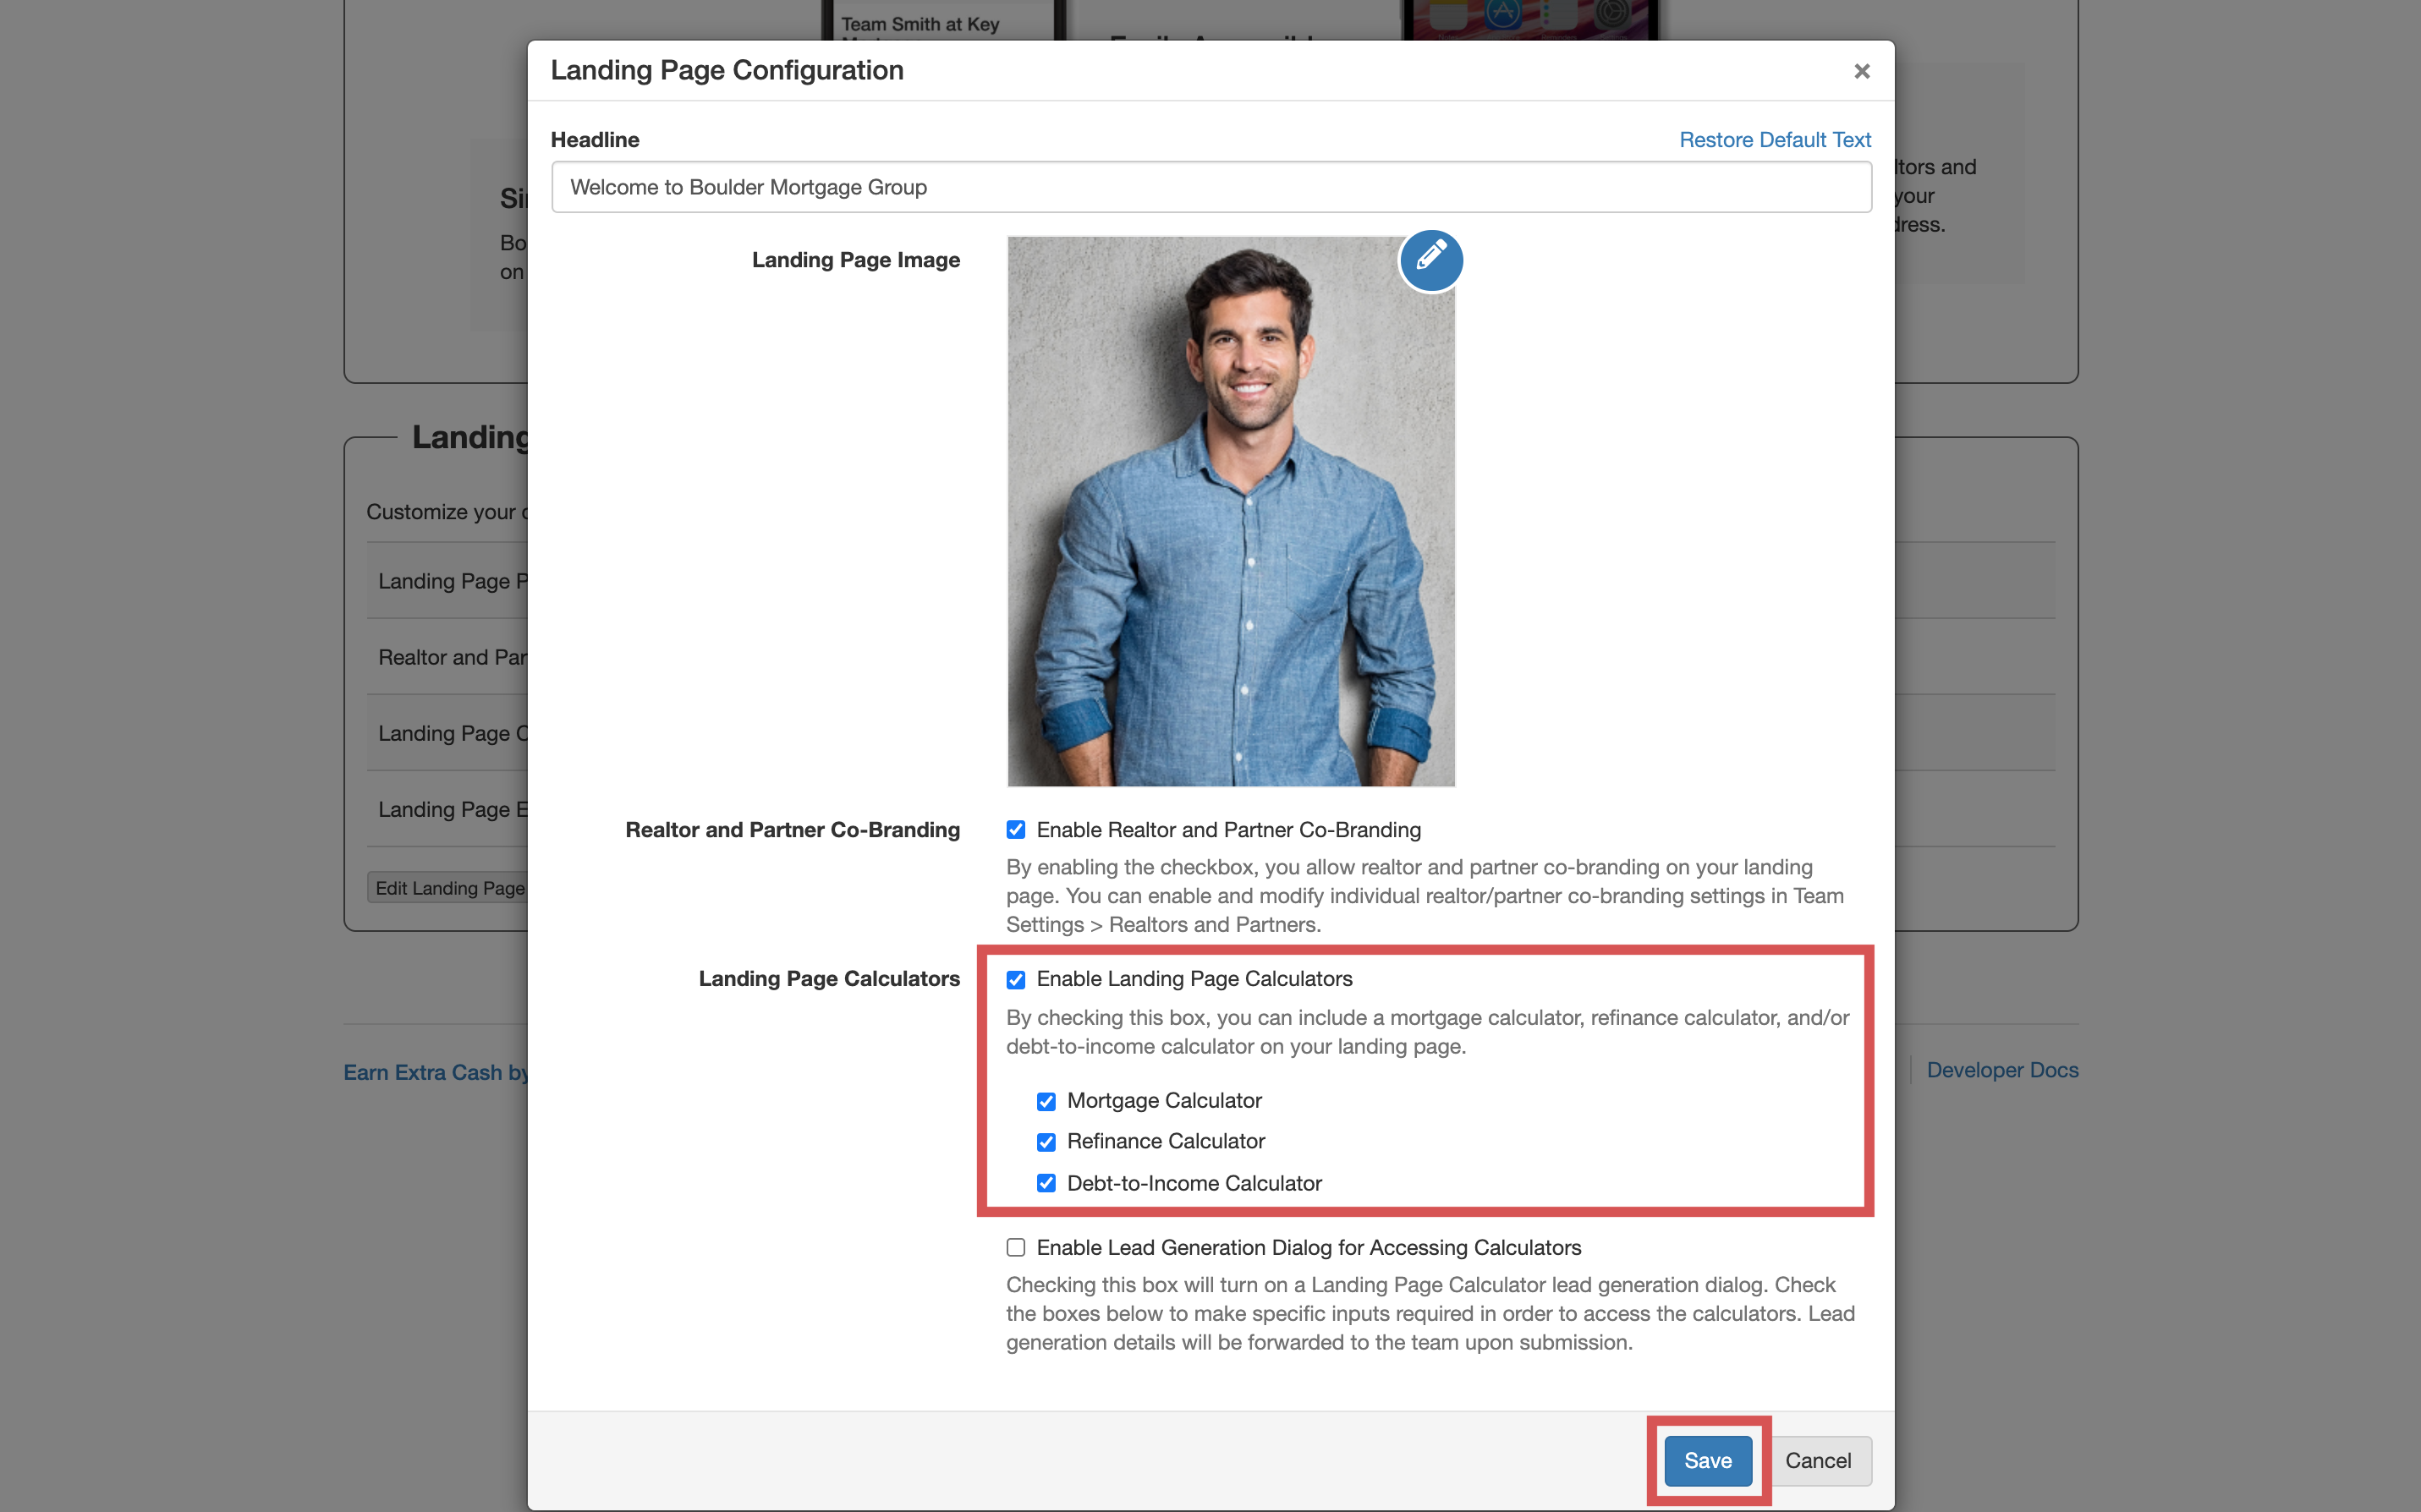
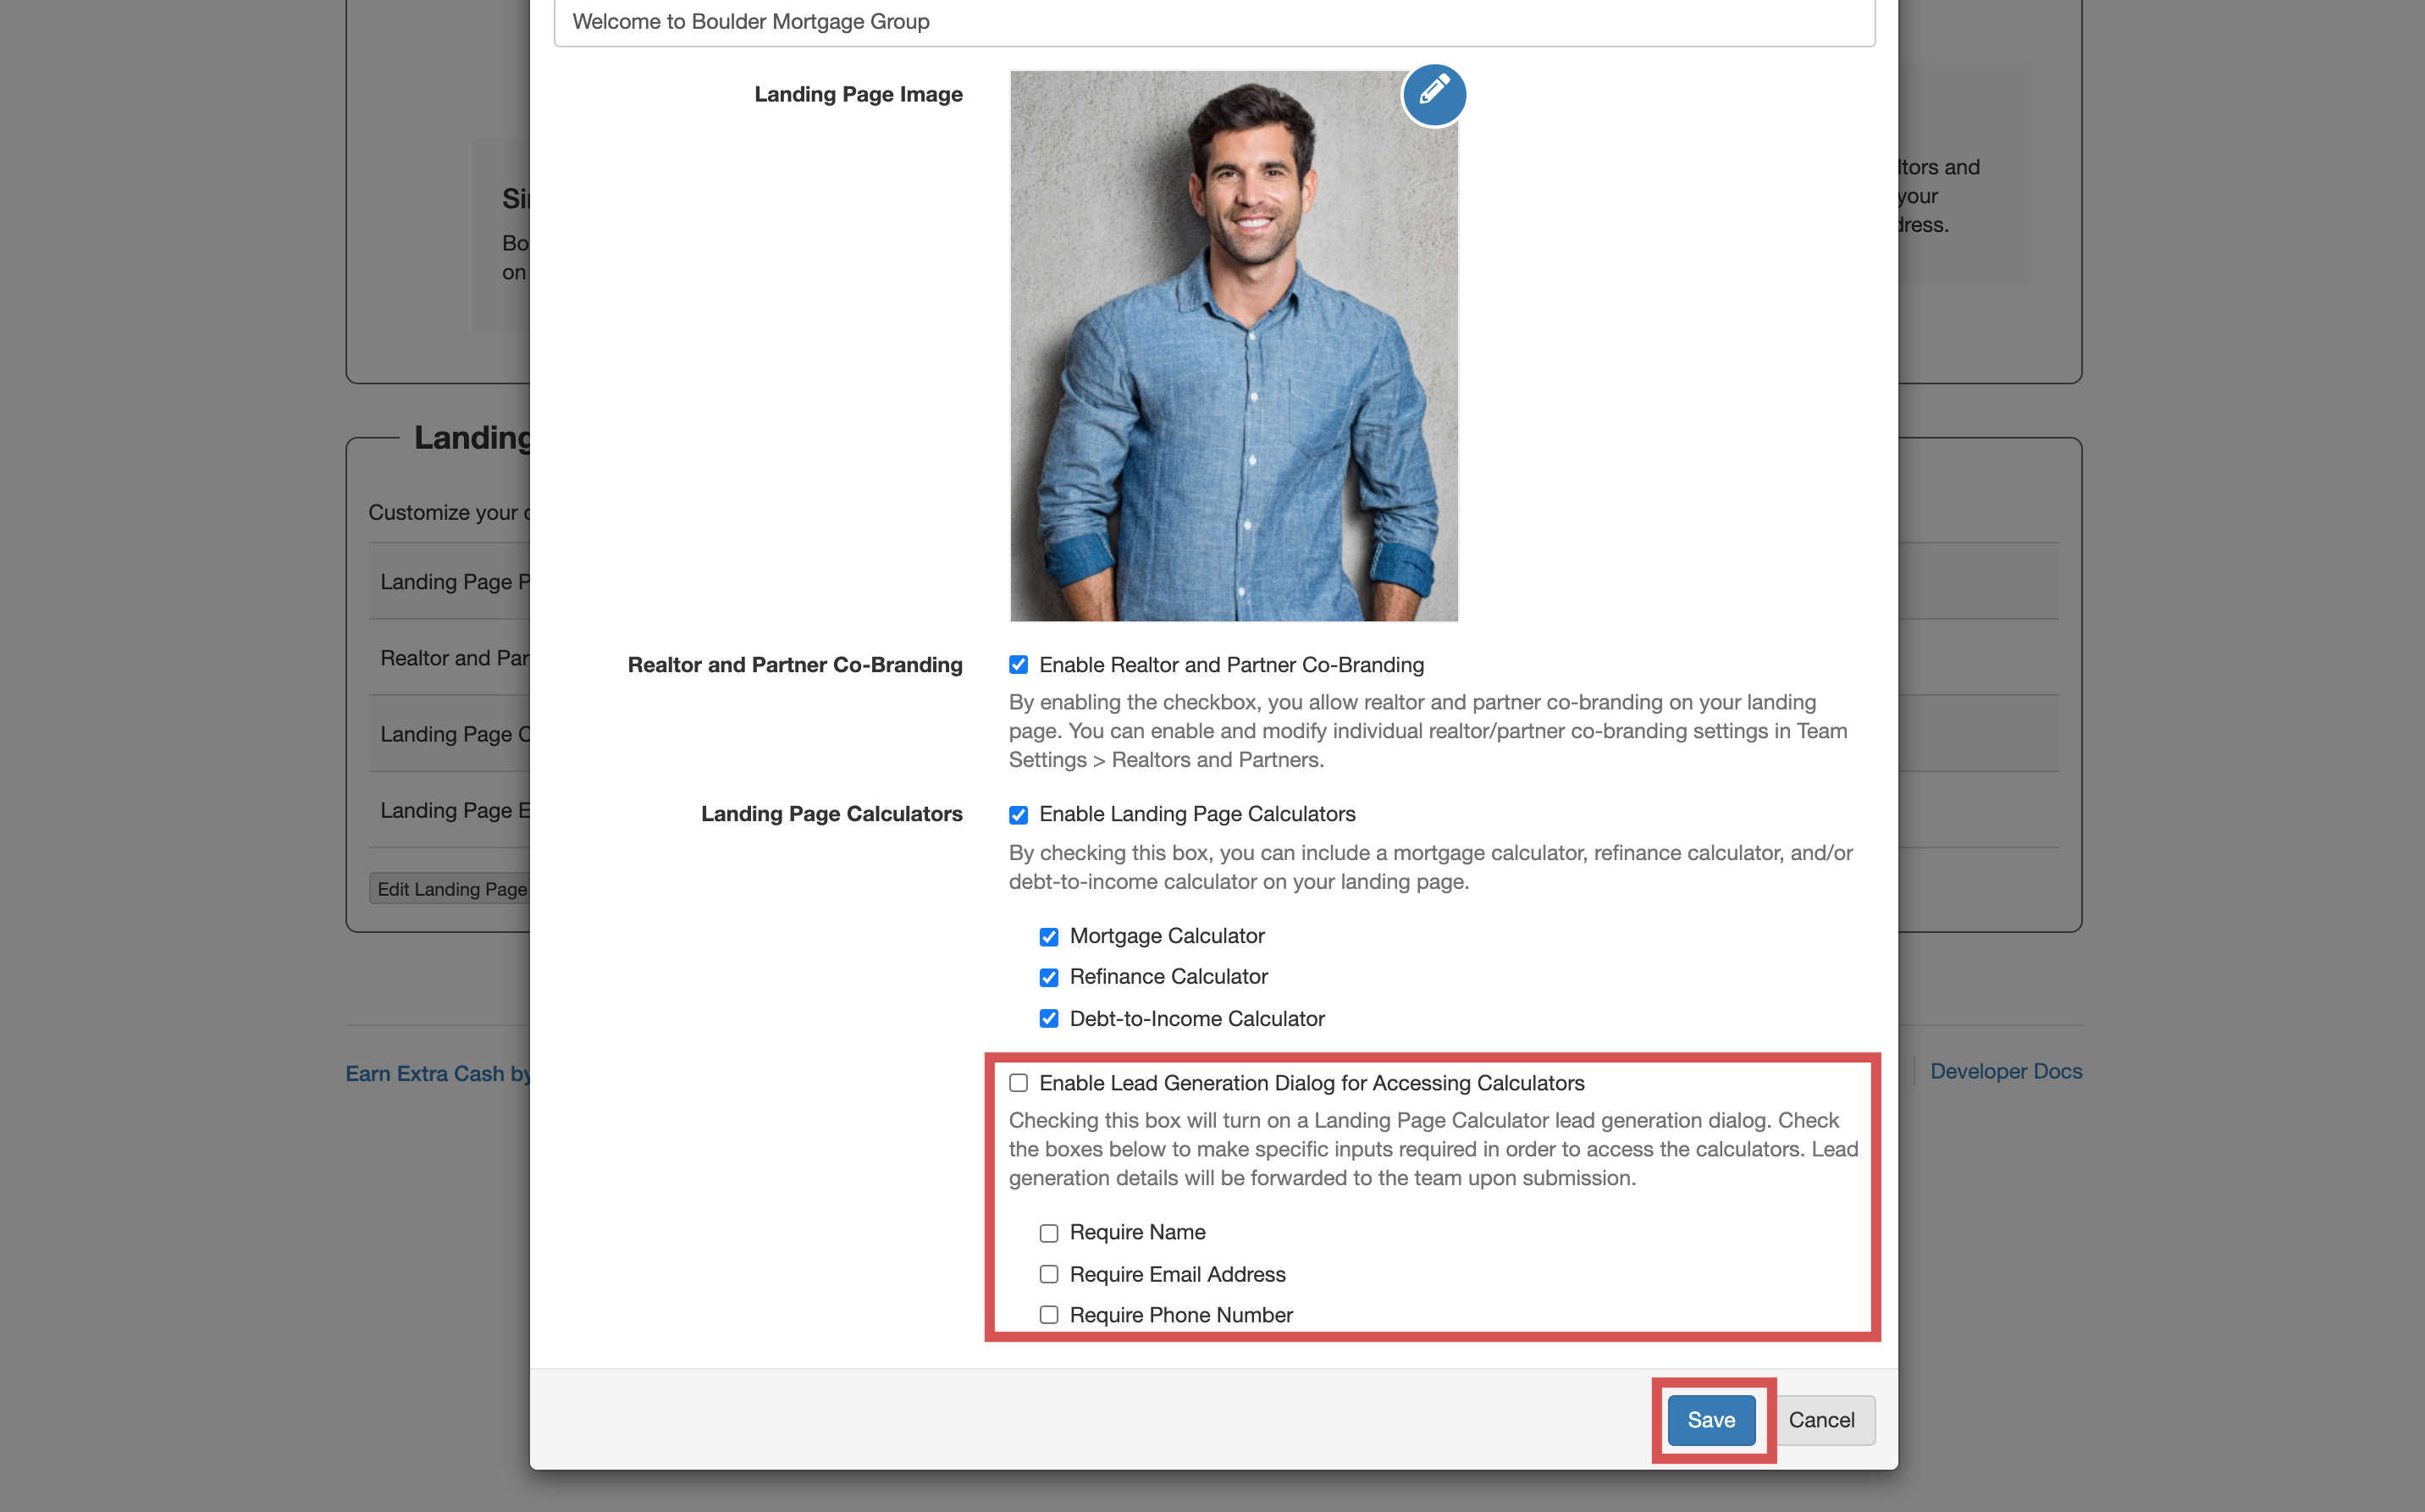
Enable or Disable My Landing Page Calculators
From your team pipeline, navigate to Settings and select the Team Info tab:
Scroll down to Landing Page Configuration and select the option to Edit Landing Page Configuration:
Select or unselect the option to Enable Landing Page Calculators.You will then be able to choose which of the 3 calculators you'd like to include. Make sure you select Save to confirm the changes:
Enable or Disable Lead Generation While Accessing Mortgage Calculators
From your team pipeline, navigate to Settings and select the Team Info tab:
Scroll down to Landing Page Configuration and select the option to Edit Landing Page Configuration:
Select or unselect the option to Enable Lead Generation Dialogue For Accessing Calculators. You will then be able to select which fields you'd like to make required (Name, Email Address, or Phone Number). Make sure you select Save to confirm the changes:
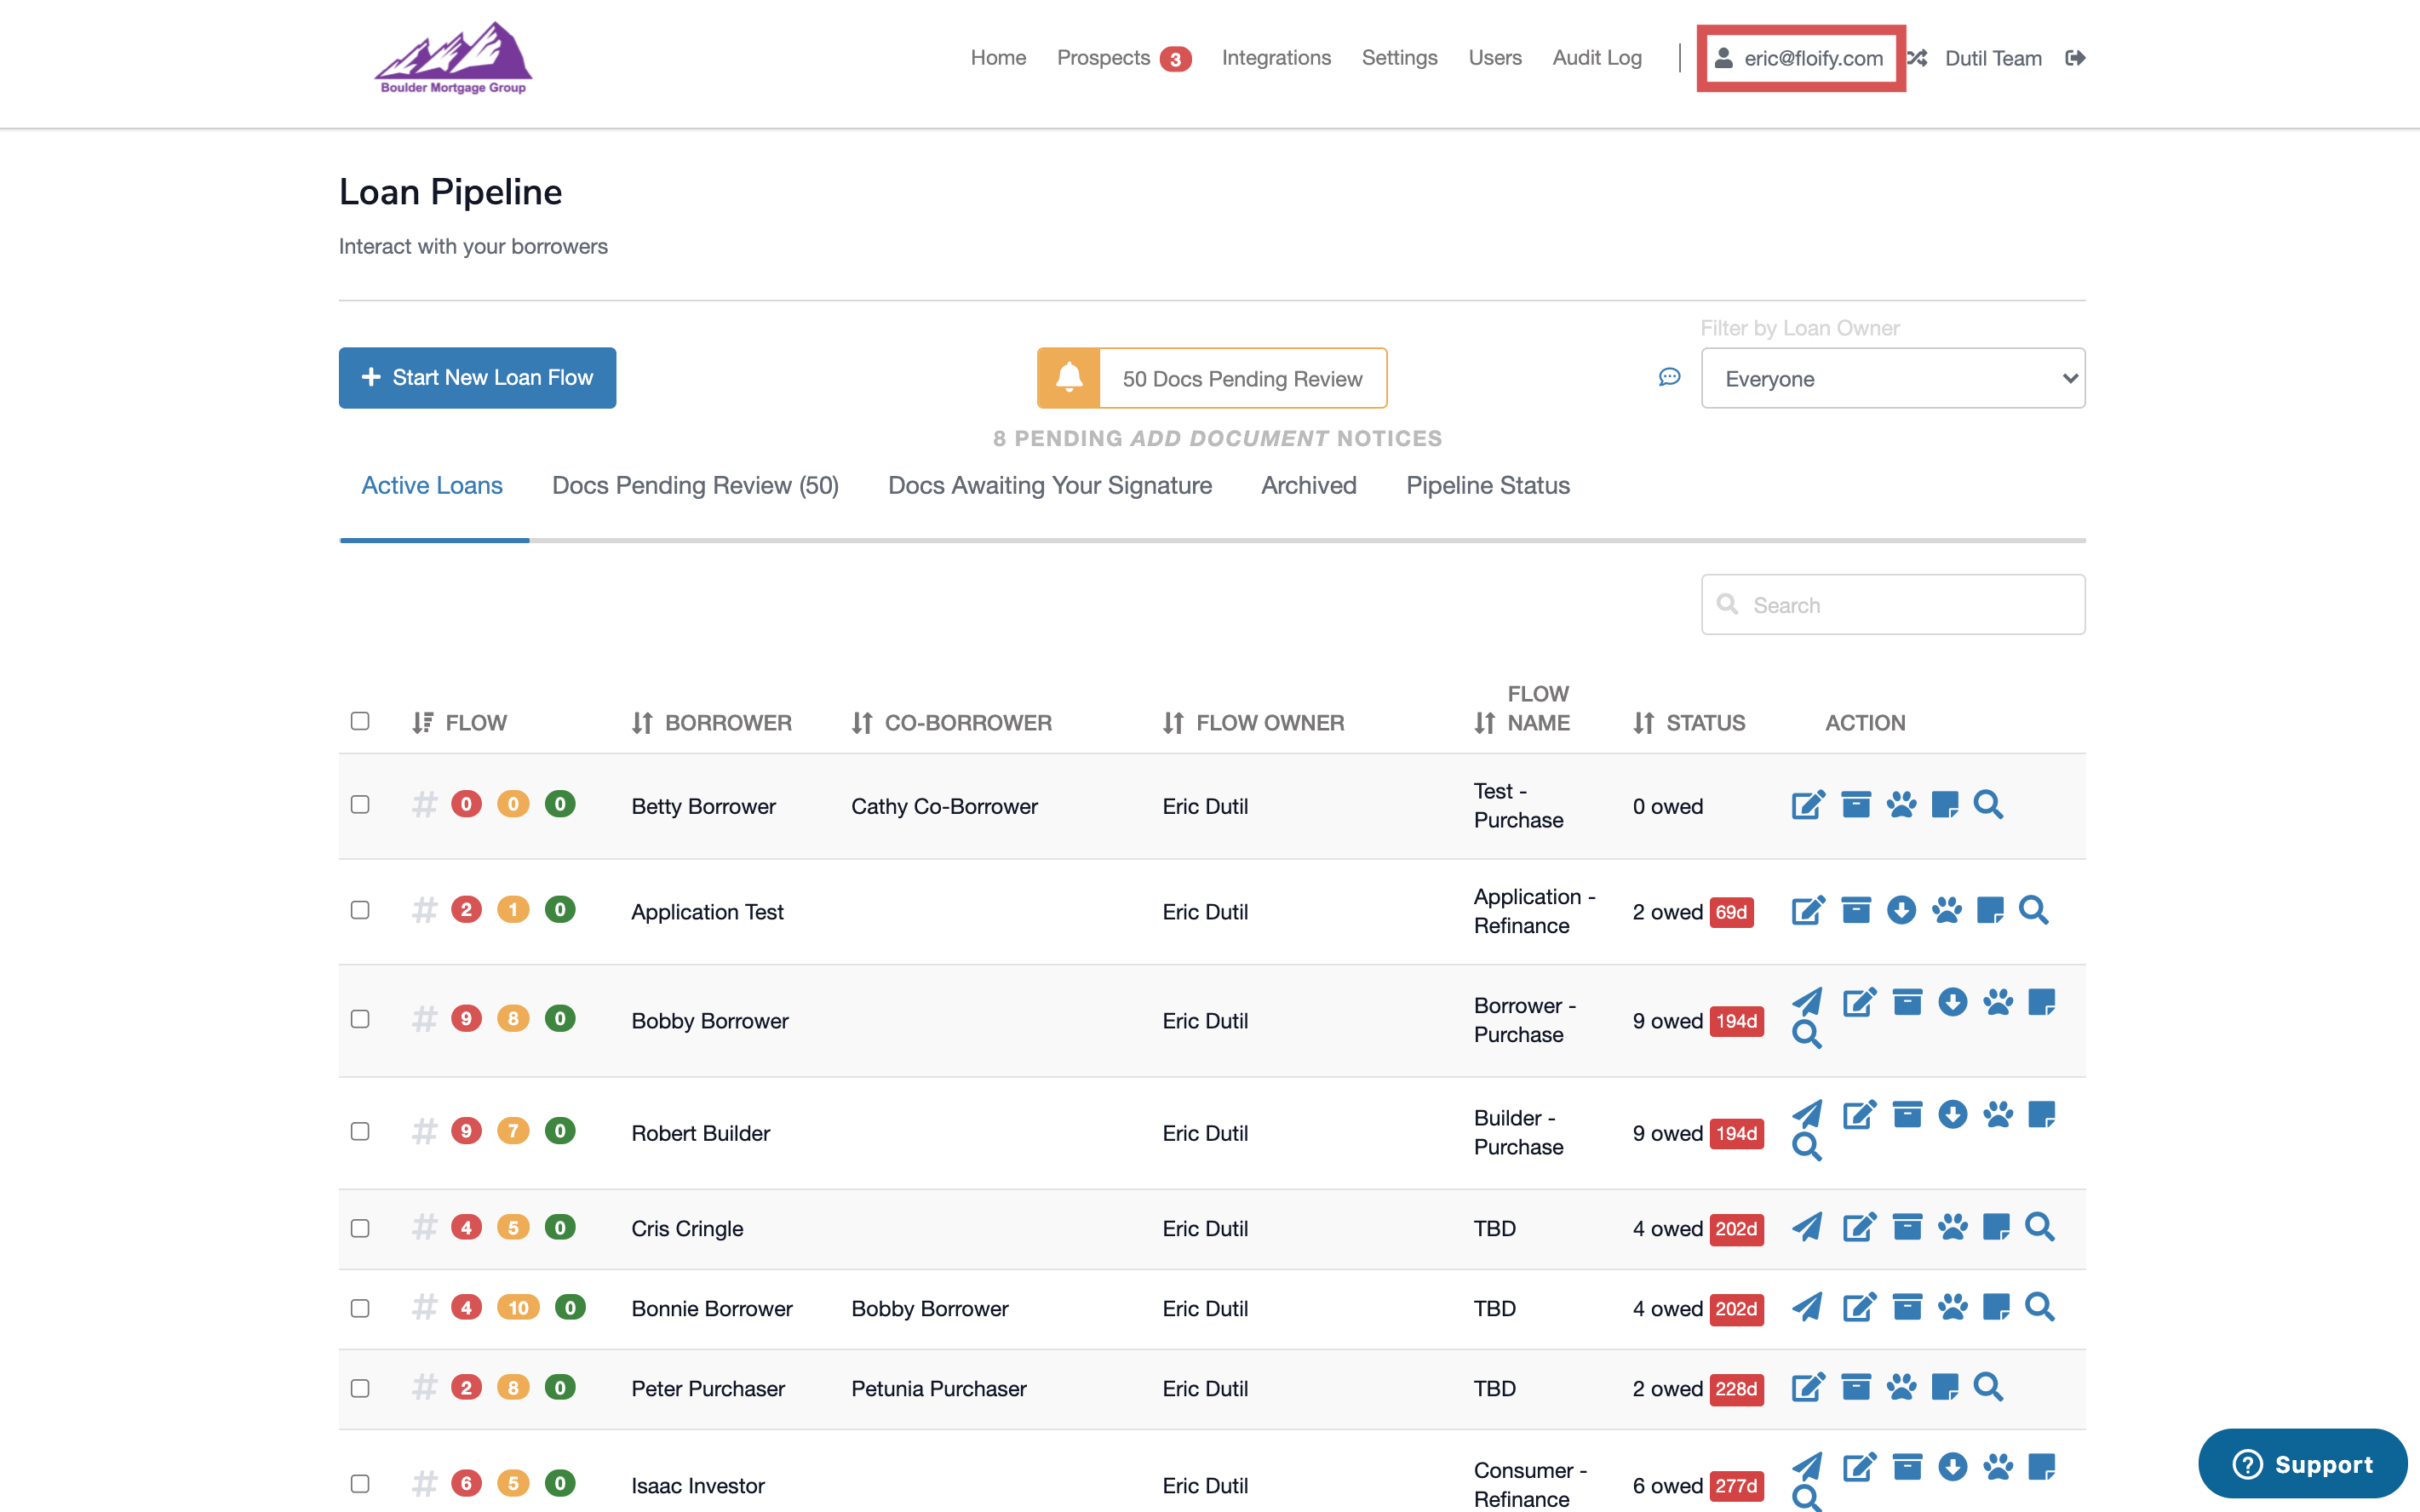
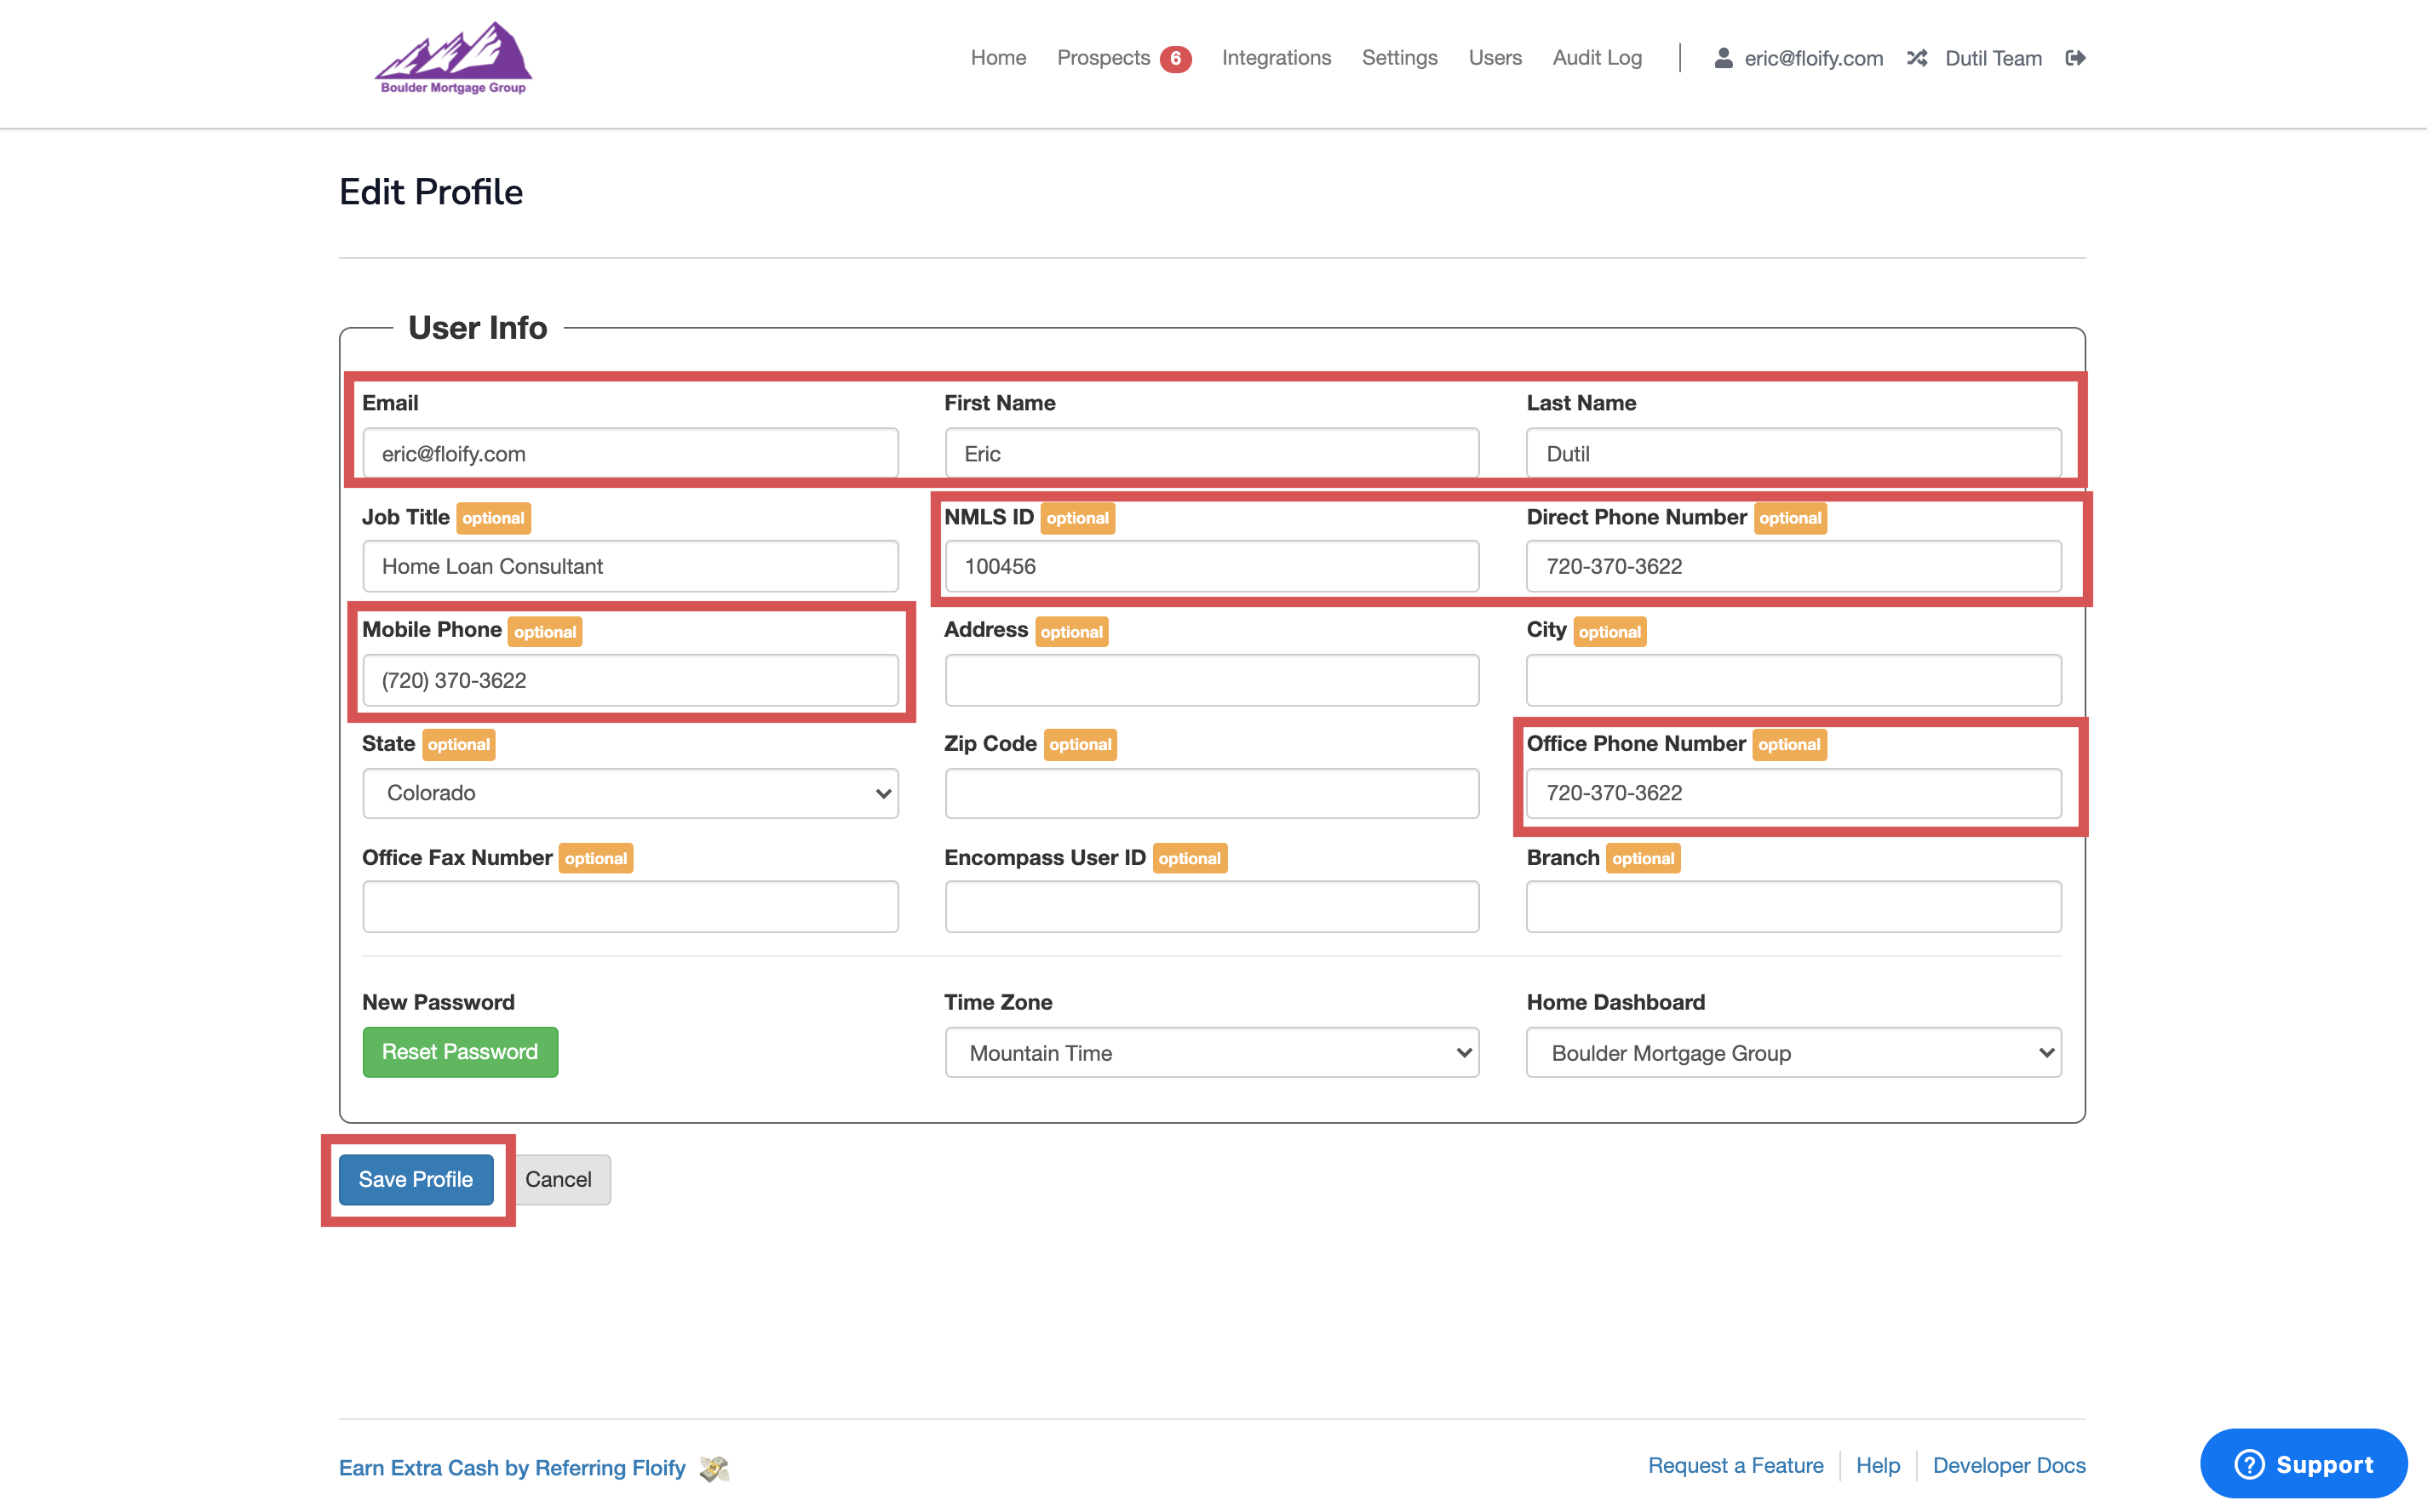
Update My Profile Information on the Landing Page
From the team pipeline, select your email address in the top right-hand corner:
In the Profile section, select Edit Profile:
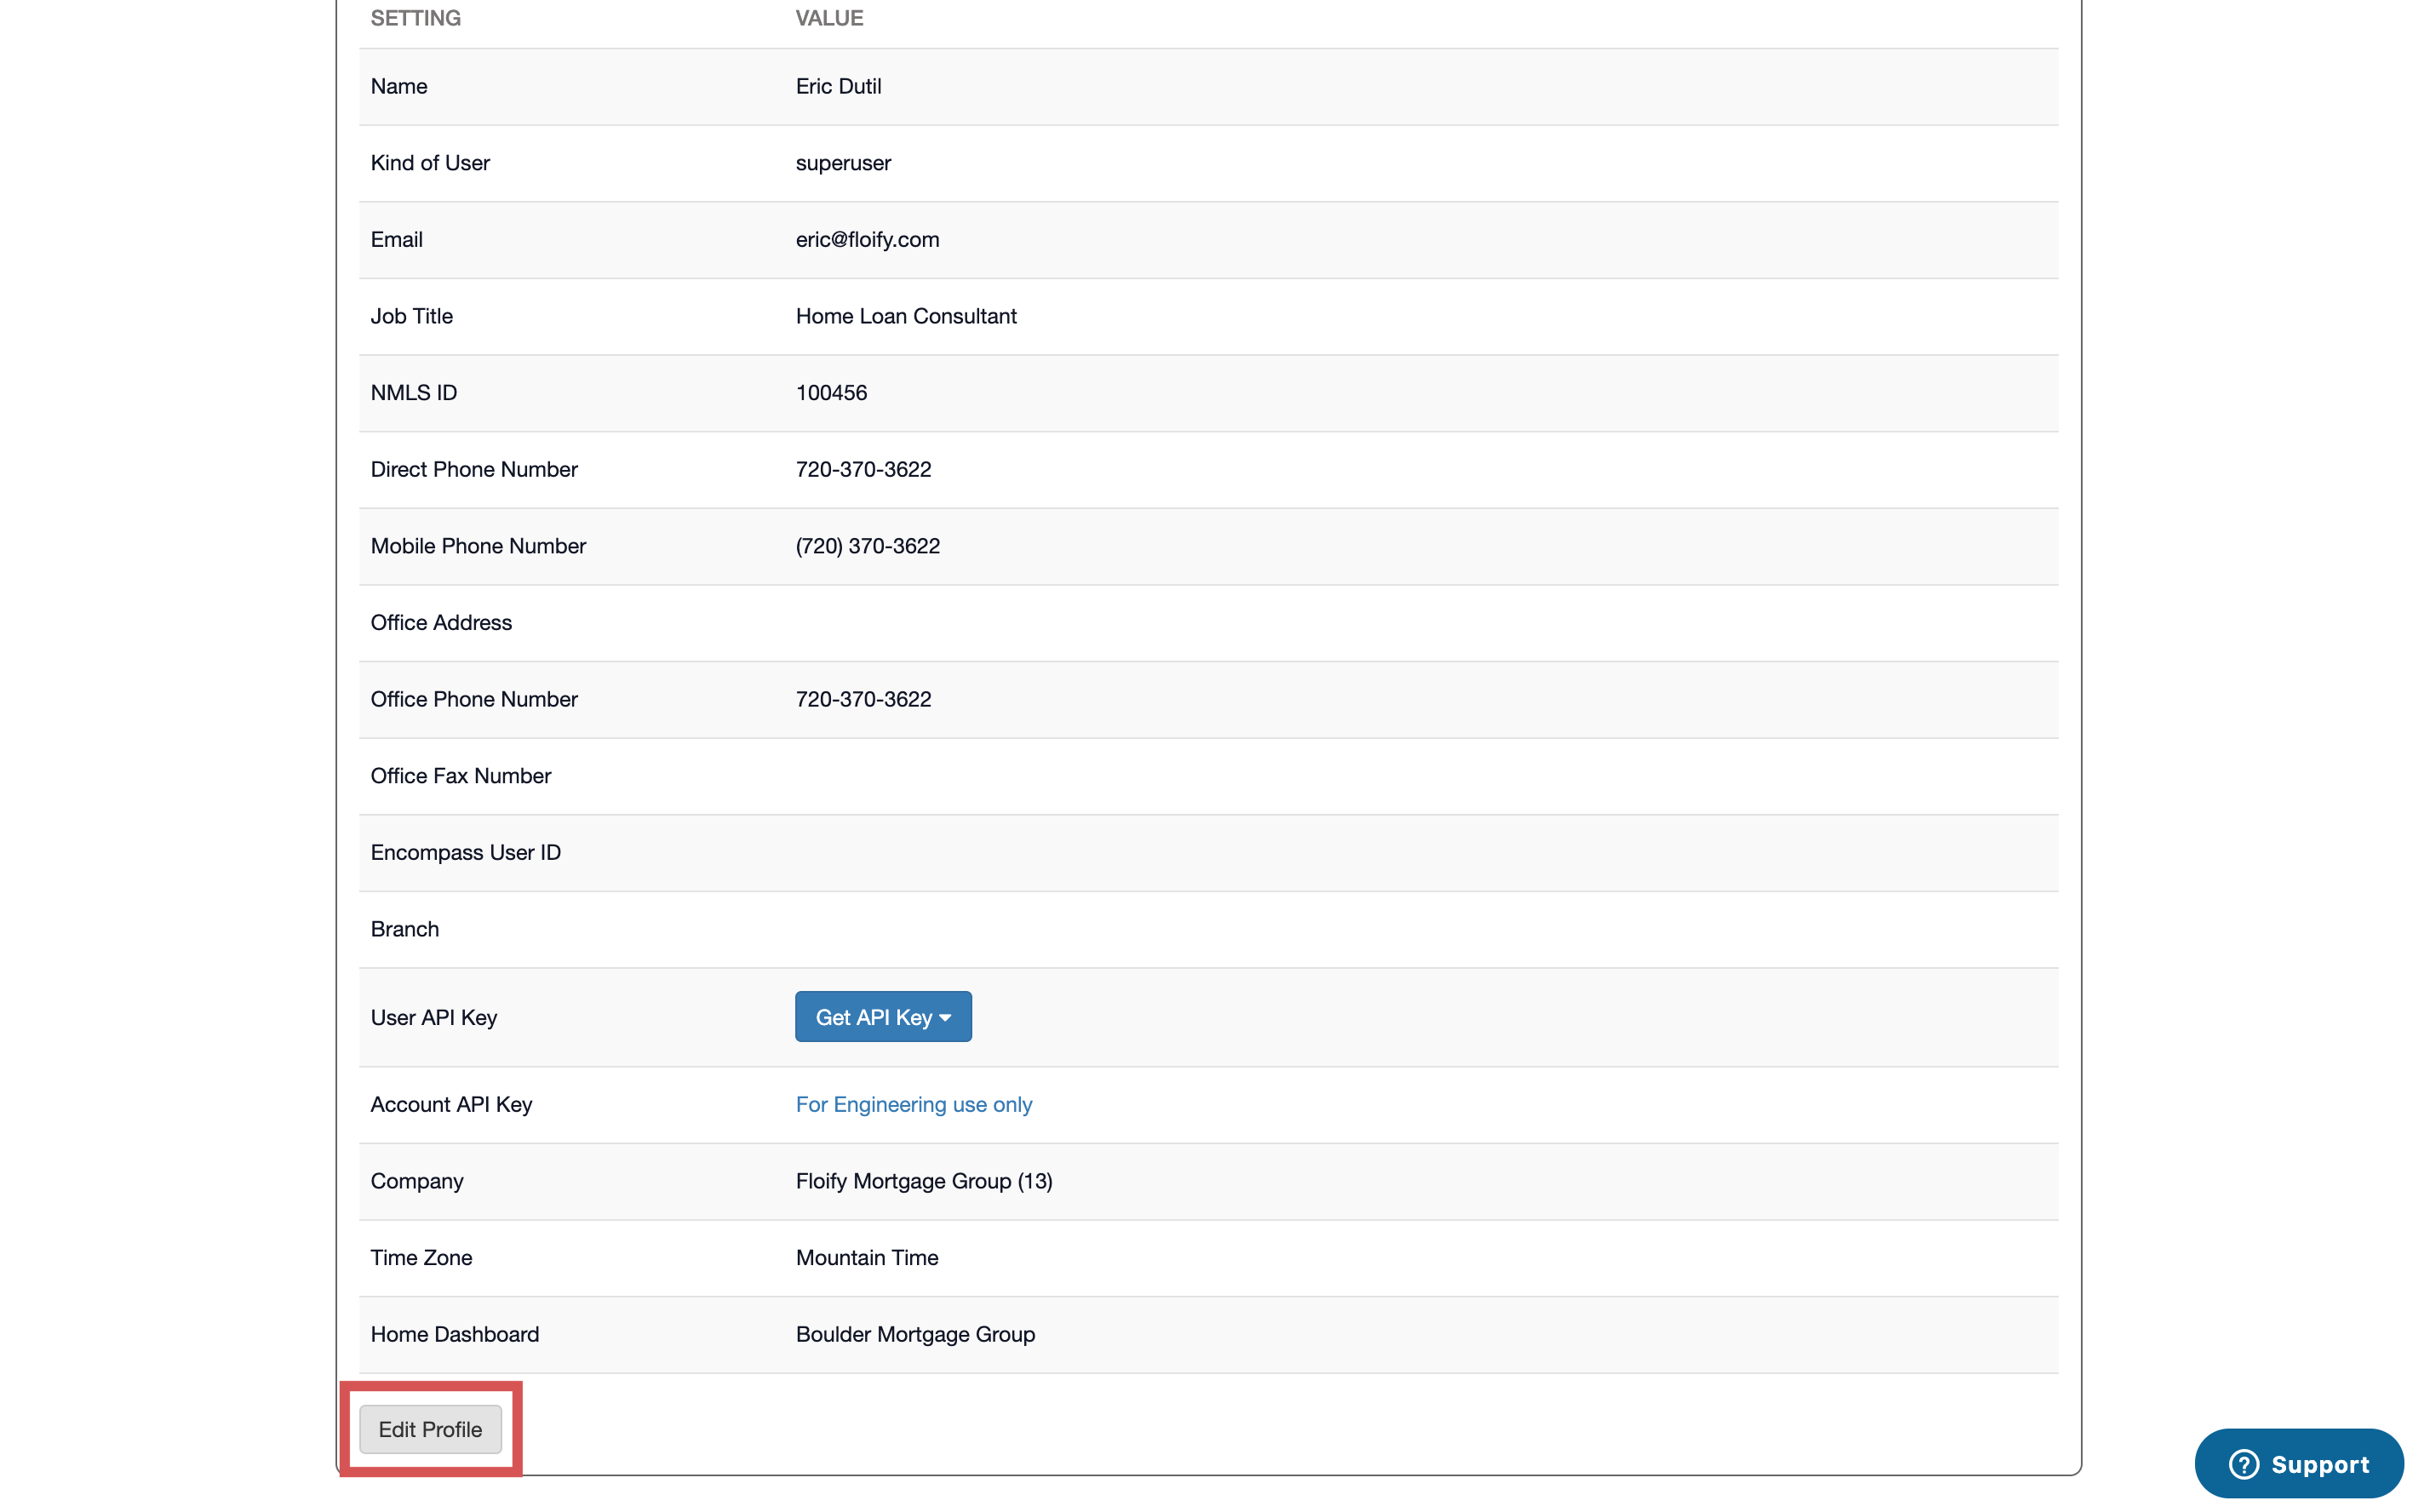
Update your email address, first name, last name, NMLS ID, direct phone number, mobile phone number, or office number. Any changes to these fields will also reflect on the landing page. Select Save Profile to confirm your changes:
Update My Branch ID License Number
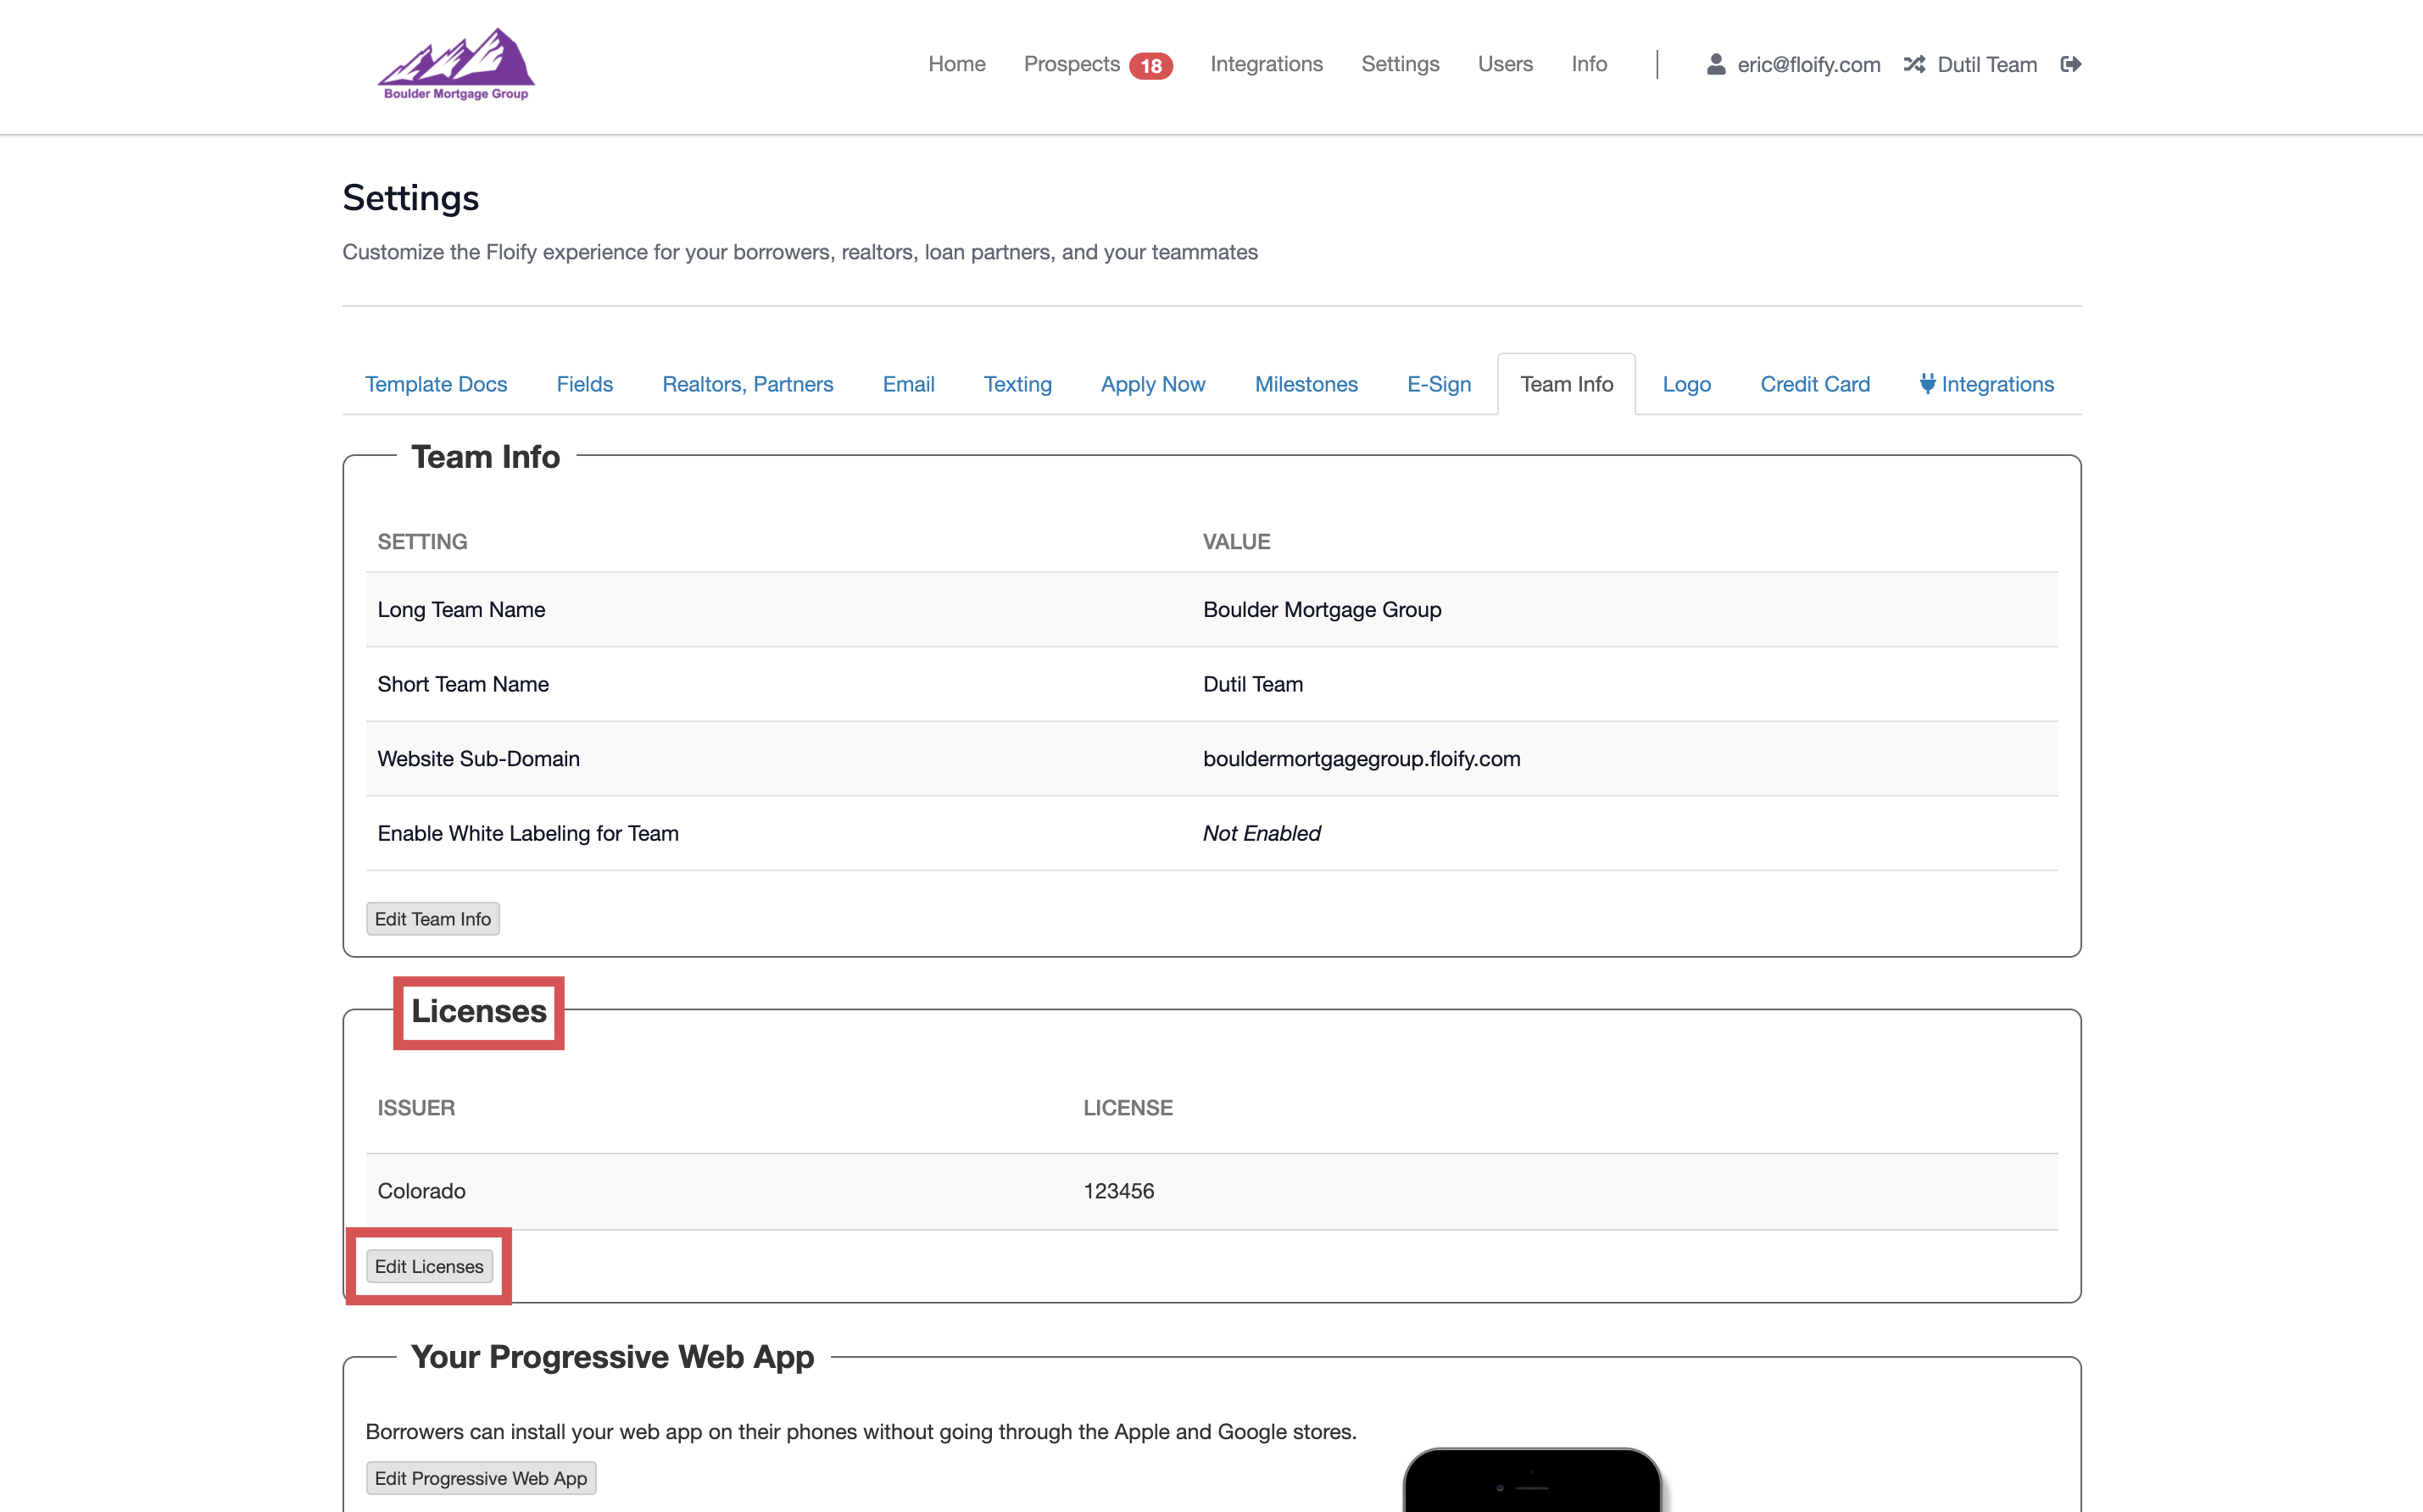
From your team pipeline, navigate to Settings and select the Team Info tab:
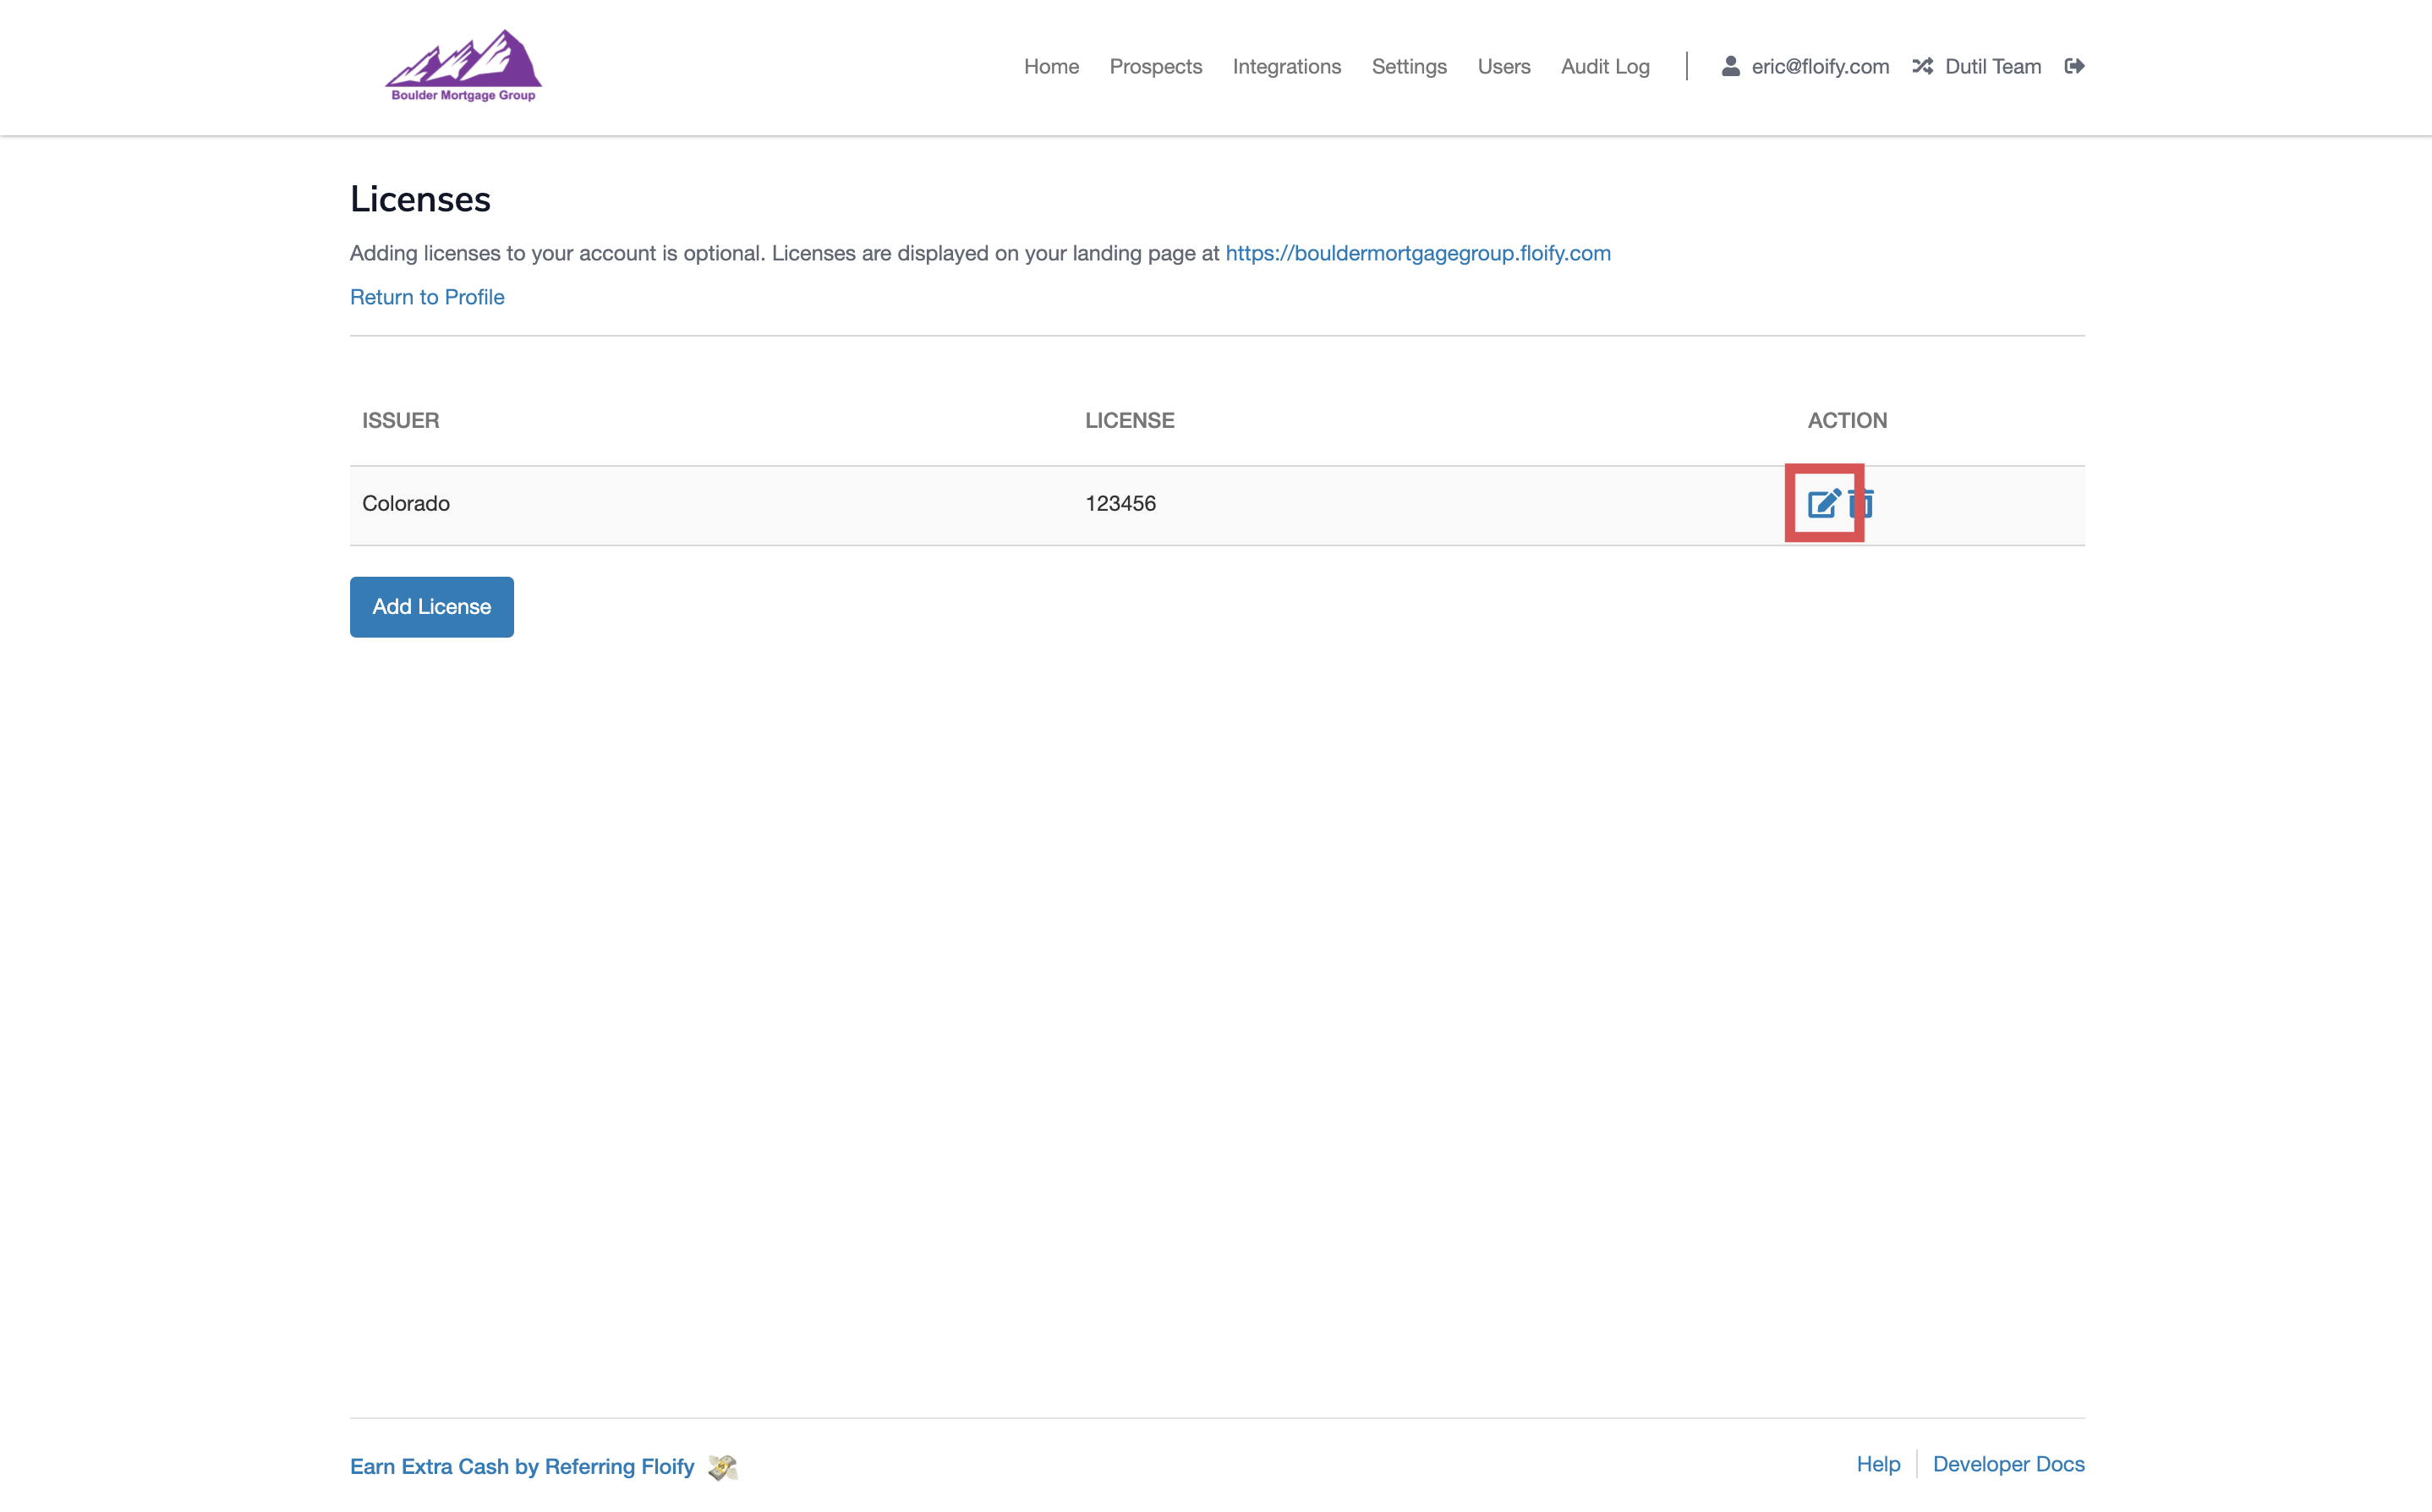
Scroll down to Licenses and select the option to Edit Licenses:
Edit an existing license using the Edit License option towards the right of the license name:
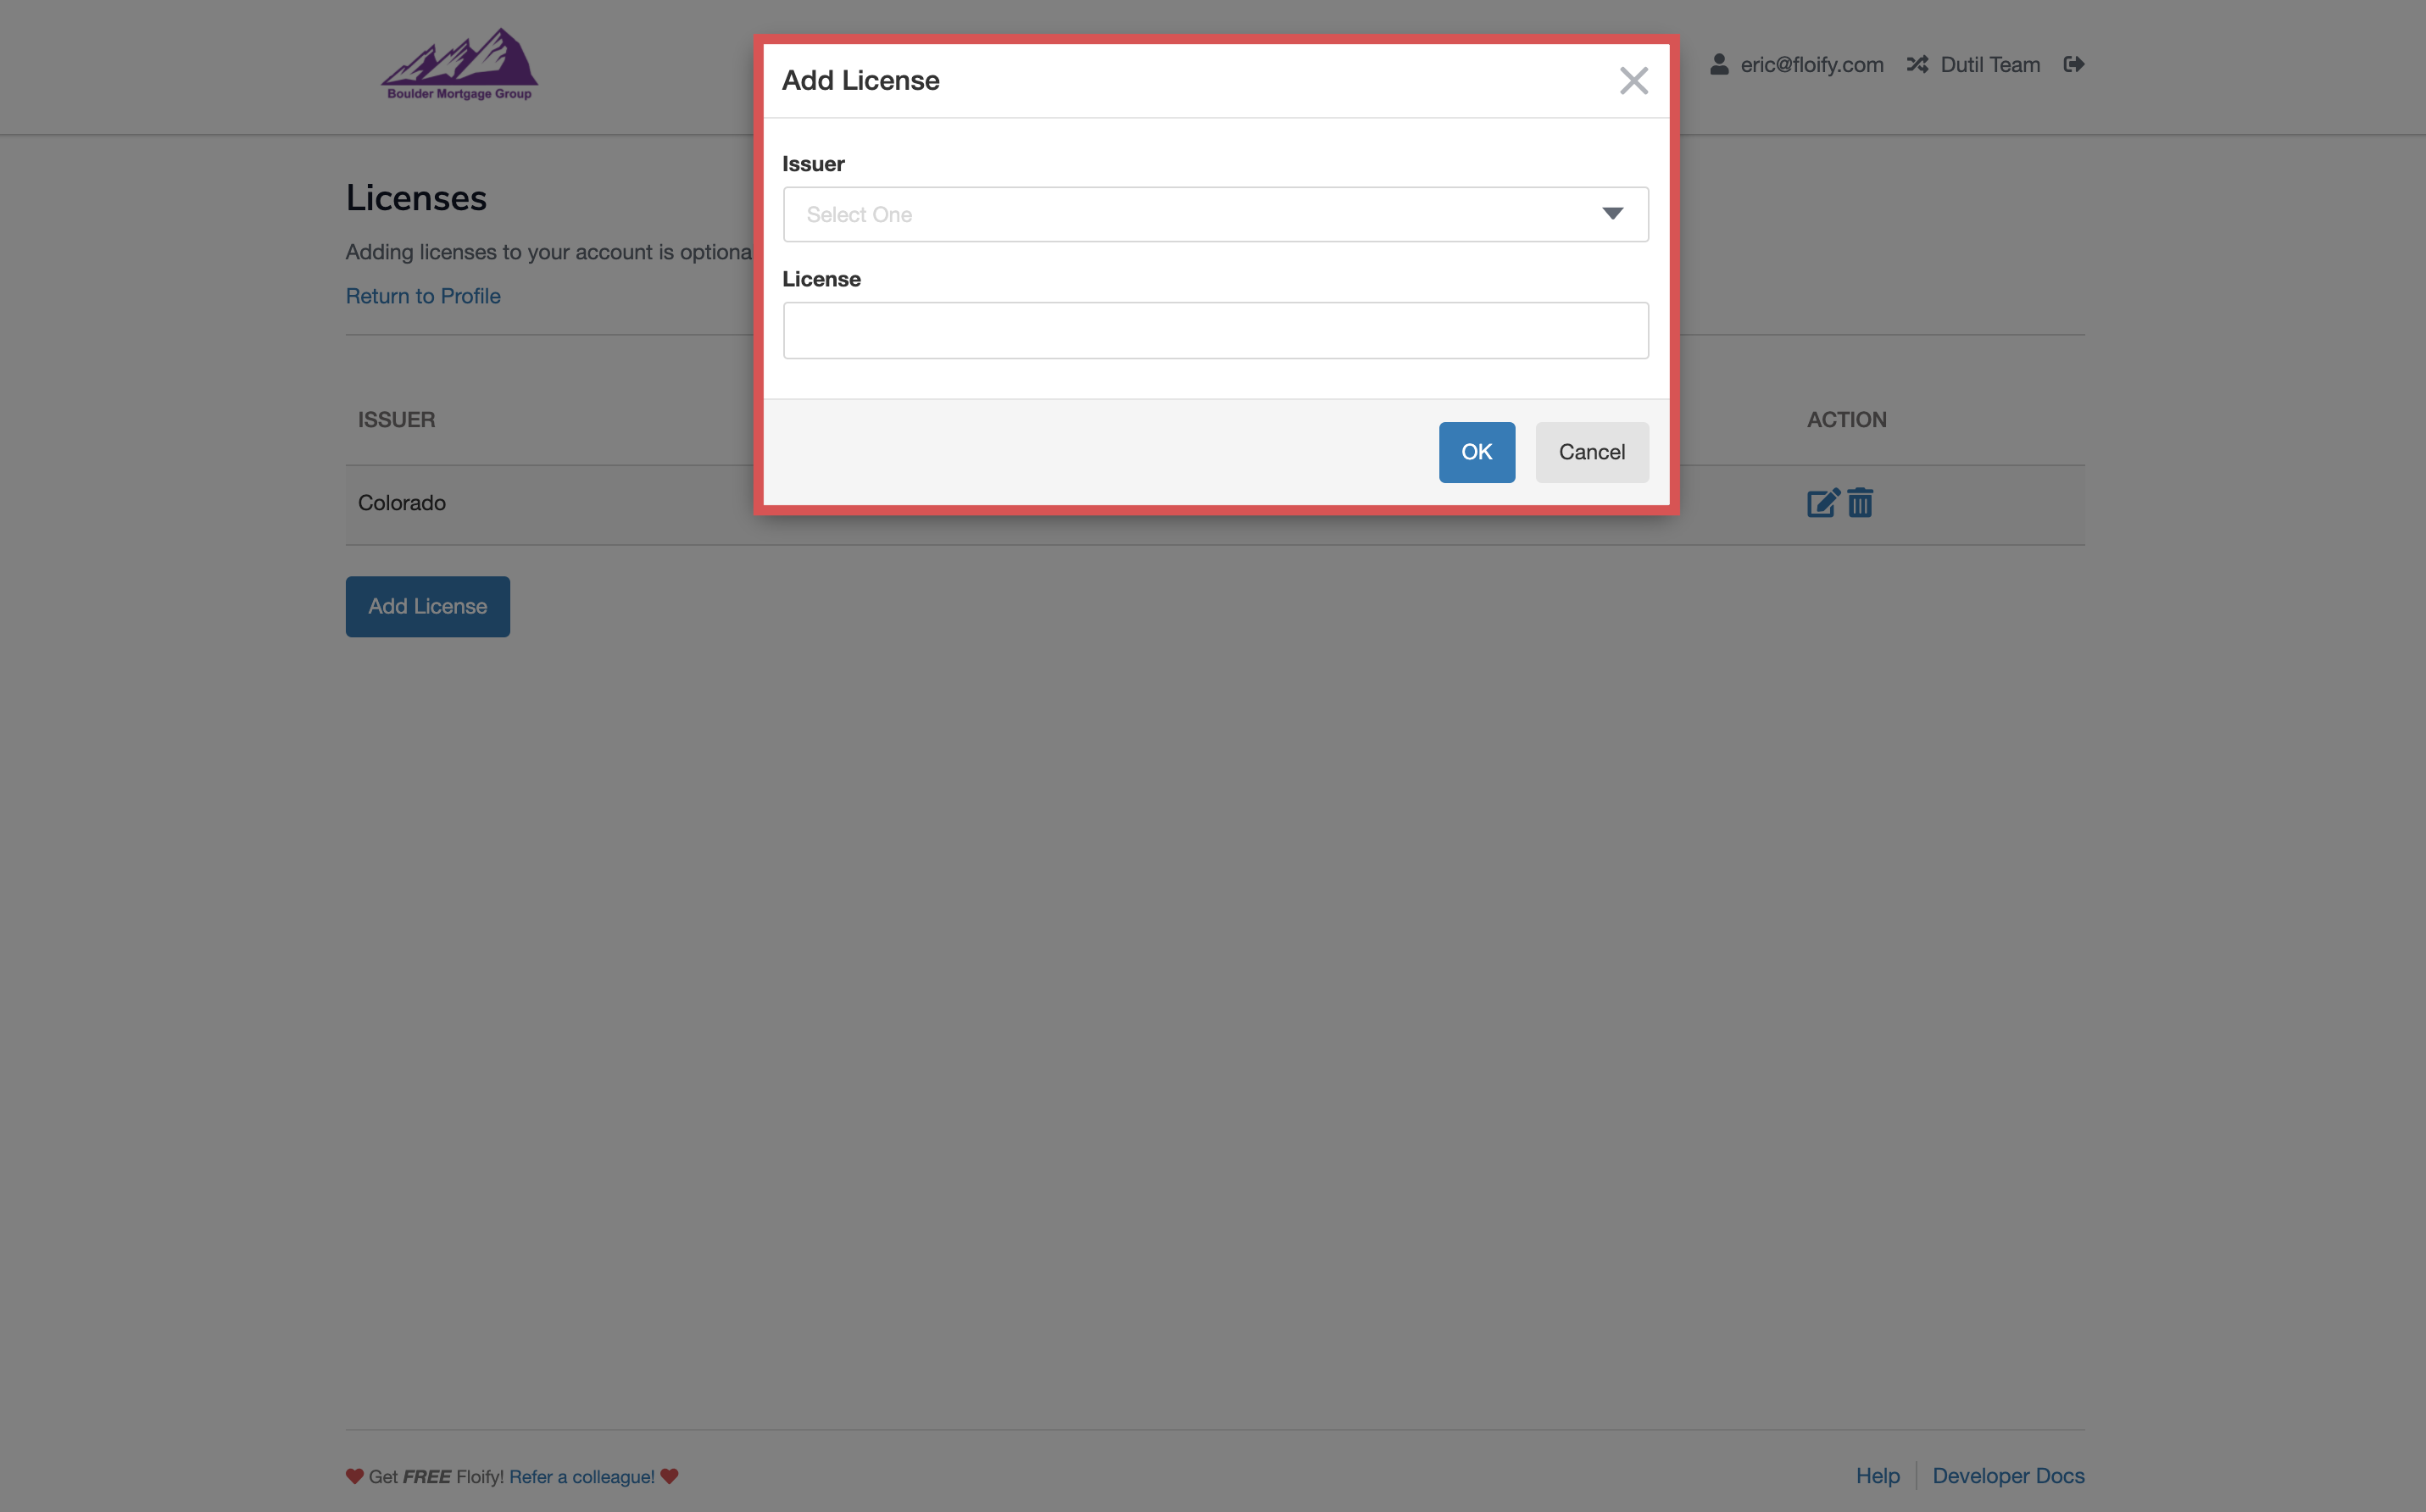
Edit the issuer or licence number as needed. Make sure you select OK to confirm the changes:
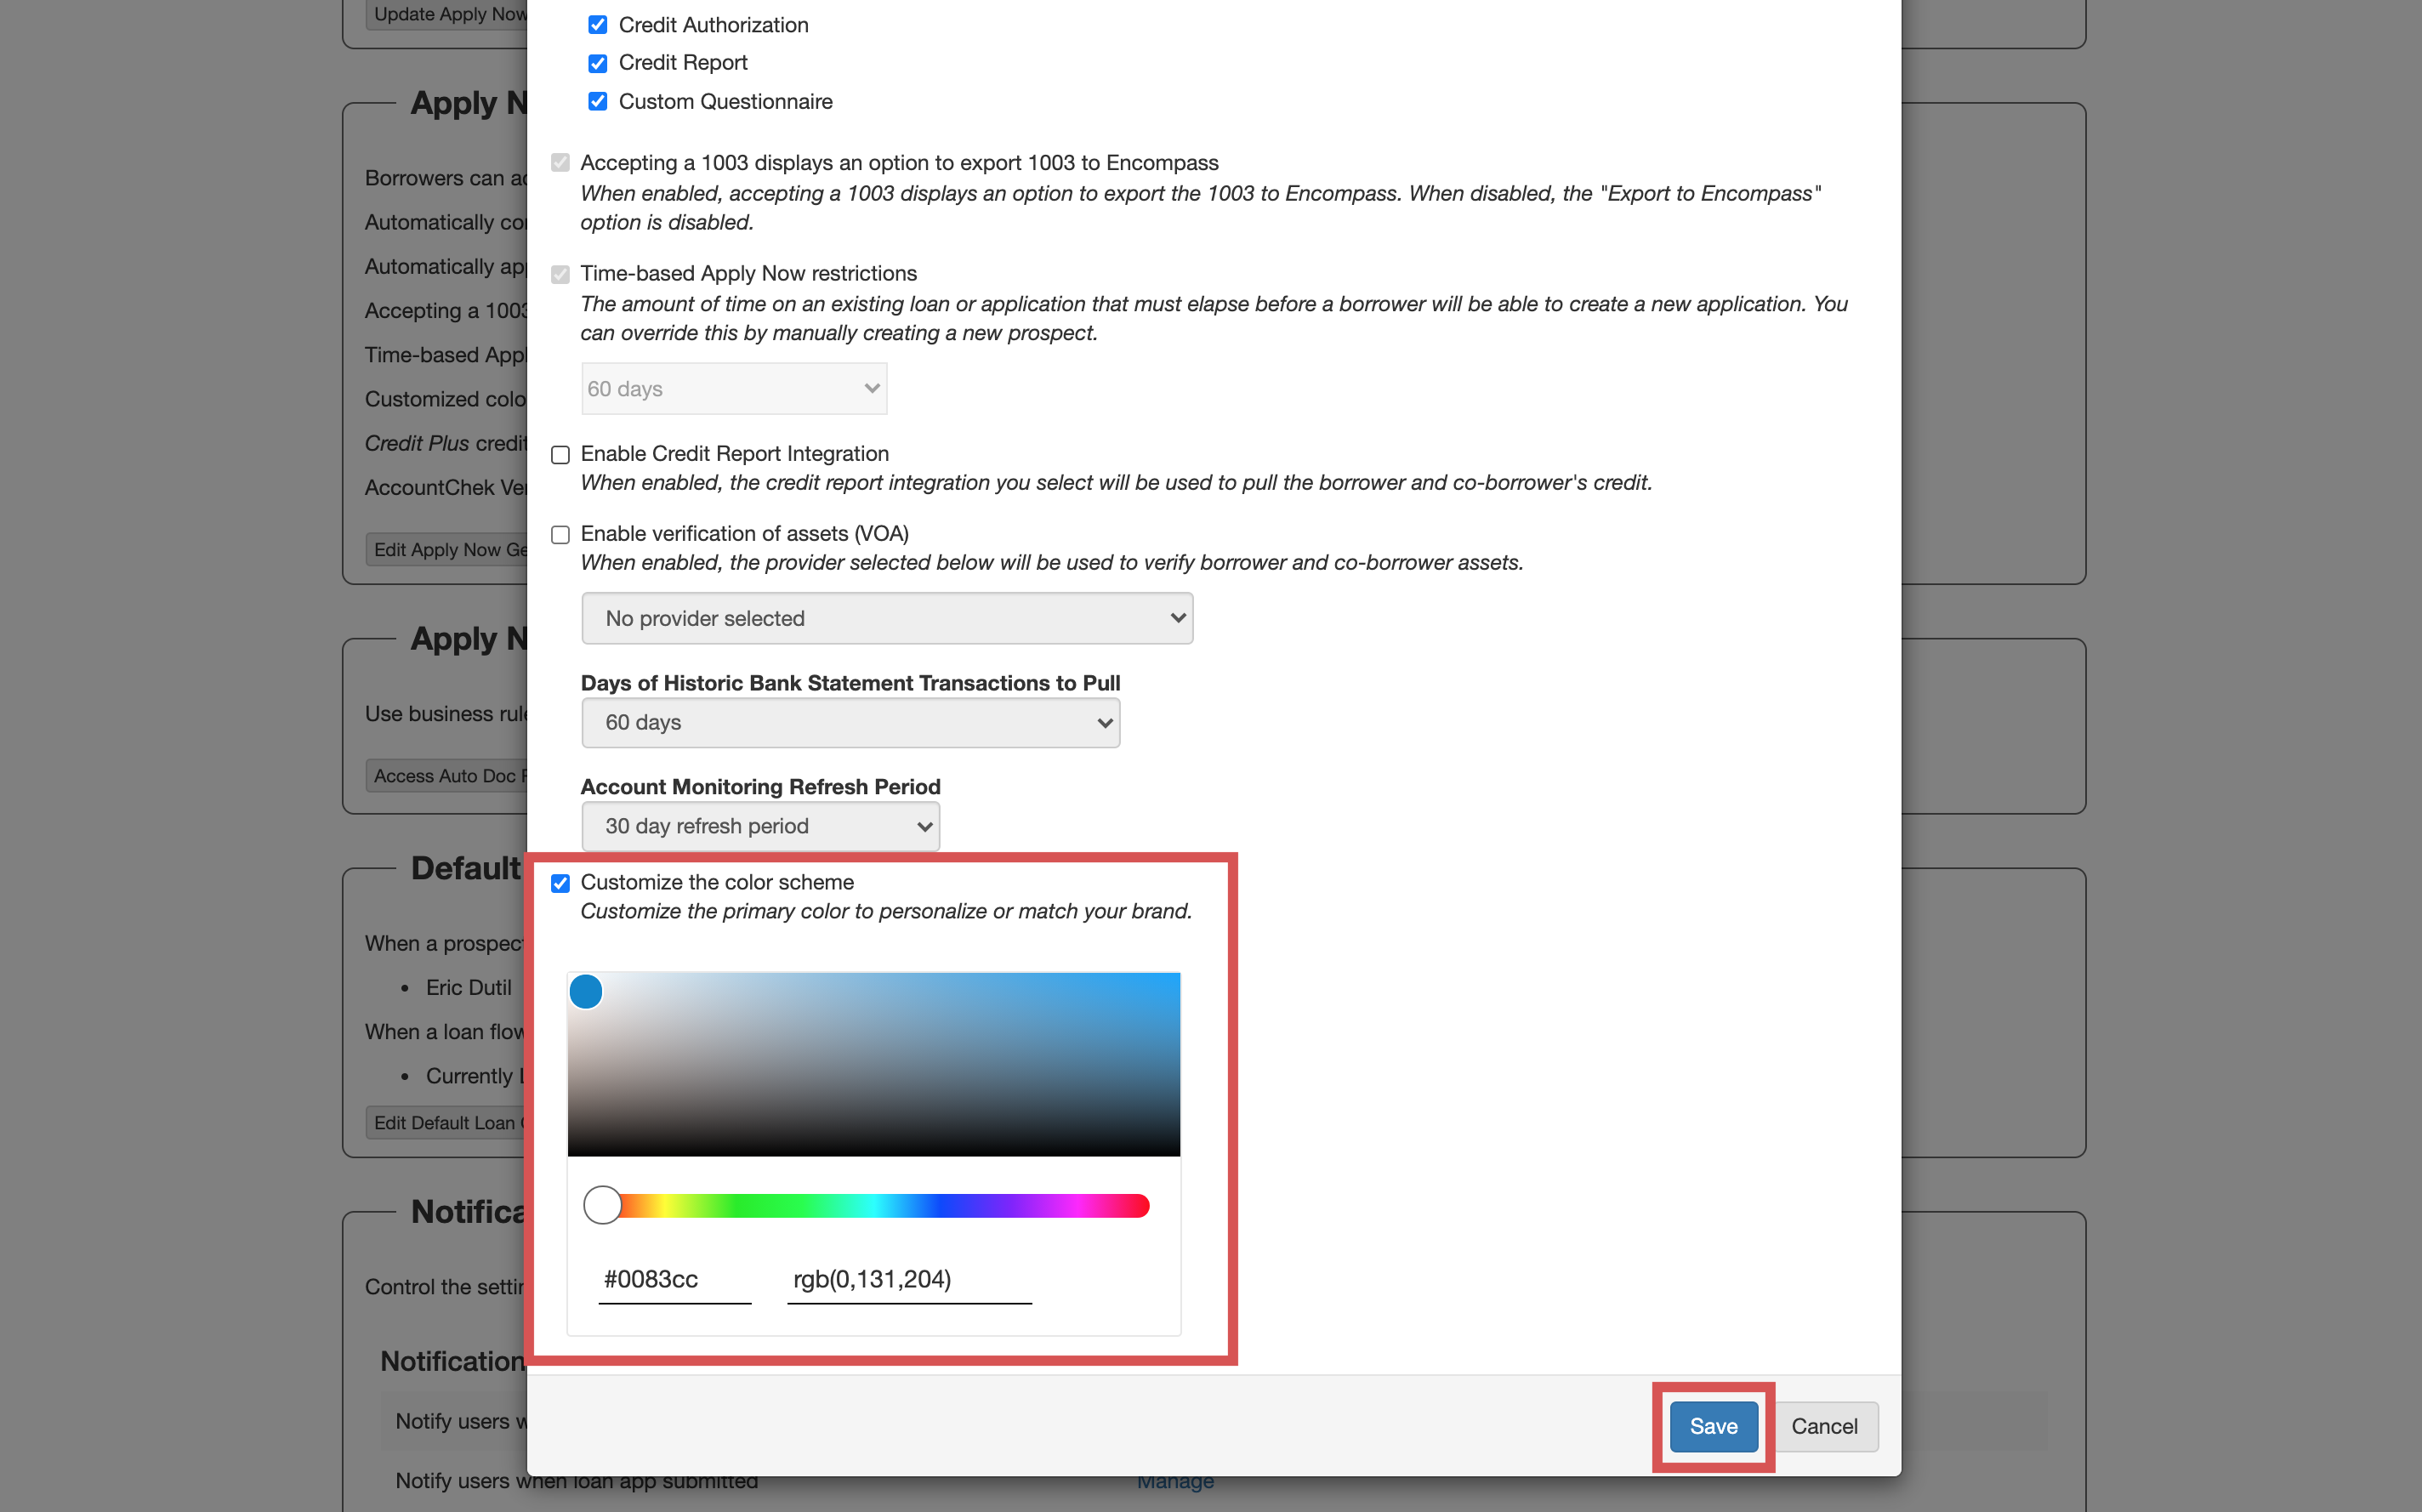
Update My Landing Page Color Scheme
From your active loan pipeline, navigate to Settings and then Apply Now:
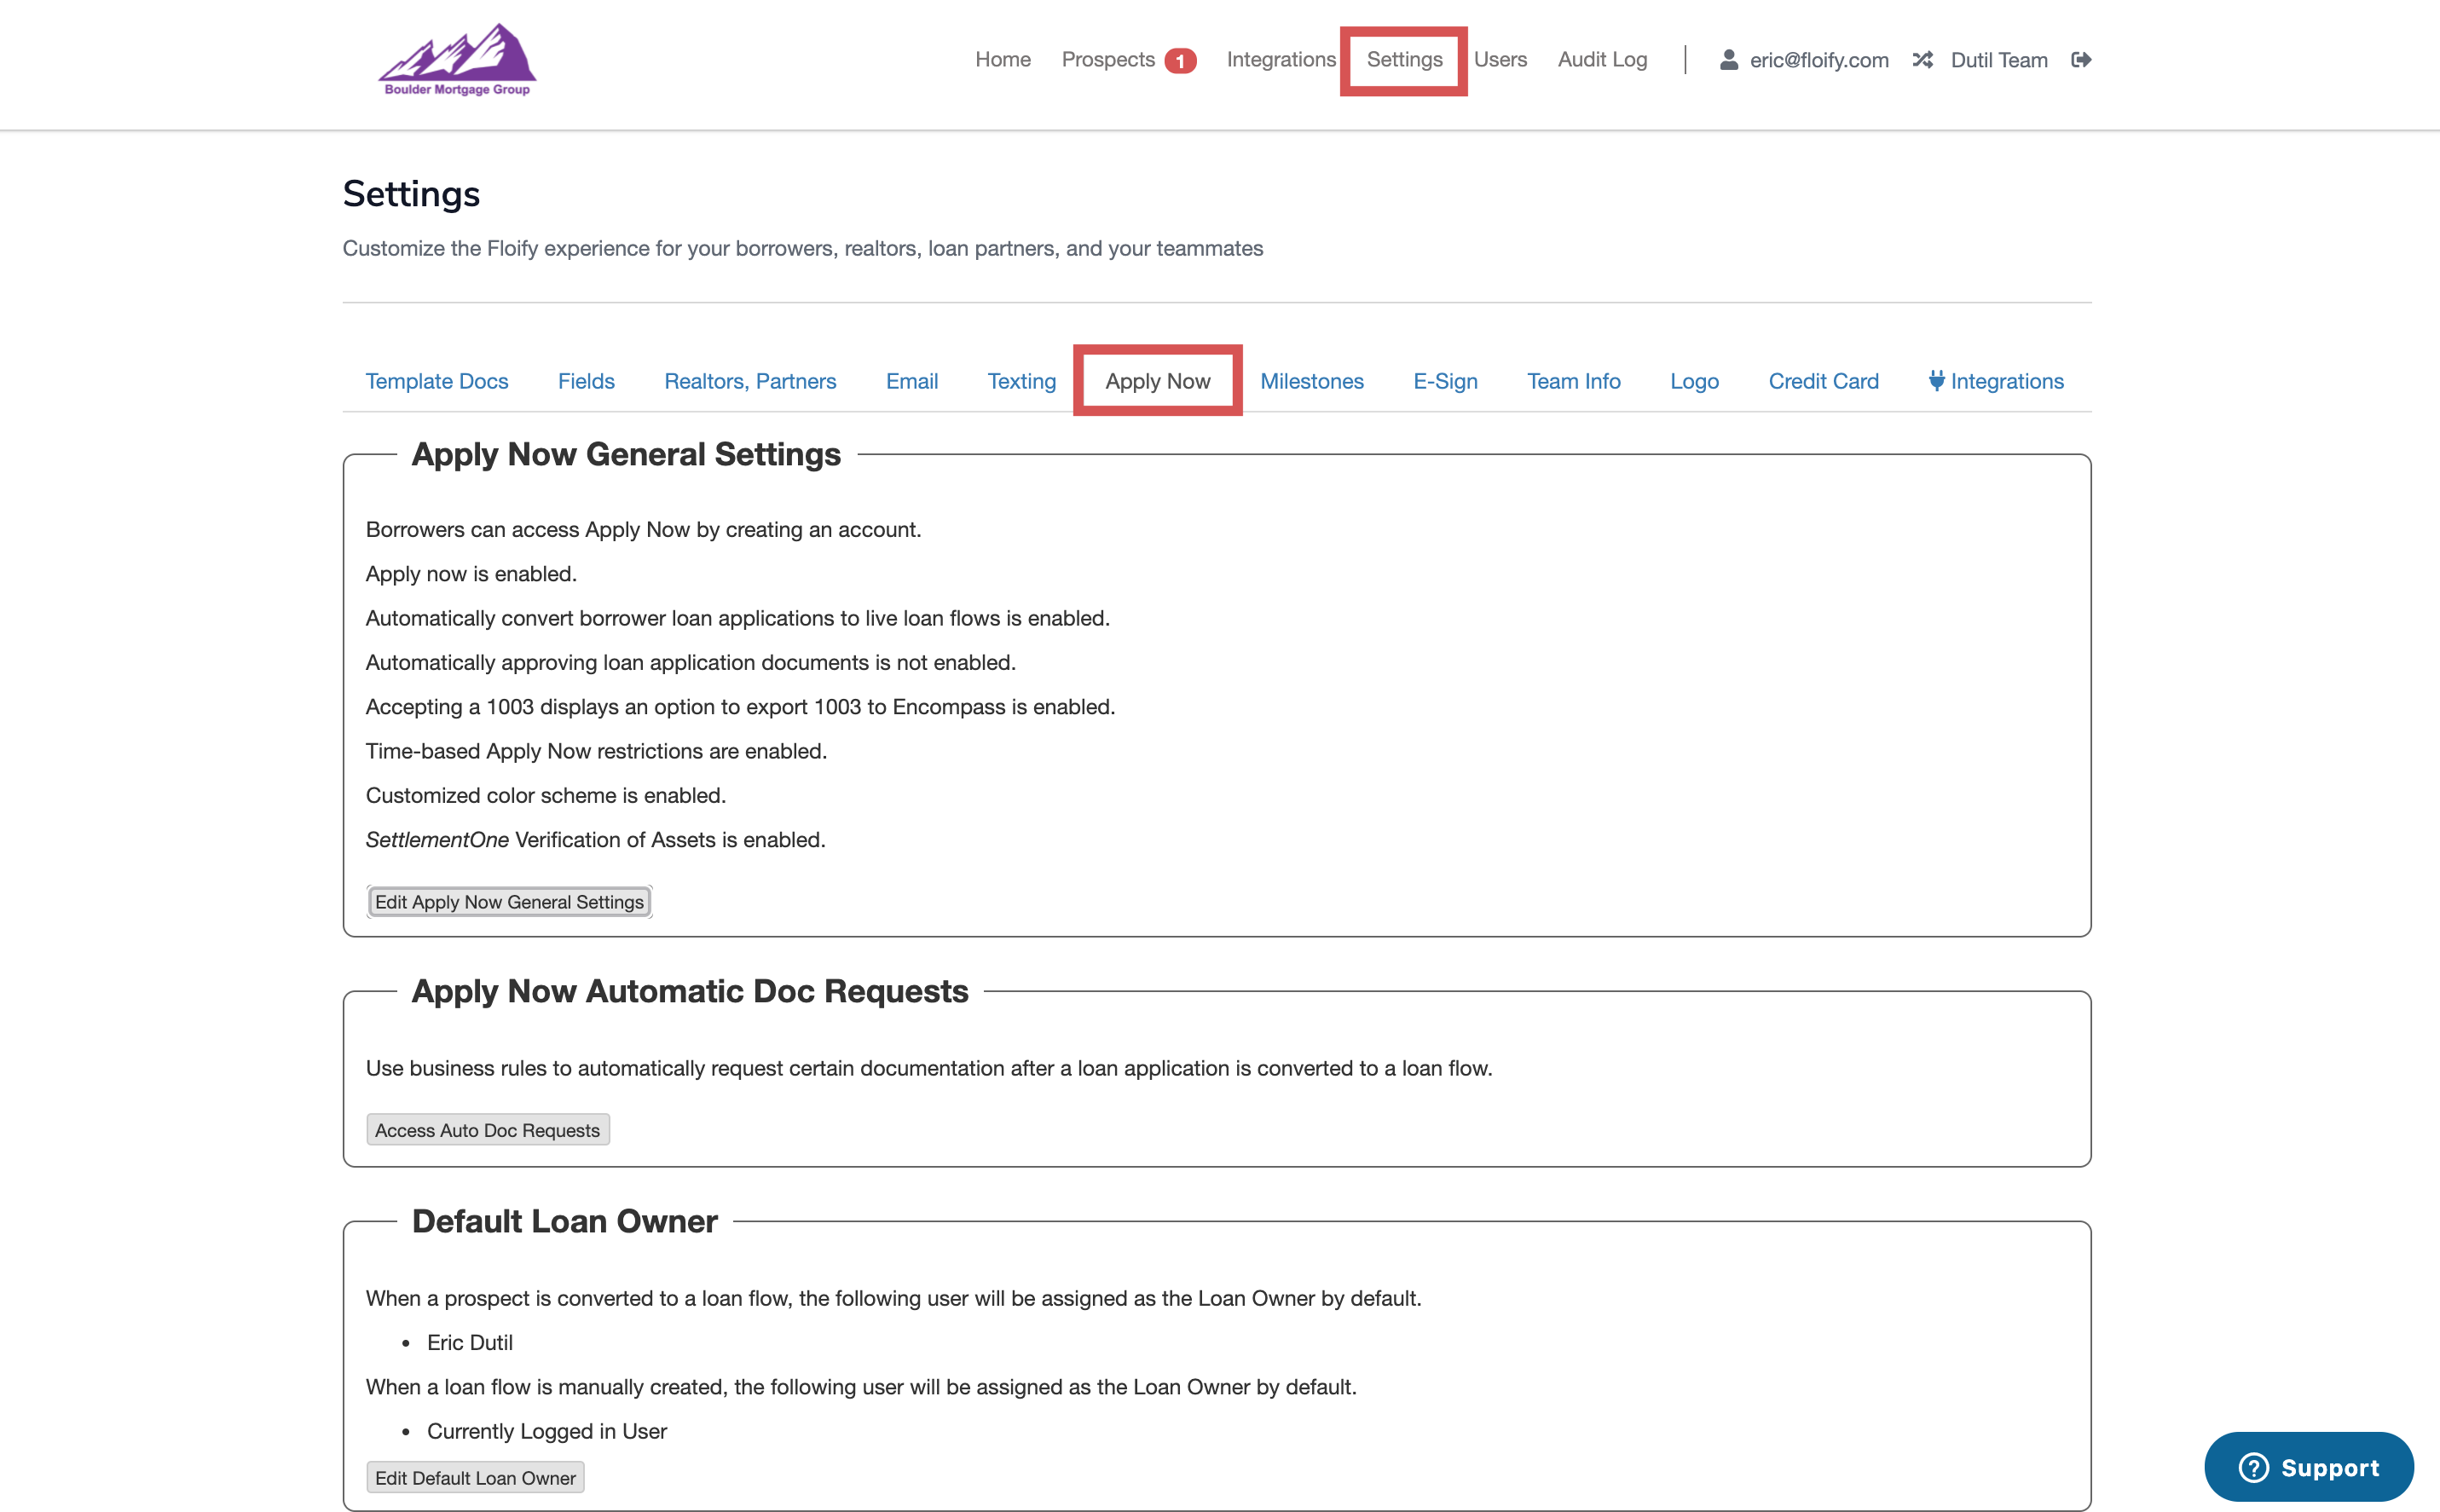
Scroll down to Apply Now General Settings and select the option to Edit Apply Now General Settings:

Select the color you'd like to use by dragging the color bar and cursor, entering the Hex color code you'd like to use, or selecting the rgb values. Make sure you select Save to confirm the change:
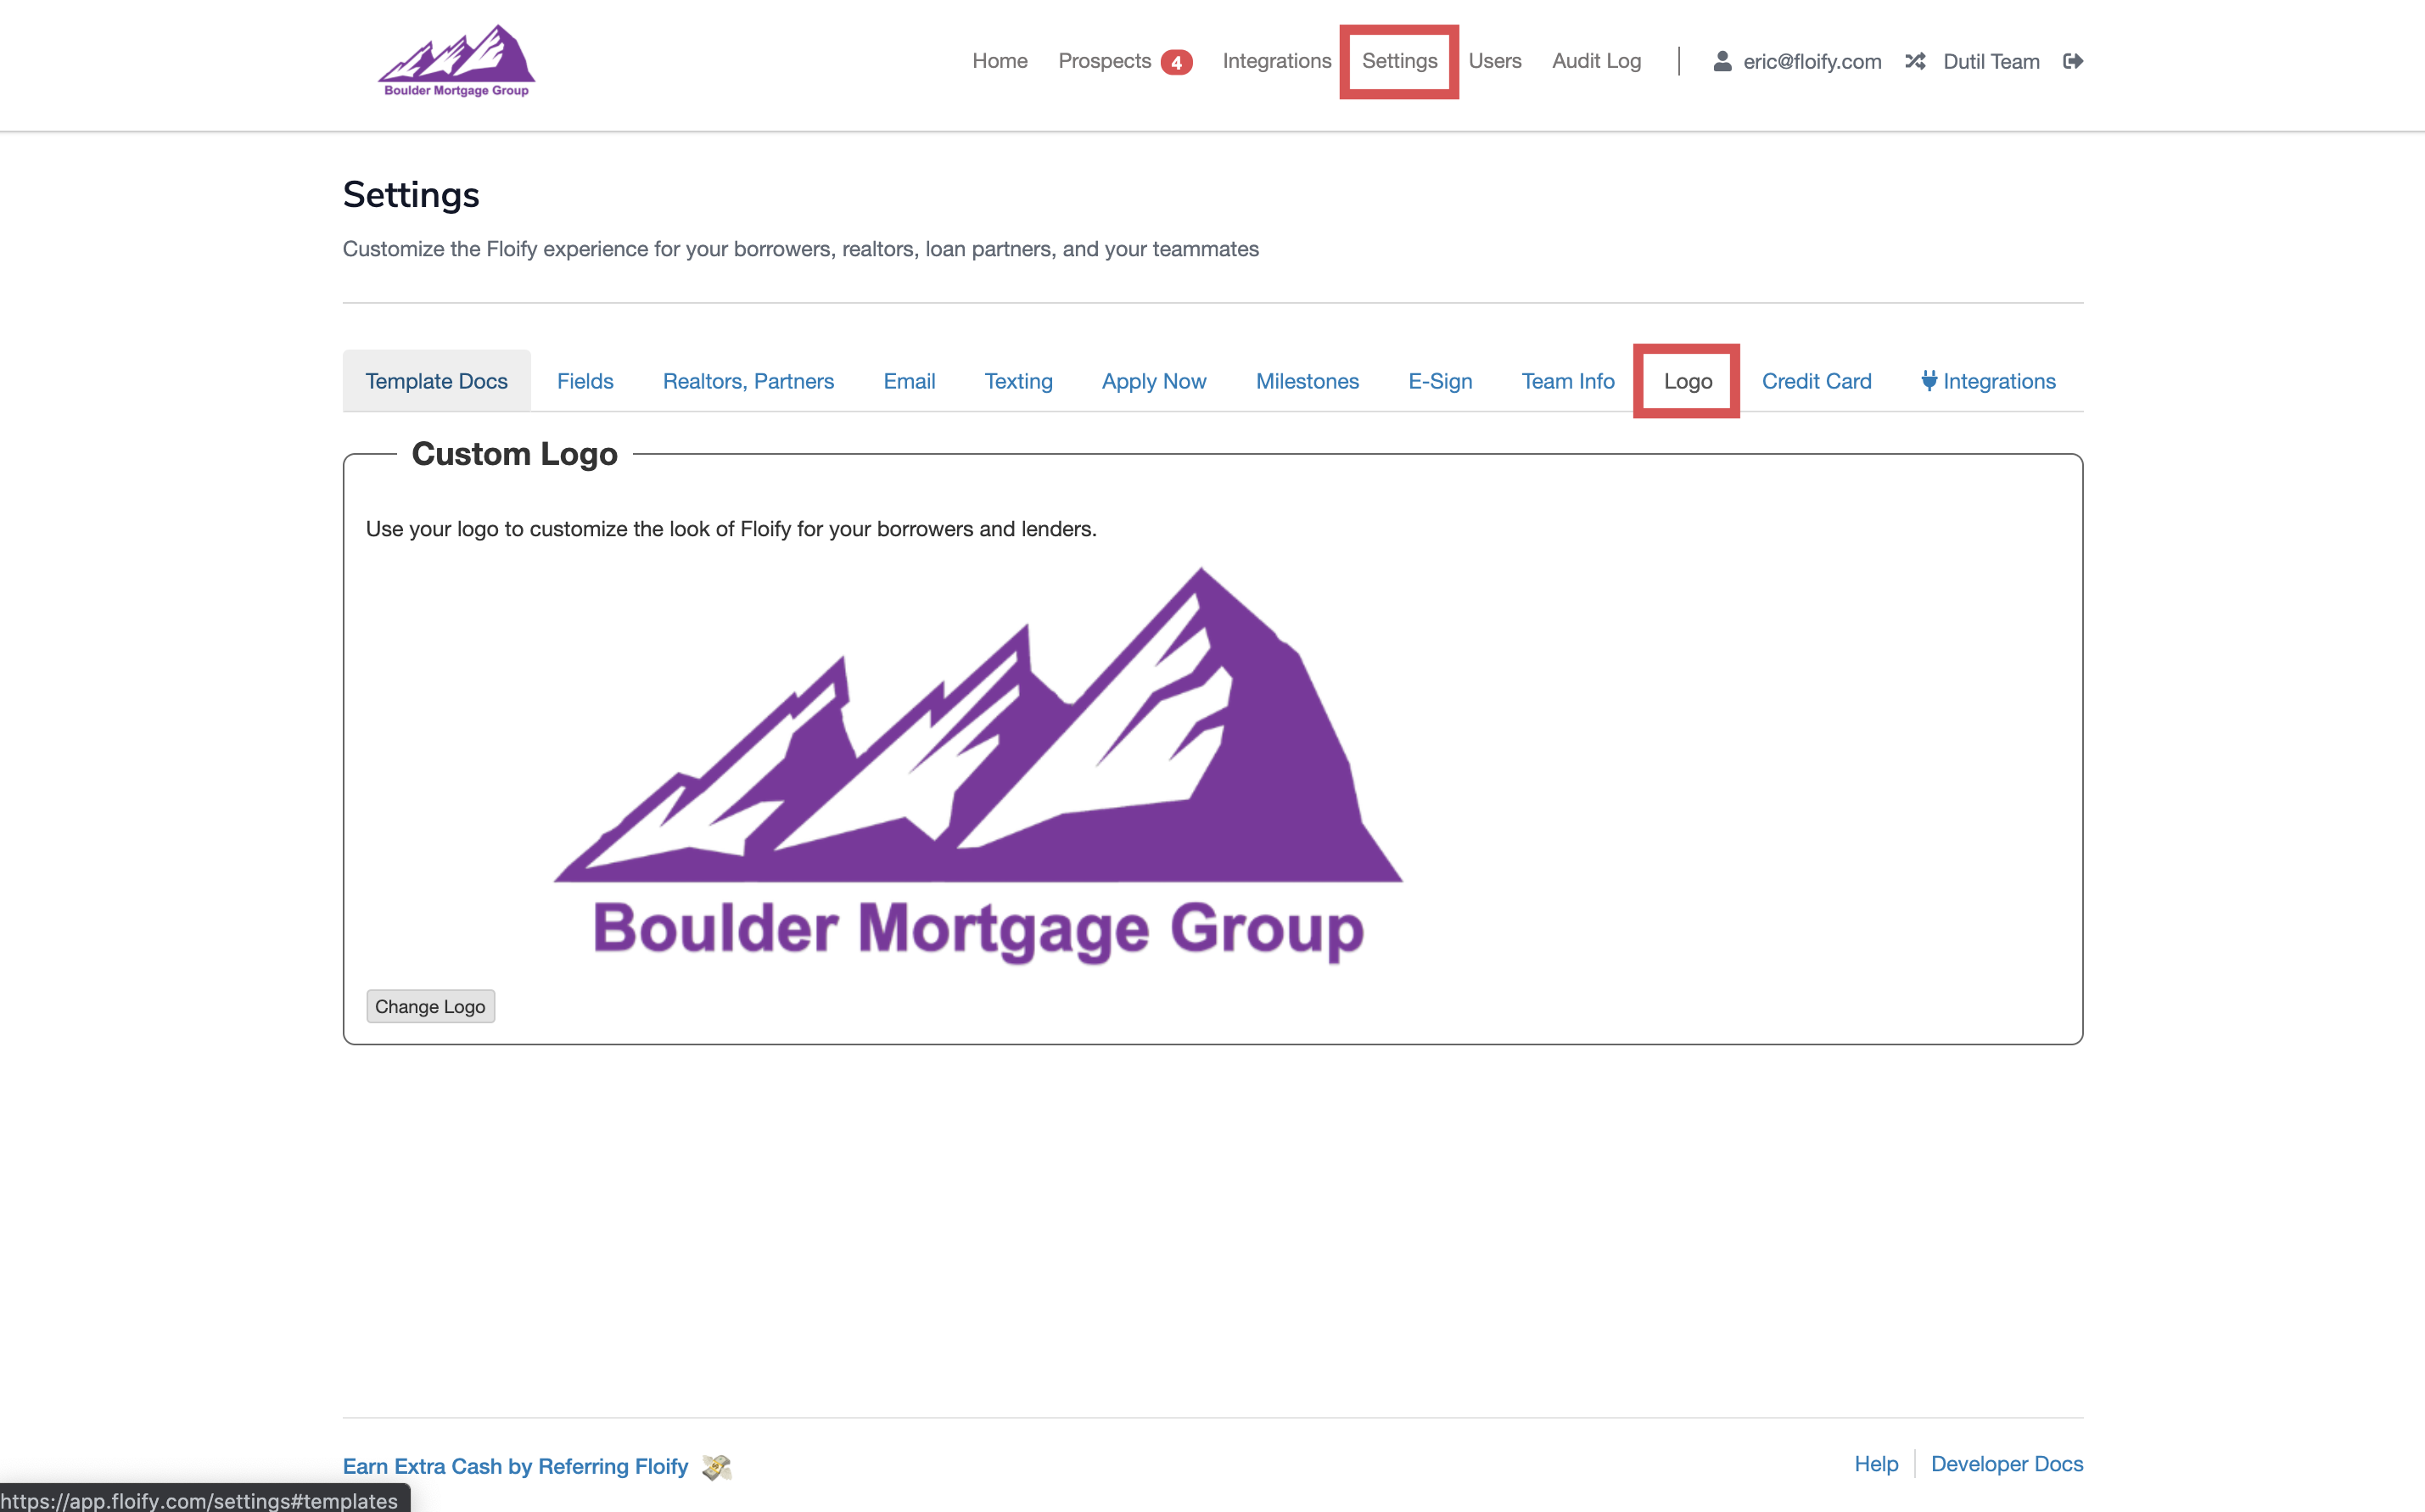
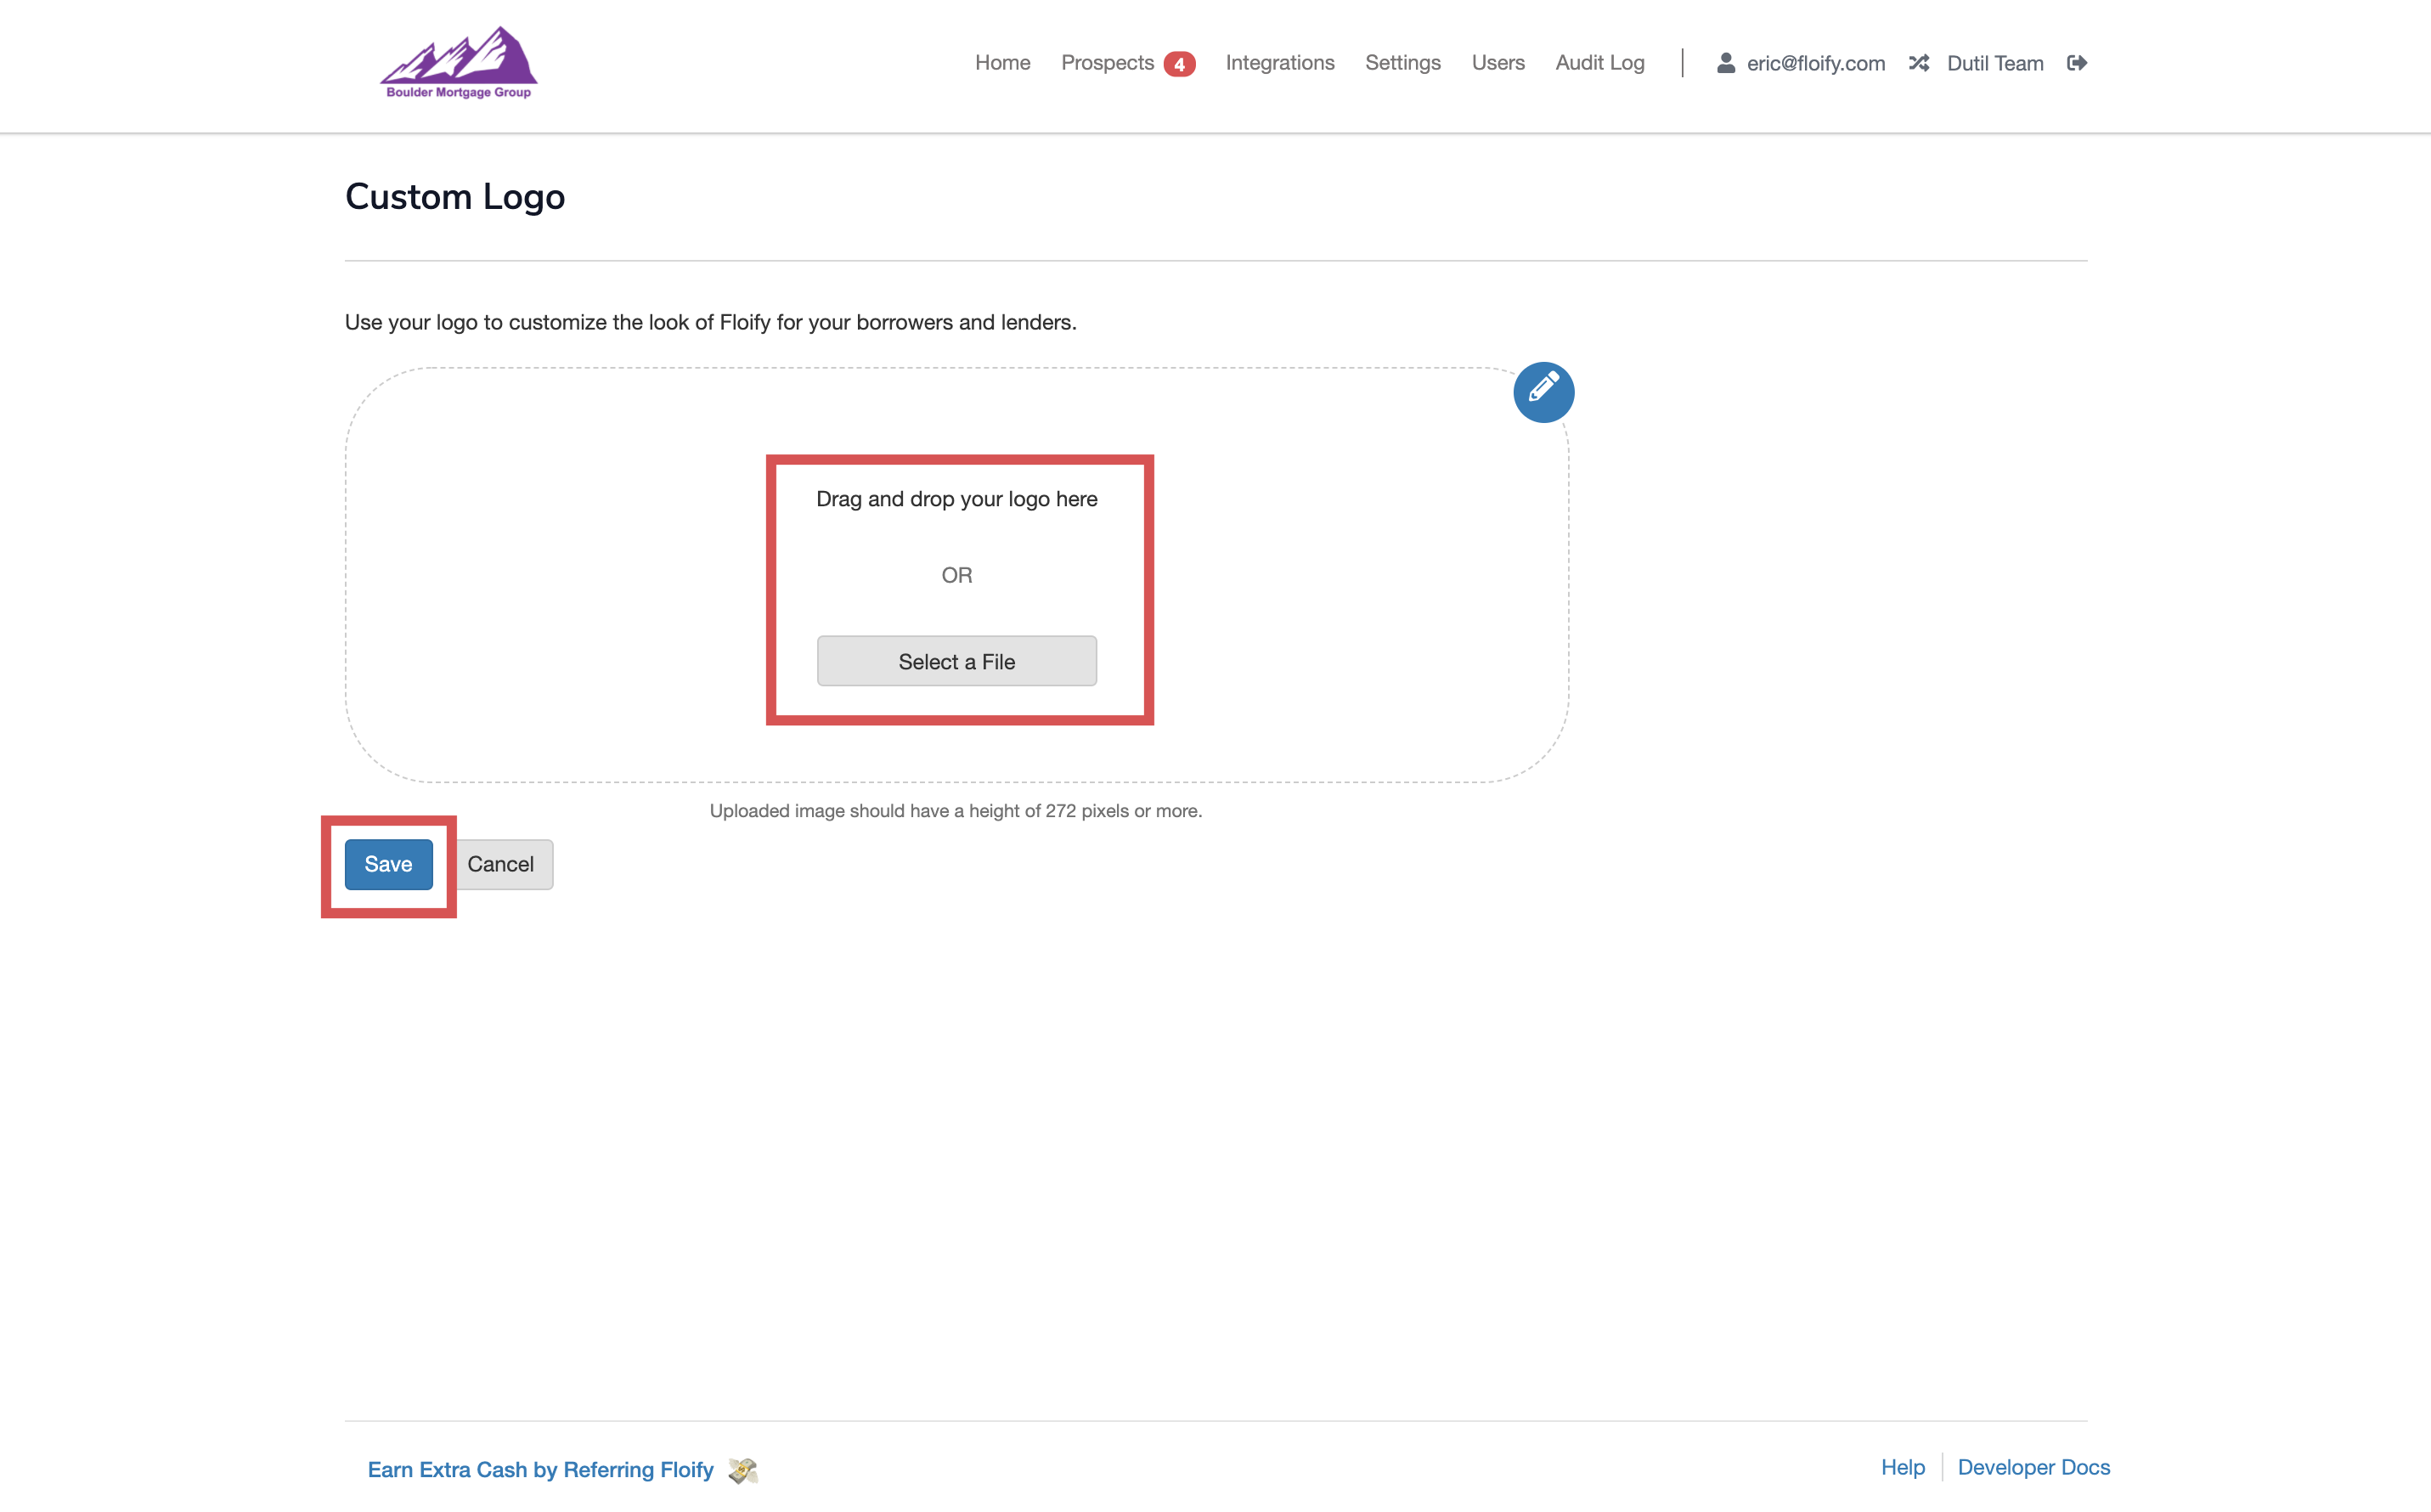
Update My Logo
From your team pipeline, navigate to Settings and select the Logo tab:
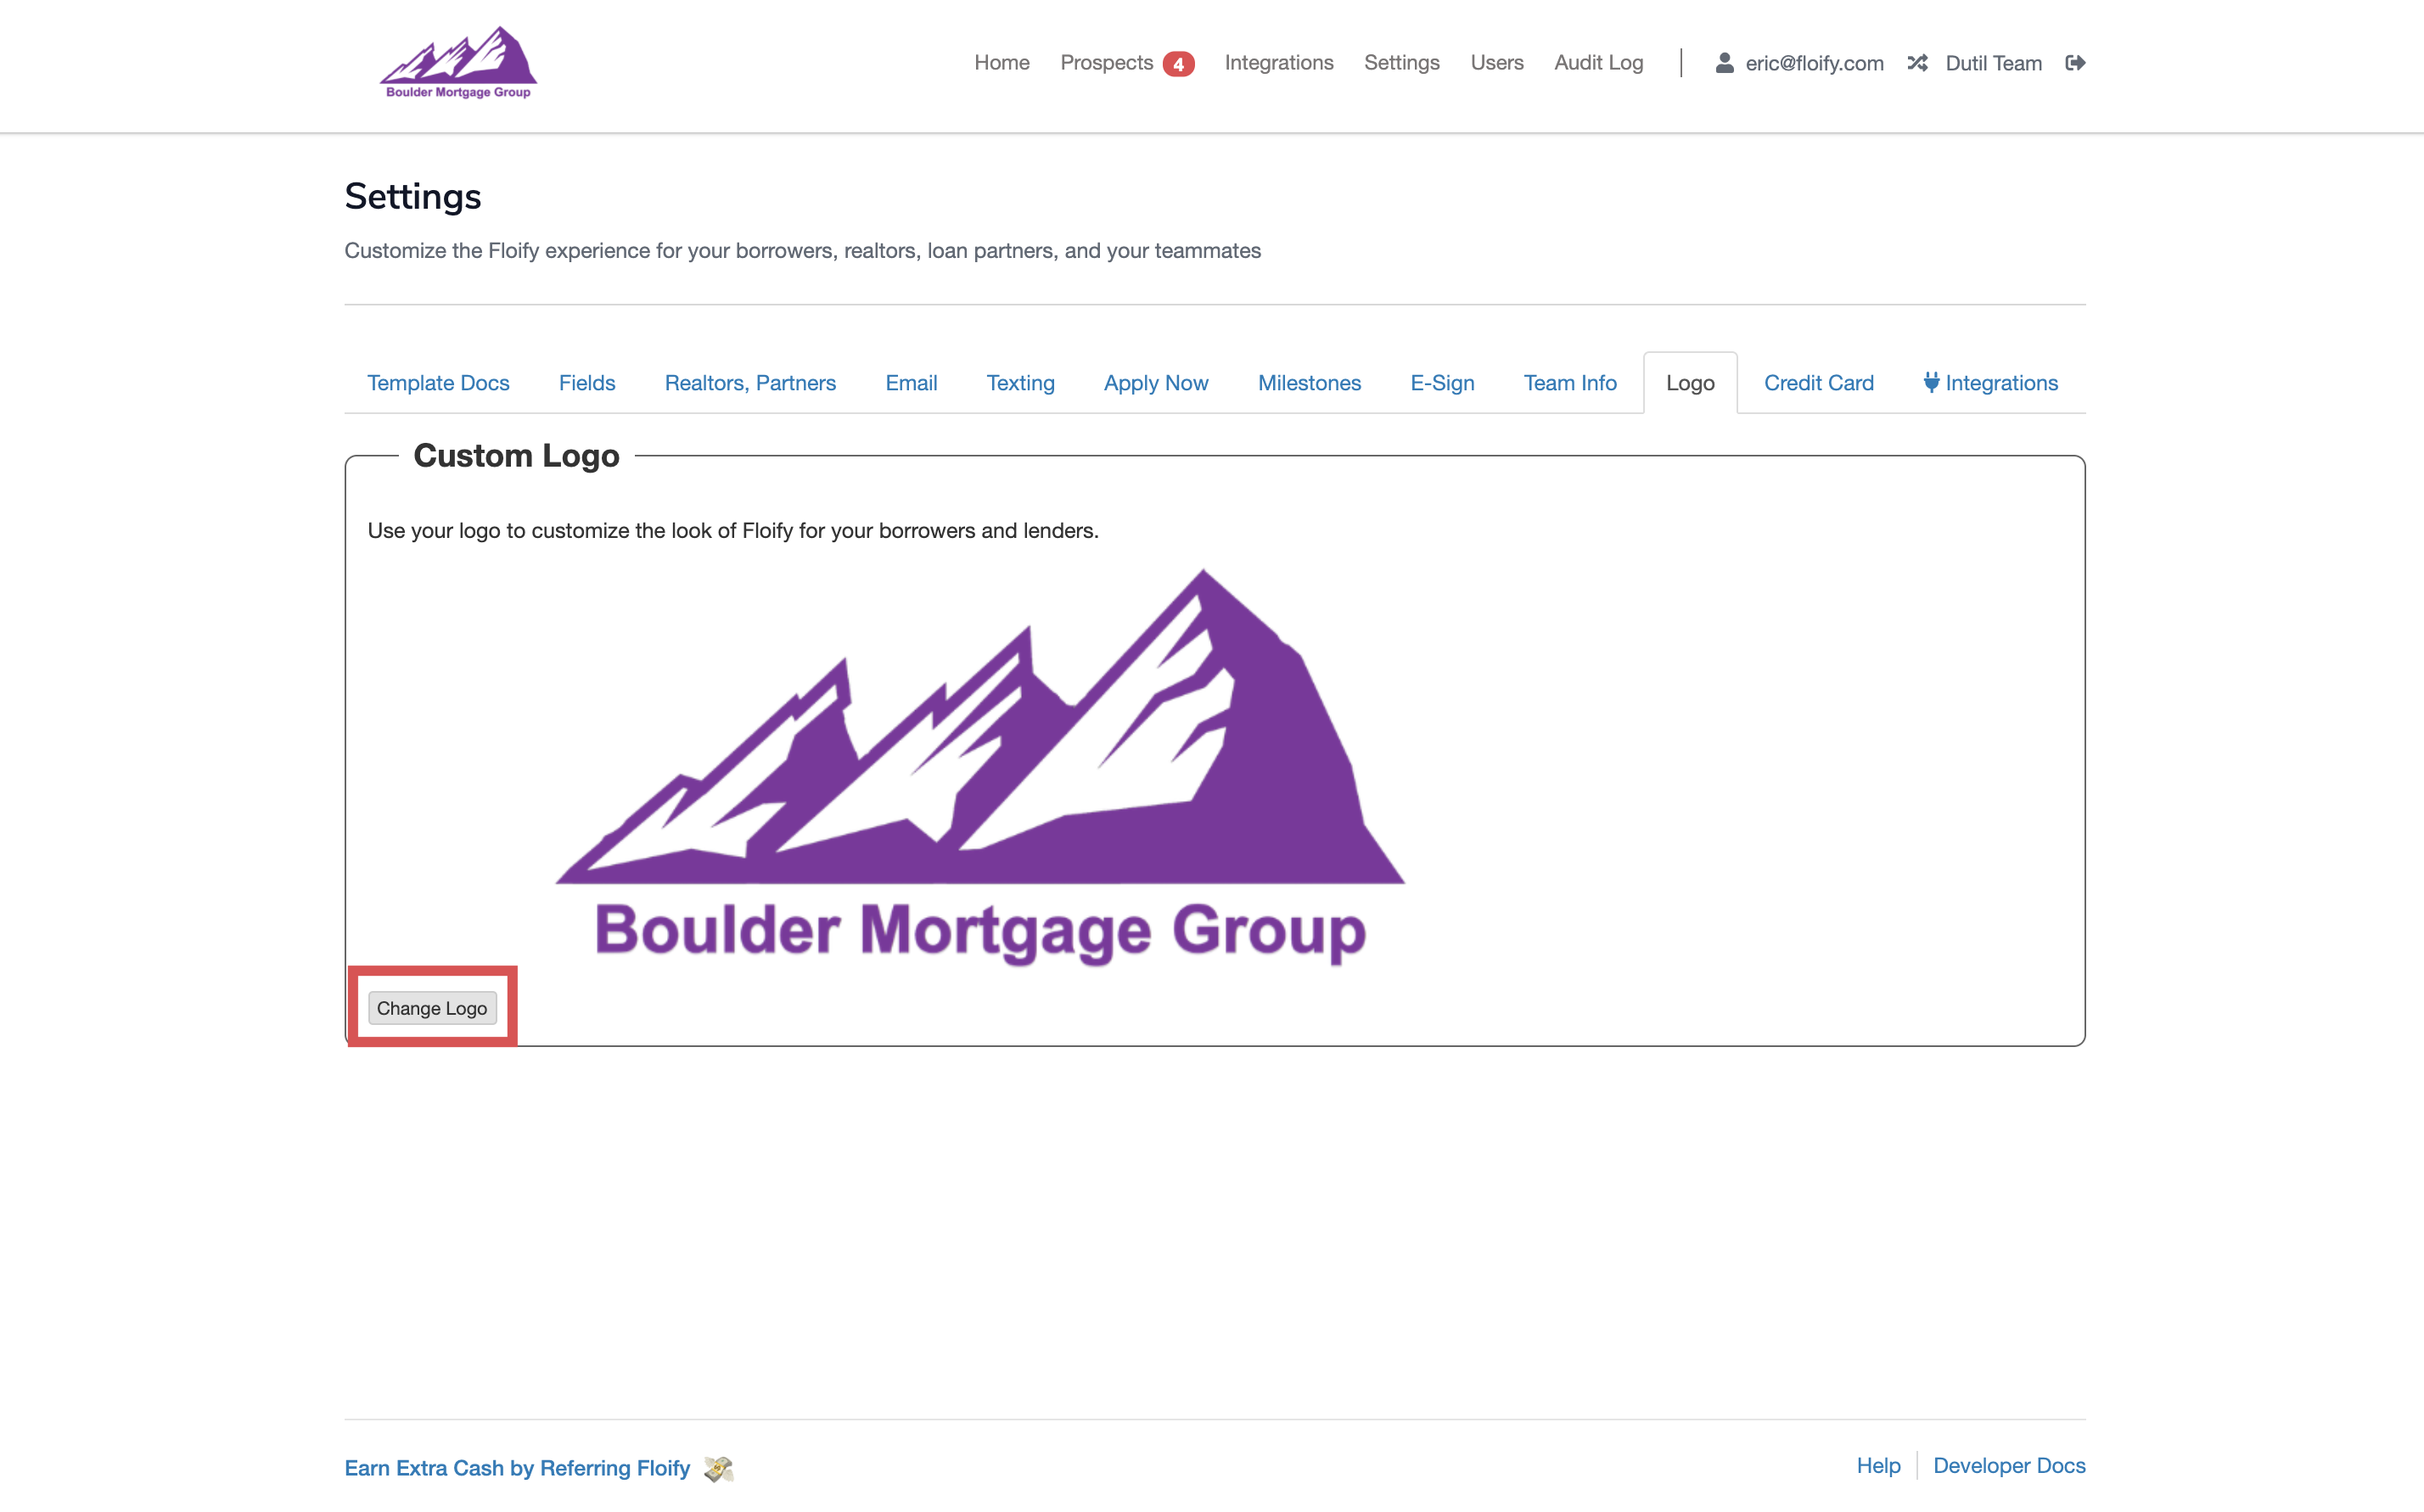
Select the option to Change Logo:
Select the pencil icon in the top right corner and Change Logo:
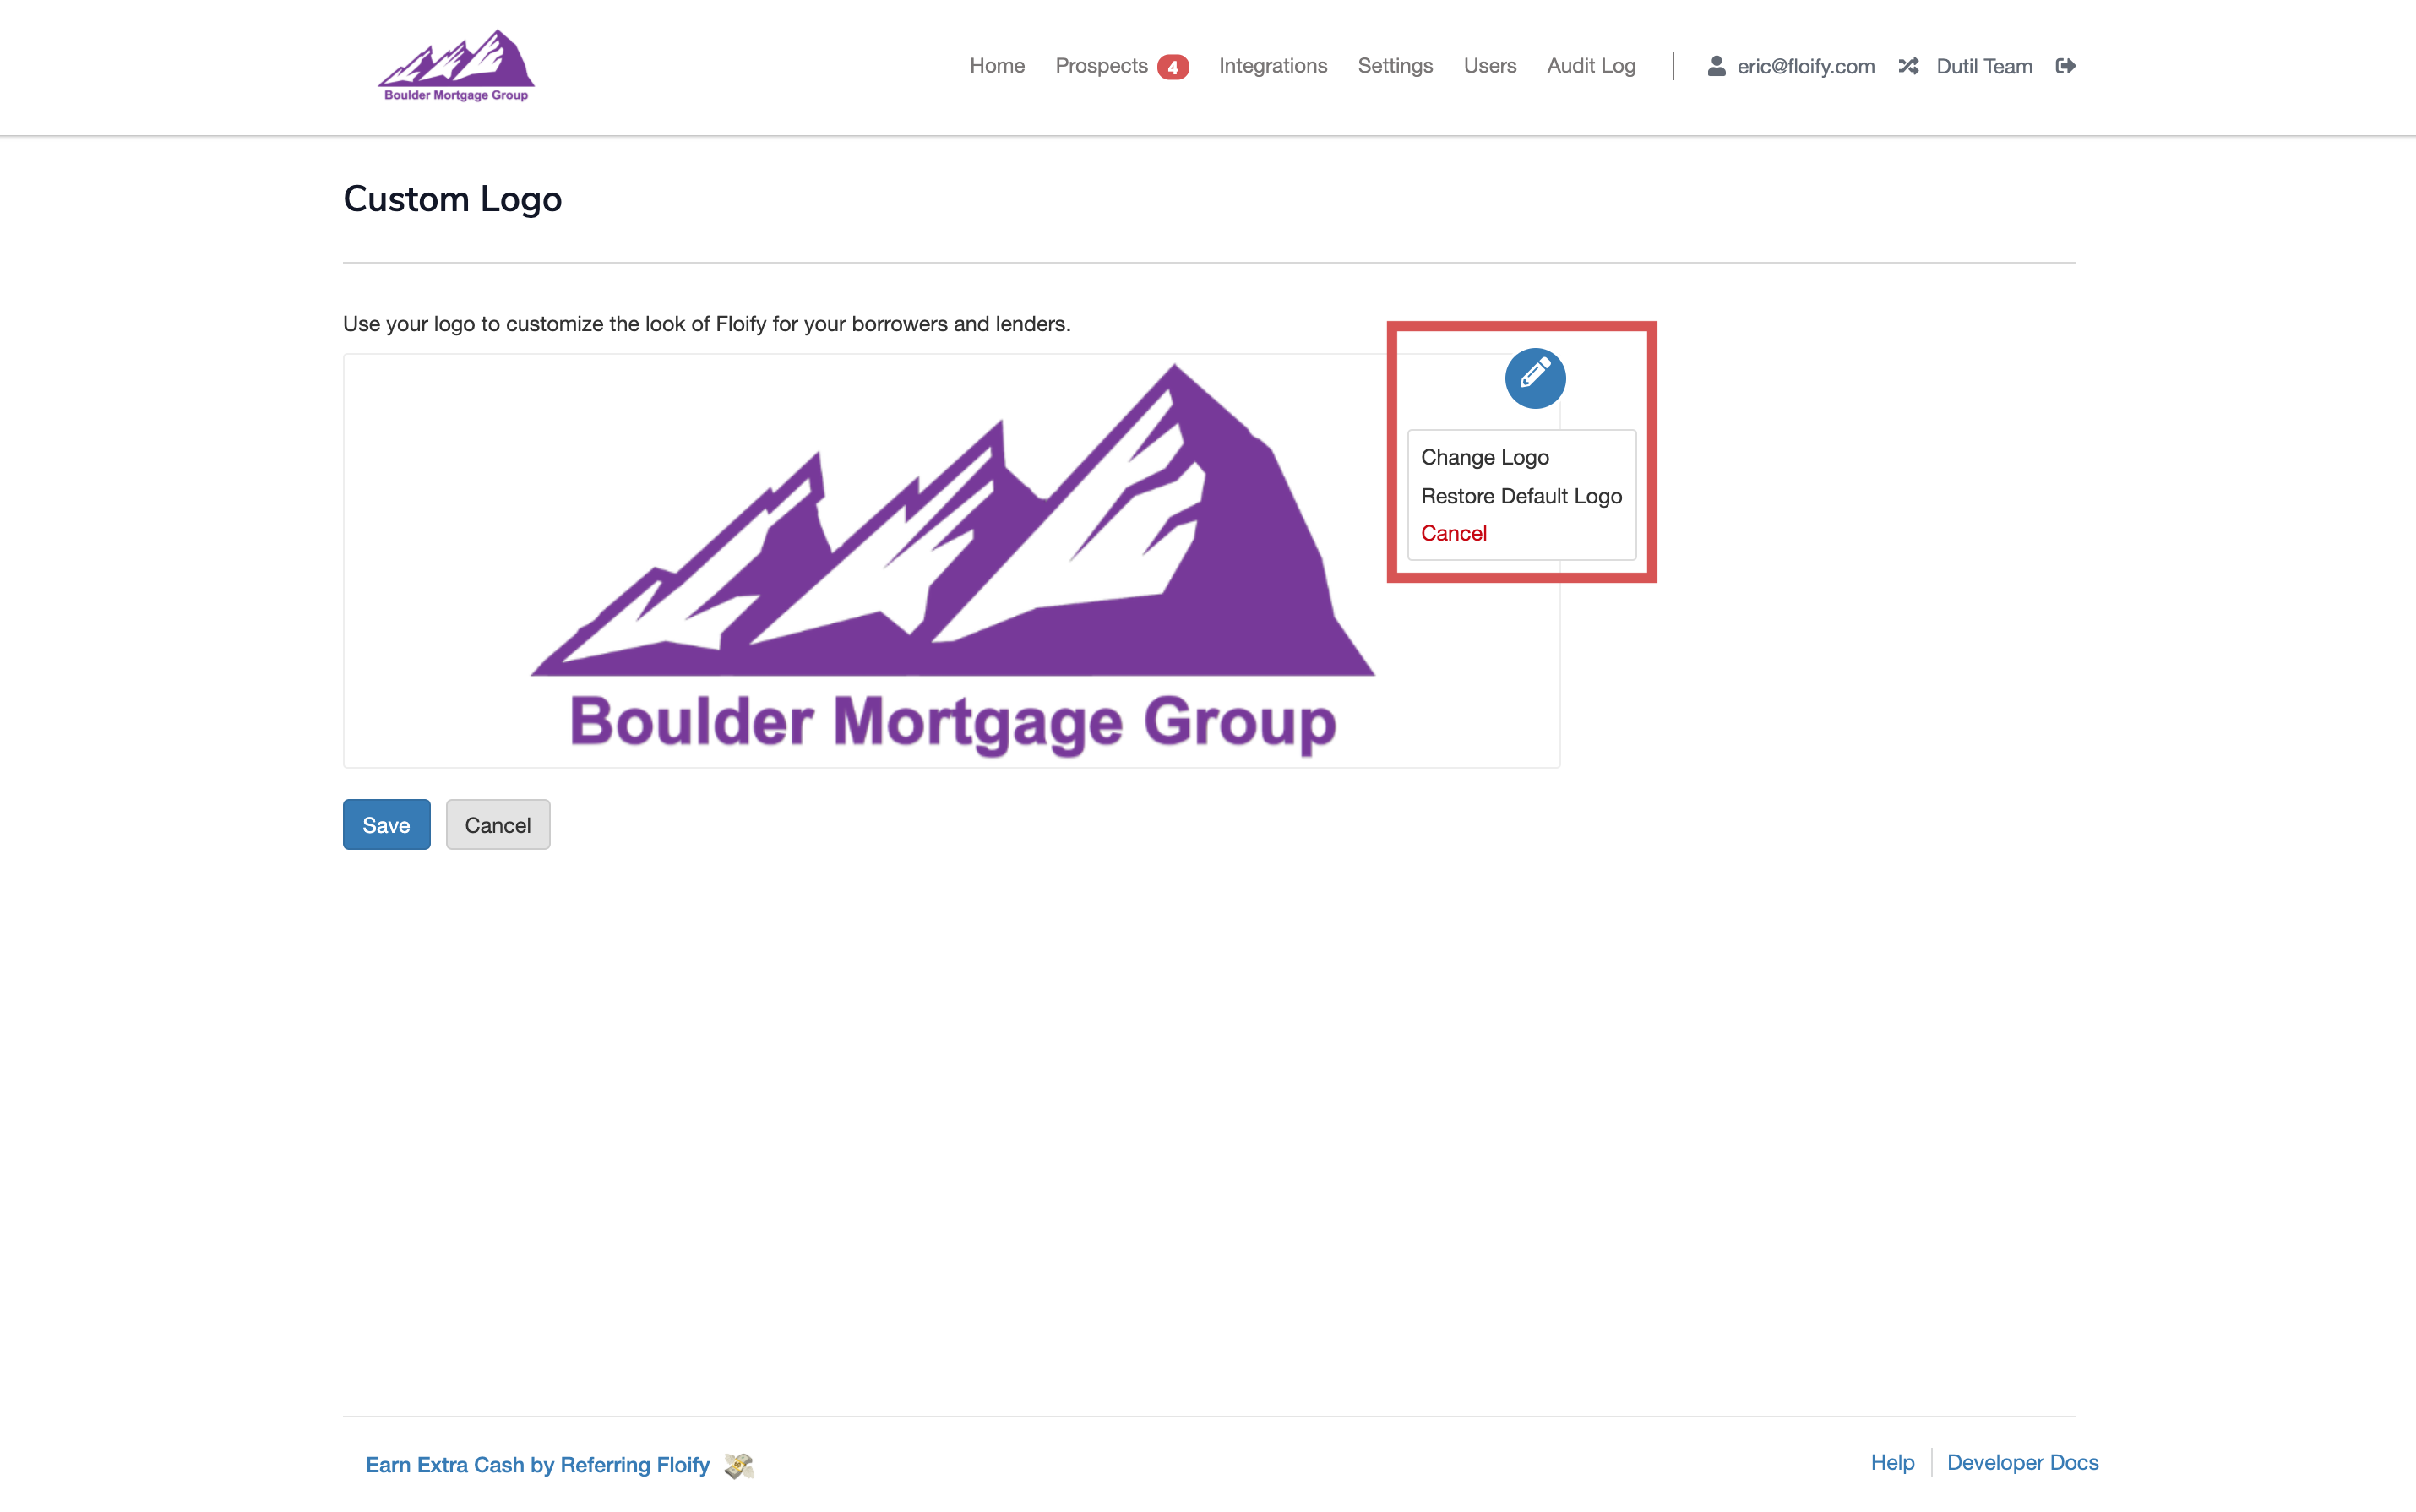
Drag and drop your logo into the field, or select Select a File to select a file from your desktop. Make sure you select Save to confirm the changes:
Please sign in to leave a comment.