Overview
The Customizations settings allow for you to make various configuration changes to your custom fields, custom layouts, your loan pipeline fields, and loan flow assignment rules.
Among these settings, you'll have access to create a new custom field.
Floify has built-in fields as well as custom fields, which make it easy for you to store custom data in Floify and surface that data where you like in the Floify user interface using business rules.
Use cases include:
- Informing borrowers when and where the closing is
- Creating a lightweight CRM that lets you focus on your active borrowers and the next time you need to follow up with them
- Creating tasks or task lists for your LO team depending on different types of loan programs or other data
Click here to view our commonly seen custom fields, layouts, and business rules.
How to Set Up
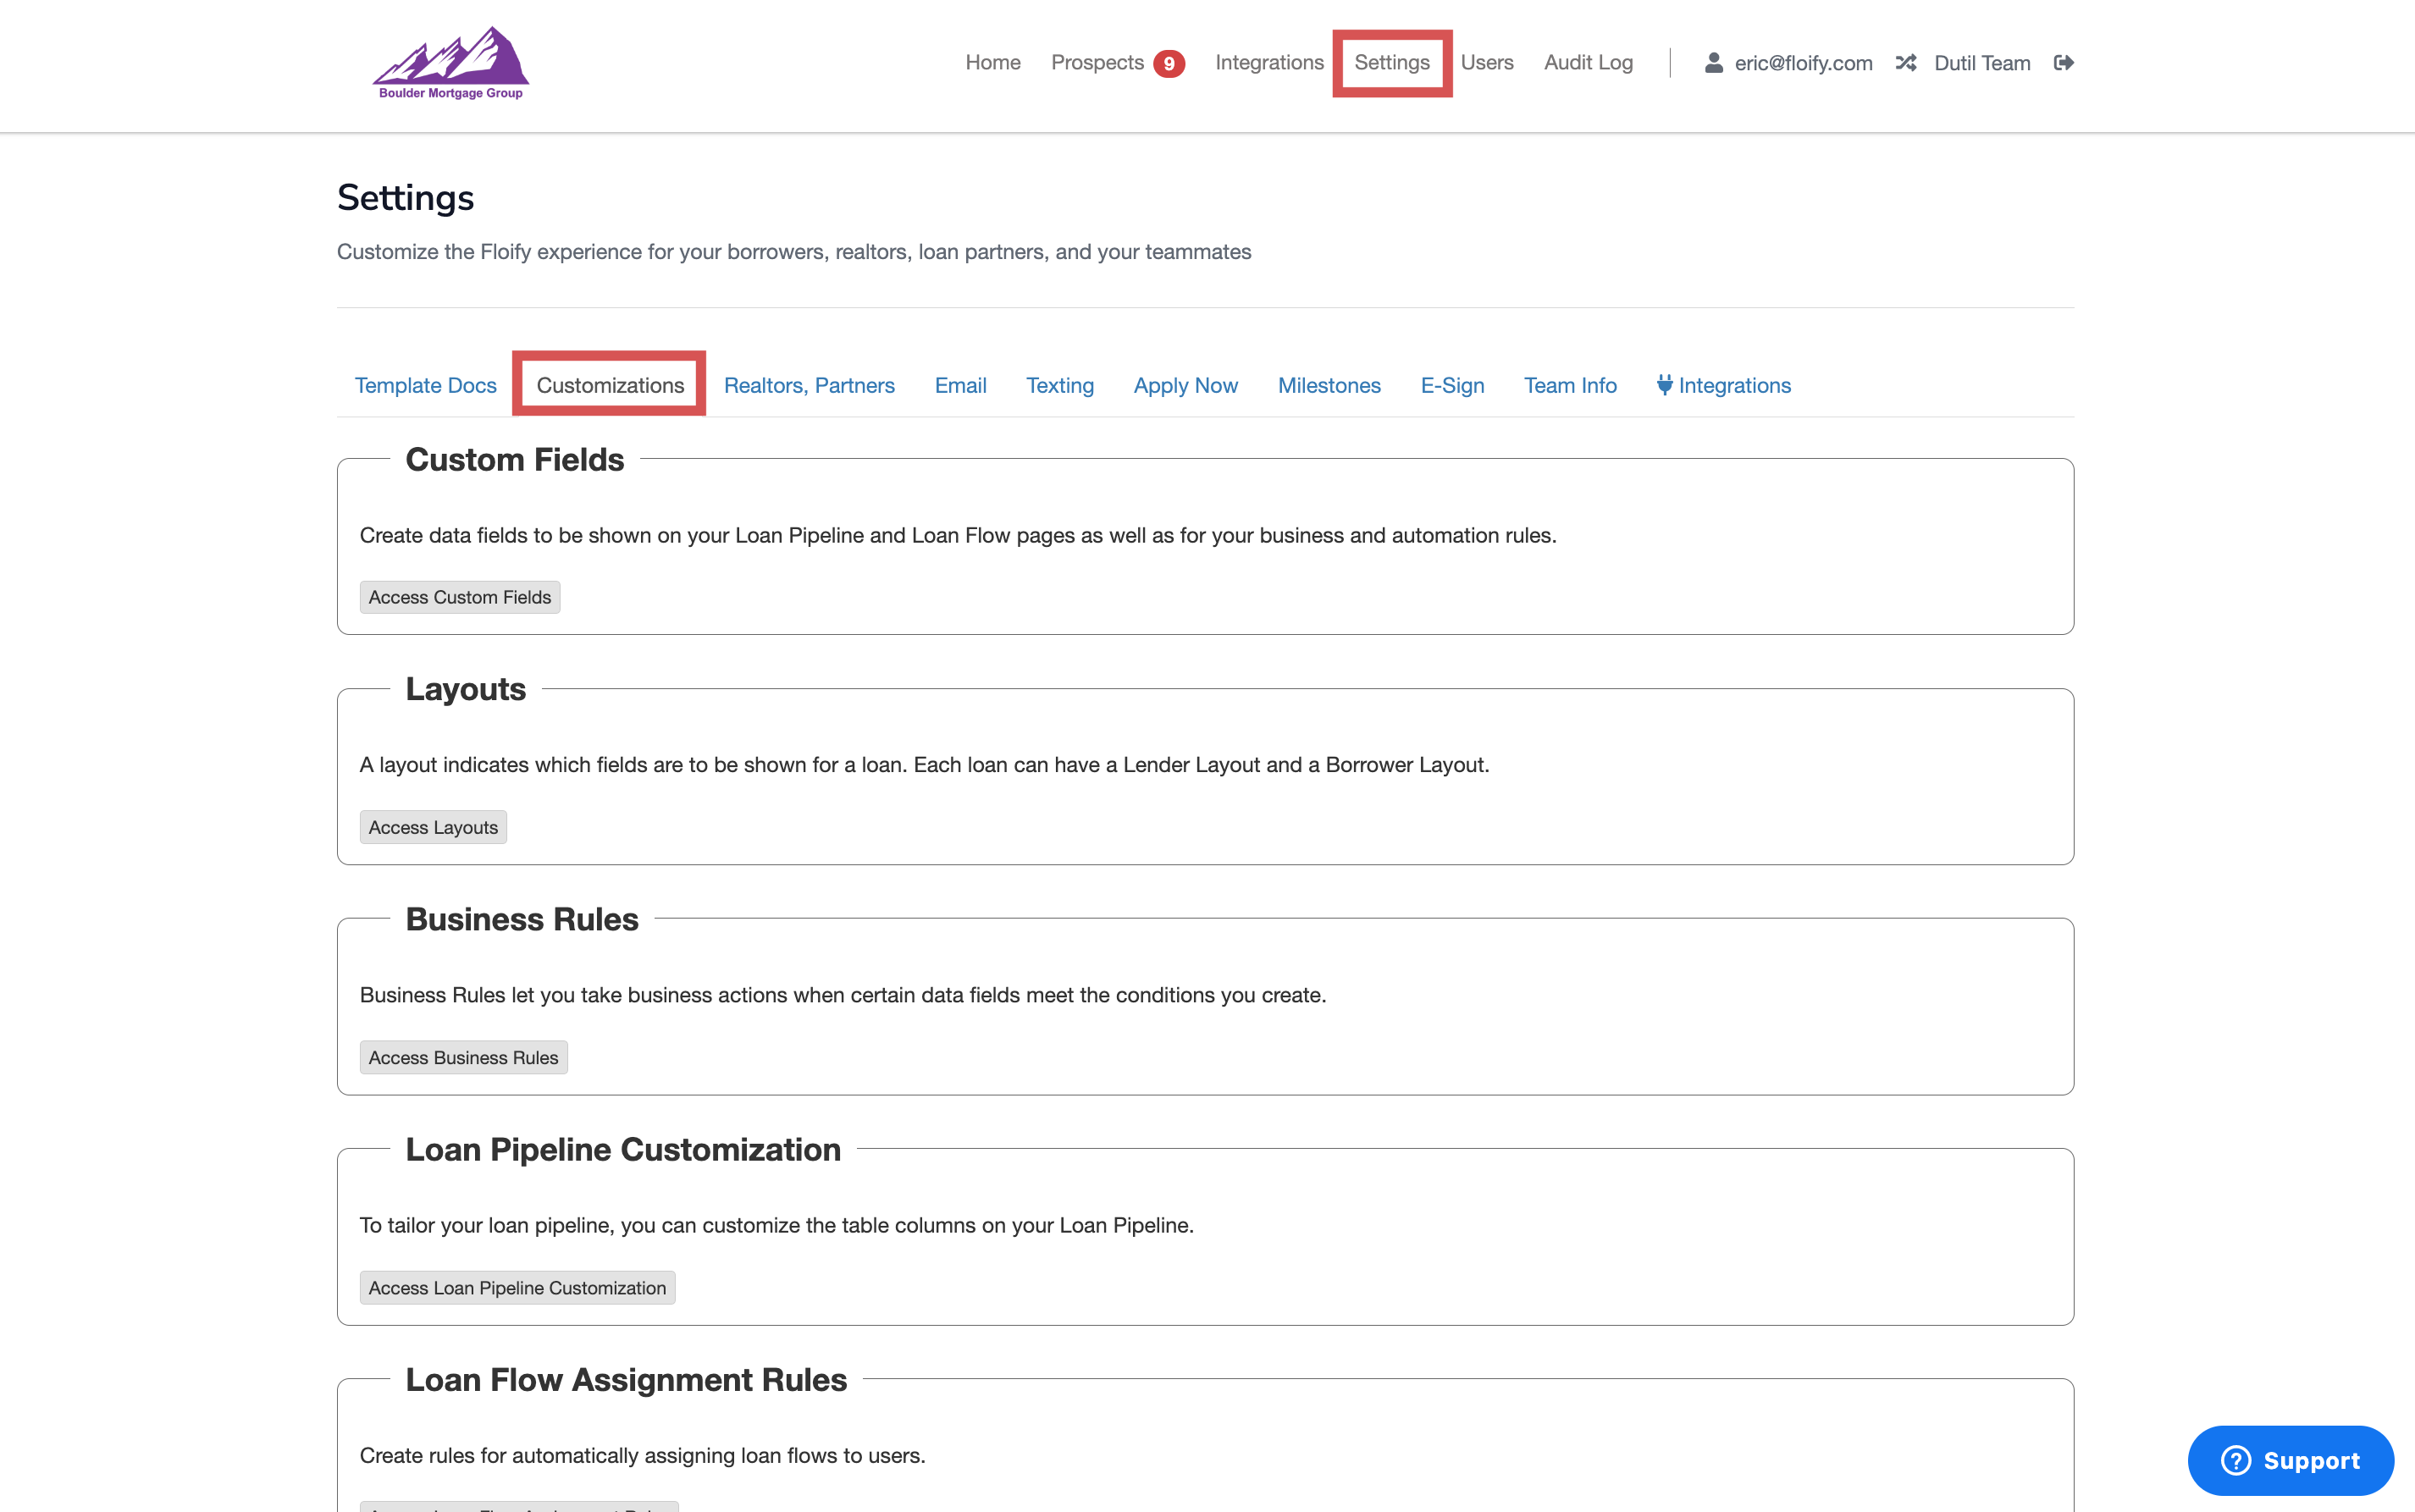
From your active loan pipeline, navigate to Settings and select the Customizations tab:

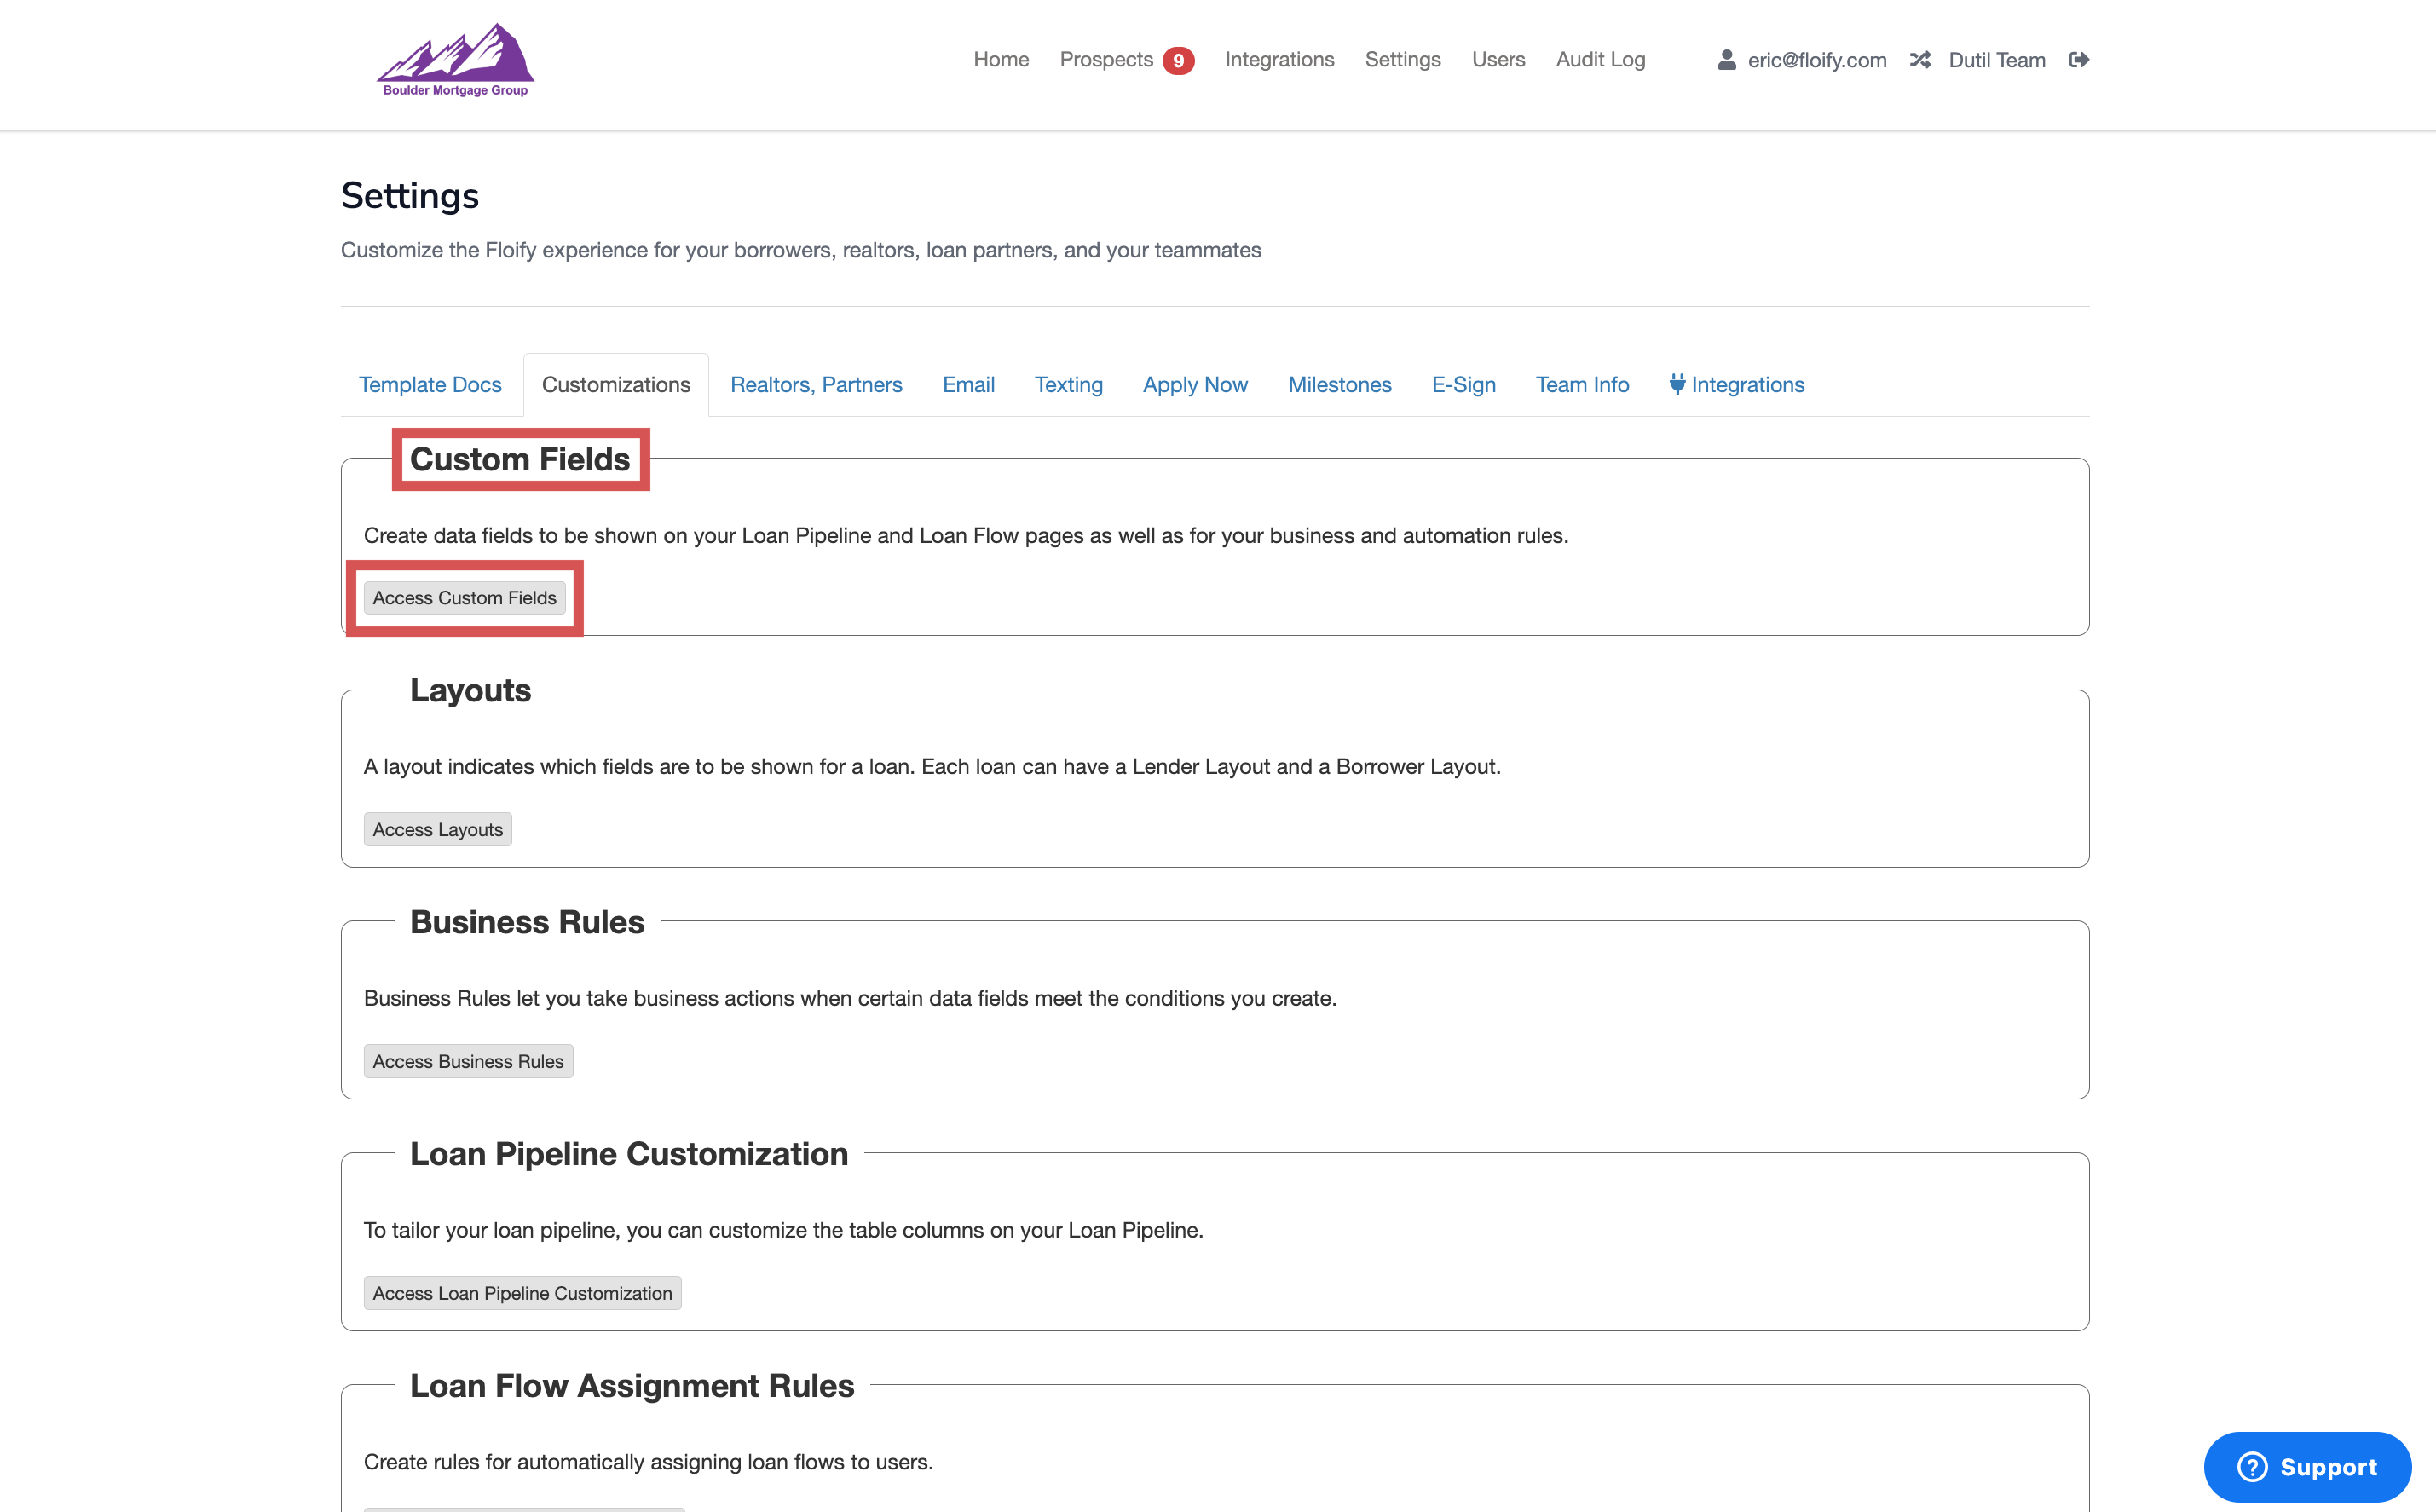
In the Custom Fields section, select the option to Access Custom Fields:

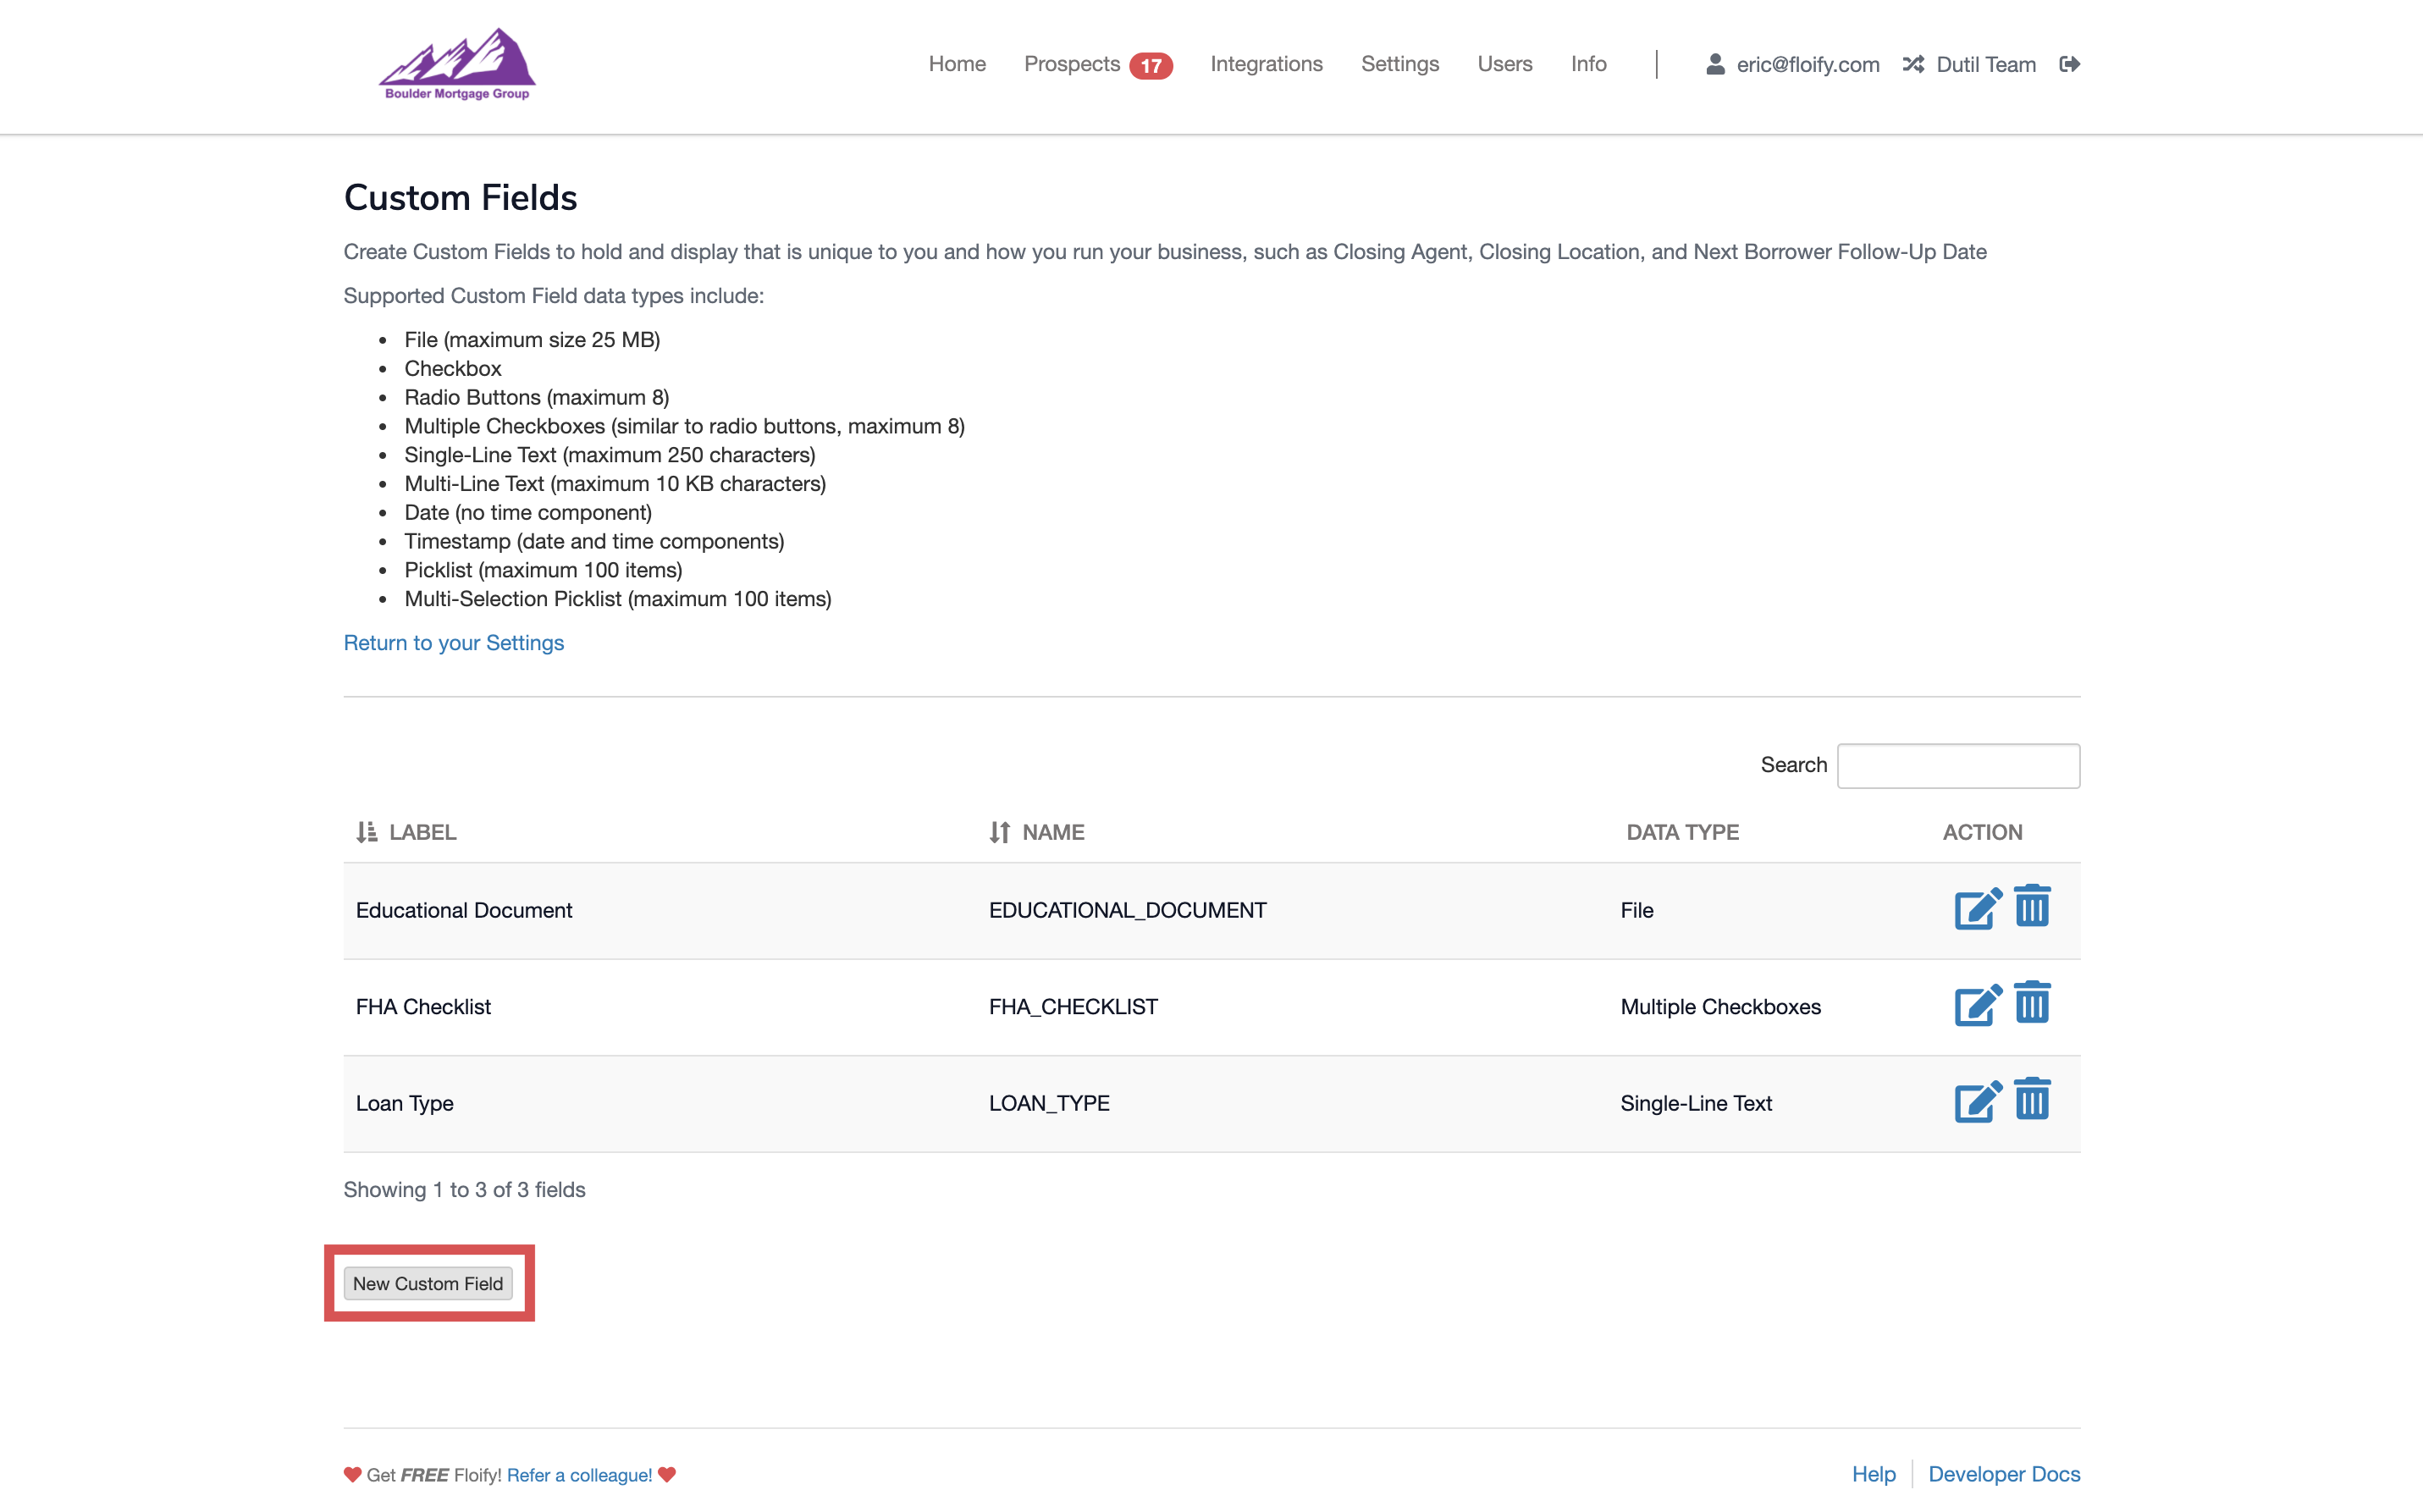
Select New Custom Field at the bottom of the screen to add a new field:

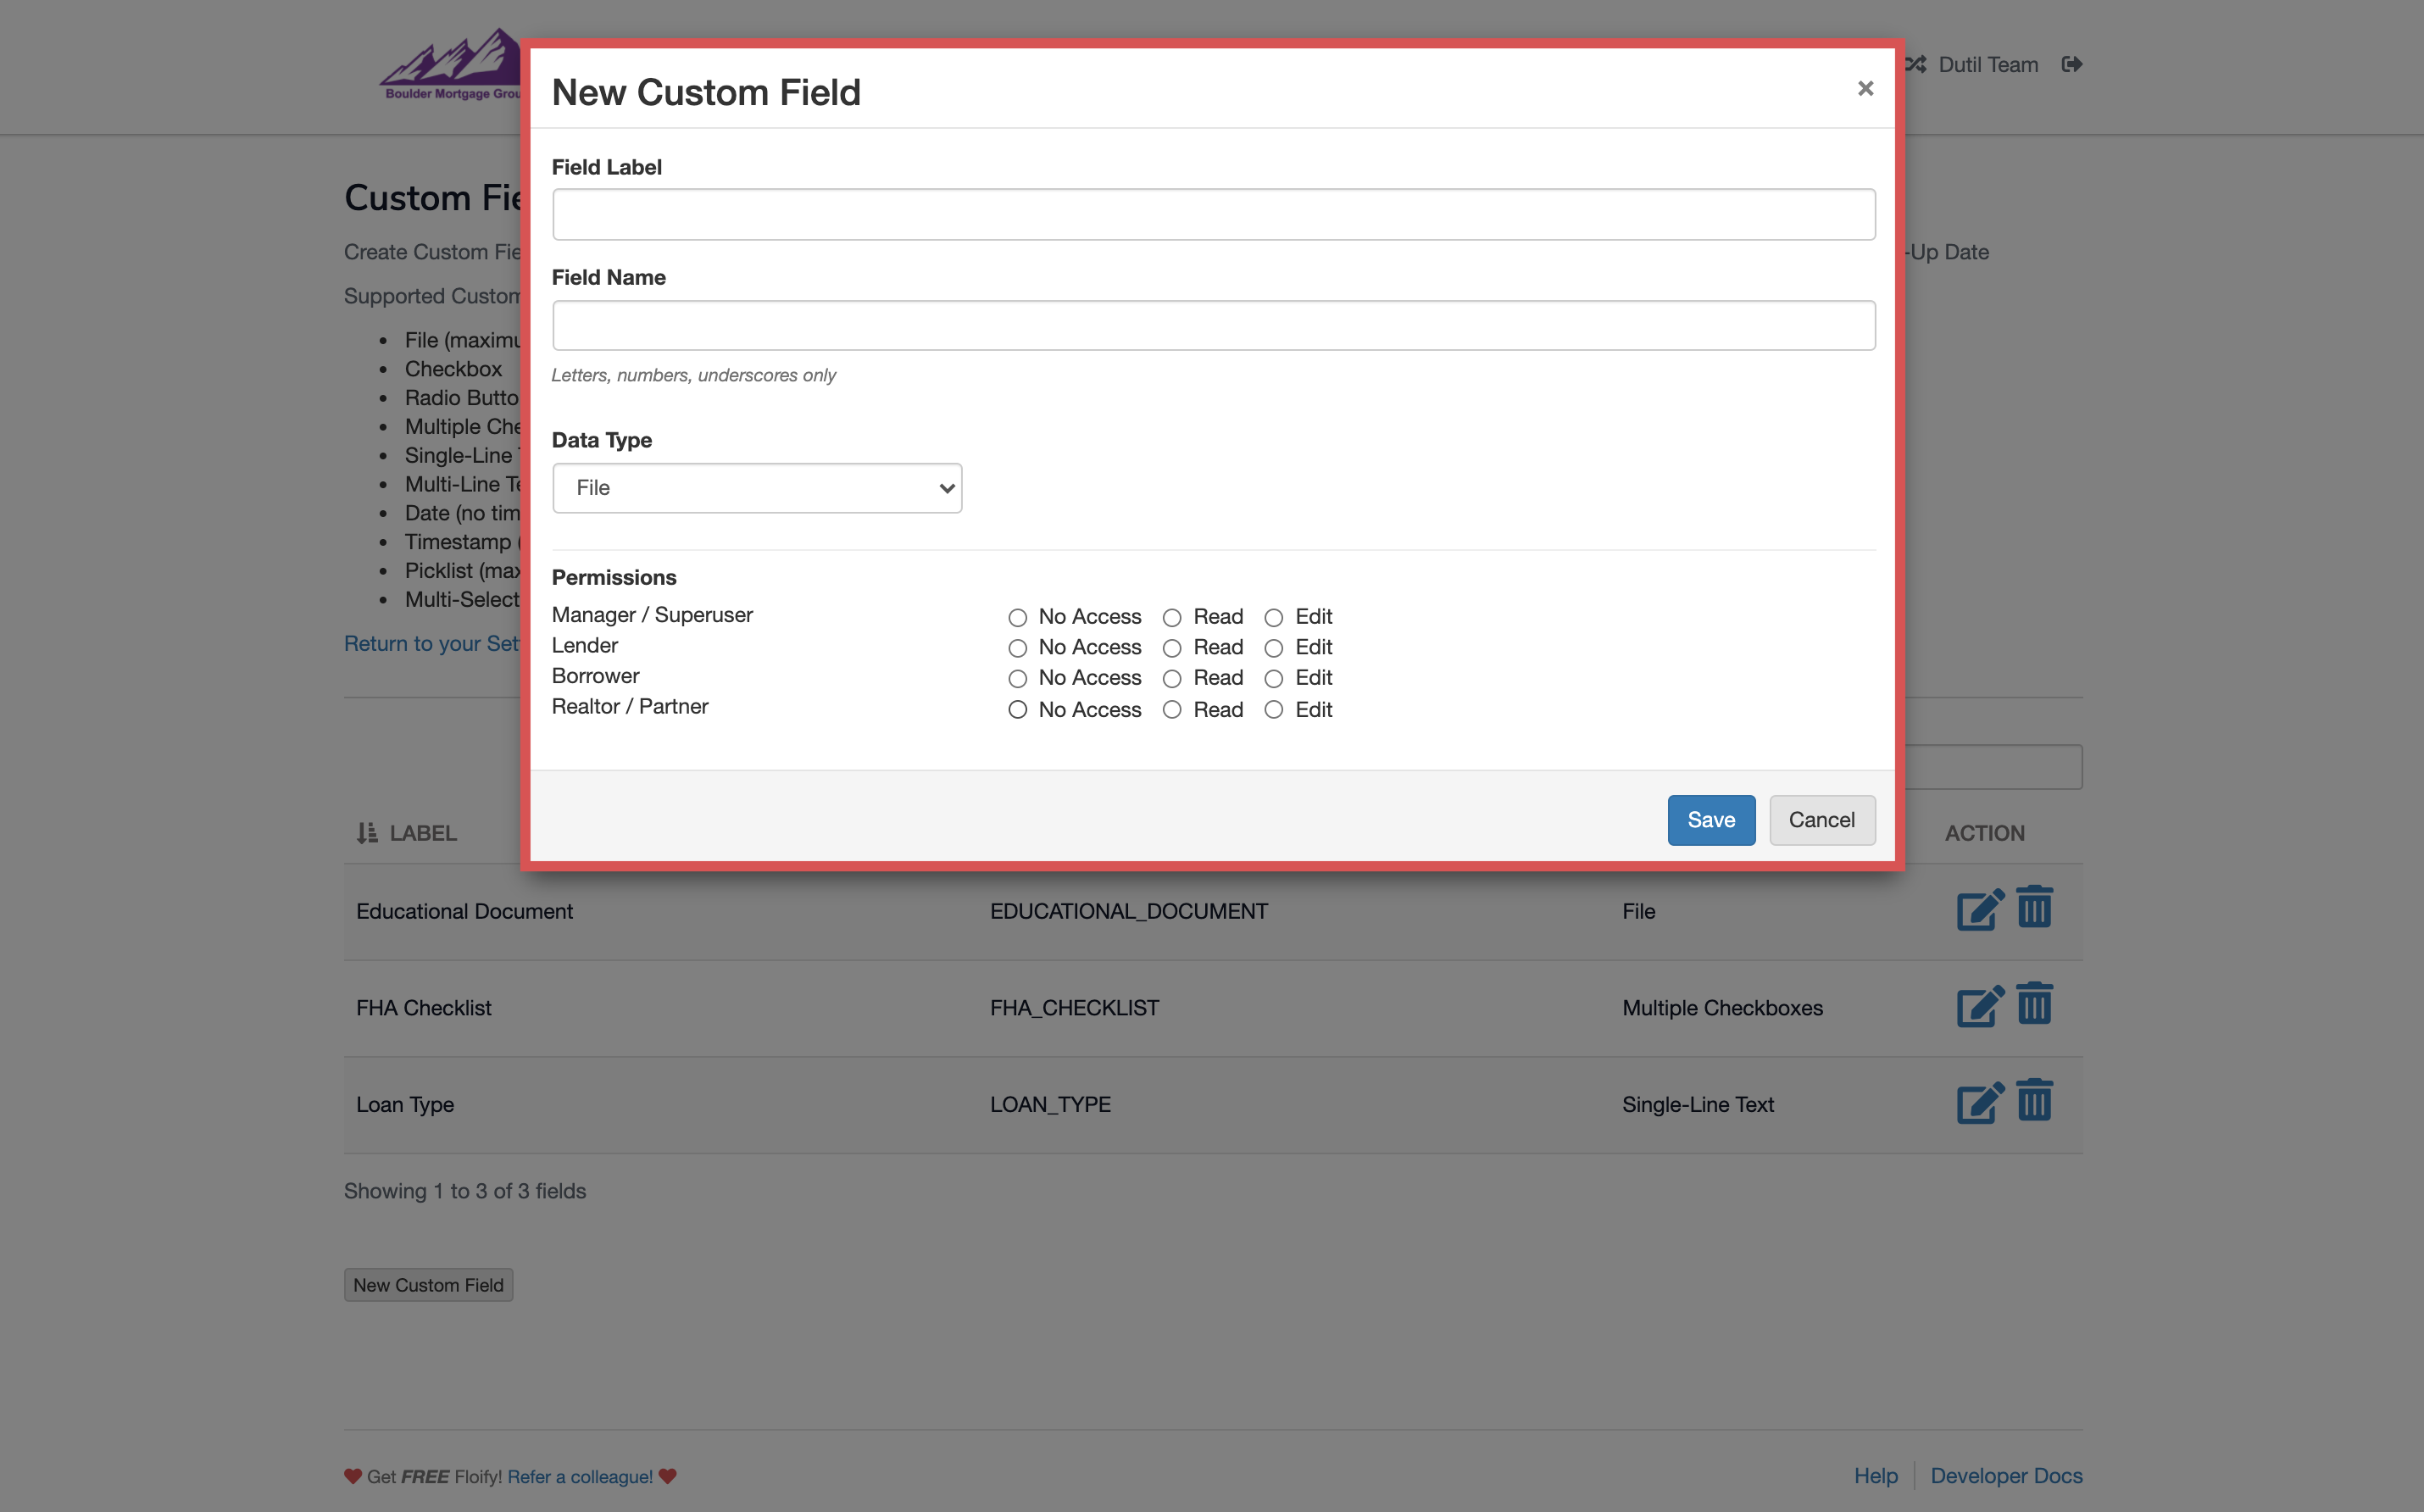
Enter the following information for your field:
- Field label: a human-friendly name for the field and will be visible from the user's perspective
- Field name: a unique identifier for the field and is usually set up by default to be very similar to the field label
- Data type: this allows you to select how the information is displayed in your field. Data types available are file, checkbox, radio buttons, multiple checkboxes, single-line text, multi-line text, date, timestamp, pick list, and multi-selection pick list.
- Select the permissions for the different types of users:
There are four user types available:
Different types of users can have different access rights to custom data fields:
Make sure you select Save once you are done to confirm your changes:

Success! Your custom field is now available to add to a layout.
See next: Create your custom field layout
Please sign in to leave a comment.